Round eye 10 revival

putuguq

Member
Fellow Frogger
Joined
Jun 9, 2012
Messages
171
Location
brunswick
Found via a RCCV ad in a garage where it had been parked since the 90’s this cute 67 round eye 10 had all four disc brake and wheels frozen and the engine and ignition lock were all seized.
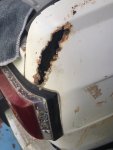
It was last driven as the street in the house sub division was being surfaced during winter so the whole underside was coated in reactive clays which caused some rust problems where it was stuck on unprotected metal.
75EBFB99-8FE6-4DCB-9518-C018C502BB57.jpeg
ECC8C103-78B7-4D7D-A46B-64765F9E846D.jpeg
C8B9DE1B-0BC3-4E6A-AAB7-AD566E1AD477.jpeg
A9441CF3-0329-4F48-9F16-1DA7C8CE2C46.jpeg
 
First job was to remove the calipers and master cylinder to get them rebuilt (Superstop in Box Hill) and to free the ignition lock with lock lubricant , I sourced NOS Cibie indicator lenses from eBay sellers for more than I paid for the car.
Initial progress was slow due to a recent shoulder reco making it hard to get up off the ground but the lights were light work (sorry) so I did those first after giving the car a scrub.
The reactive clays had caused major rusting to head light buckets but I sourced some from Renault lovers and interstate contacts.
97BA5DBD-F82D-4736-93C8-CE38433BDF57.jpeg
6B1E14F1-127F-4800-B144-802D7F532F3D.jpeg
BDC90E38-9A3C-45E6-B672-463F52CD7422.jpeg
 
First job was to remove the calipers and master cylinder to get them rebuilt (Superstop in Box Hill) and to free the ignition lock with lock lubricant , I sourced NOS Cibie indicator lenses from eBay sellers for more than I paid for the car.
Initial progress was slow due to a recent shoulder reco making it hard to get up off the ground but the lights were light work (sorry) so I did those first after giving the car a scrub.
 
Good looking round eye 10. Keep us up to date with progress.
What are you doing with the Caravelle / Floride parked beside the 10?
 
Looks like its all there for you!
Keep us all updated on your progress.
 
After re assembling the brakes and master cylinder I pulled out the radiator, had it tested (it failed) so I took it to AutoCool Altona to be rebuilt. (I actually got them to rebuild three radiators and five water pumps as I have a few projects).
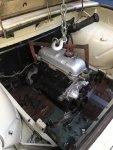
I pulled the engine, which after a month of being soaked in diesel still wouldn’t budge, cleaned the engine bay and pulled an old Caravelle S engine out of storage.
It had sat in my garage for 20 years. After I pulled off the rocker cover and timing cover I was a bit shocked at the fine rust dust (photos) over everything.
0BA4404B-BE9A-49B9-AA2B-1EB4D3E3208F.jpeg0BA4404B-BE9A-49B9-AA2B-1EB4D3E3208F.jpeg
 
Wherever the reactive clays had stuck in wheel arches and sat for thirty years there is rust. I have heaps of spares and pulled out a right rear ten panel to repair this rust (above) in the rear guard but decided as much as possible to keep the car as built.
I’m having trouble uploading photos but have a good library of shots of the progress.
 
I also pulled out a 10S dash and restored it for putting in but then decided on keep it original philosophy as the dash is cherry wood vinyl and looks great George Fireblade and Greg Smith are giving frequent advice as is Rob Sealey (all greatly appreciated) and both felt the originality theme is important.
This “policy” can cause troubles, the Caravelle S engine has a seven bolt fly wheel and modern diaphragm clutch and roller bearing but the bell housing on the car is standard as the 1100 in the car had an old clutch with graphite thrust release bearing on a five stud flywheel.
Today I put the Caravelle S engine in against the earlier clutch fork which I had fitted with an early roller bearing but will have to pull the engine, swap the input shaft to a 10S and put on a 10S bell housing, all collected spares I was saving for an eight resto or floride resto down the track.
58C49DDB-4554-4363-AB38-58FBBDB9329A.jpeg
 
I pulled off the sump, cleaned the oil pump sieve, cleaned 3cm of accumulated rust and scum put on new gaskets sprayed the timing cover and sump with gloss black and sprayed the rocker cover with ceramic paint. Before going ahead with the install, as well as checking the dizzy (rebuilt) the water pump
(studs needed helicoiling: 60 years of corrosion = snap anguish and new skill development). It took a good soaking with diesel in each cylinder to remobilize this engine too. Makes me want to fill all my idle engines with oil!
Just putting stuff into dry storage doesn’t stop decay!
 
I’m toying with the idea of exploring building up the rocker on the clutch fork with weld to see if I can get the combo of bits to work?
Anyone tried this?
 
Tried building up the back of the clutch fork by welding on a sectioned. Piece of one inch steel pipe, reinstalled the engine and it all aligned but checking in with Franz, Steve CAV and Rob Sealey convinced me the old fork paired with a modern fan type pressure plate just will not work.
Trouble is the 67 Caravelle S fly wheel is a 7 stud flywheel and the 160 D push plate pressure plate simply didn’t fit the flywheel.
I had everything I needed to update to a 10S bell housing and input shaft except for the modern fork. I couldn’t swap back to the 1100 flywheel and mount the original pressure plate because it was a 5 stud flywheel.
Stalled I contacted my mentor Rob Sealey and he suggested he may have an earlier 7 stud flywheel that could fit the larger (earlier) pressure plate which is closer to 170mm in diameter. We did a flywheel swap and I mounted the old pressure plate over a new driven plate with a resurrected early spinning thrust bearing replacing the carbon one.
Engine in, new radiator in, I decided to open the heater tap and use a shop vac to empty the heater pipes before back flushing with a gentle flow of mains water under Greg of 50 Renault who suggested heater water pumps are low pressure so “go easy” pete or you’ll damage the heater unit.
Highly recommend doing this step as the crap and corrosion that came out was remarkable. Worth remembering the lower return line on the water pump runs up next to the gearbox whilst the hot water flows from the upper connection along the right side of the guard. Disconnecting both pipes you can backwash via the return line to catch any crud that’s been fed into the heater. Then flush using the hot water pipe to thoroughly clean both pipes. Whilst the water flowed I checked under the car and inside for heater or pipe leaks.
I restored an 8 some years ago and drove it through Summer before turning on the heater and dumping all the coolant out a fractured return line because I hadn’t checked it. (Bozo)
 
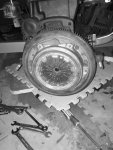
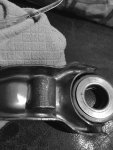
Images inB W cos my files are too large....
Modified fork (didn’t work!)
New pressure plate(discarded)
Old pressure plate
E258C035-5CFE-4186-A141-9F9CC6AD27C5.jpeg
 

Attachments

  • 913390DA-2A09-48BA-A912-017ED2C3A449.jpeg
    913390DA-2A09-48BA-A912-017ED2C3A449.jpeg
    598.2 KB · Views: 198
Always great to see a round-eye being resurrected. Nice work.

I'm totally puzzled by your clutch diameter discussion as the only 170 mm ones I've seen are R12 or rather later R10 (R10 1300 - I have such an engine), not earlier I think. Doesn't matter that I'm puzzled though!

You can buy those later clutch forks but you've worked out some combo that operates, so all is well by the look of it. Great.

That pressure plate on the photo with the free fingers is the type used on the later type R10/10S thrusts that slide along the steel tube fitted to the late type bell housings as you've sorted out. Those late bellhousings and matching driveshaft are precious and rare. What's wrong with the new pressure plate? Does it have the thrust plate in the middle, therefore appropriate for the early-type fork/thrust system with the graphite thrust?

Once you've got it running, my gratuitous advice (forgive me please) would be to check those callipers very carefully for leaks. They can be difficult to get sealed properly if there was corrosion in the 'o' ring groove (and there often is). If they don't leak, Messrs Superstop deserve a koala stamp!

Good luck with the rust - that's potentially the only really difficult area I'd have thought.

Thanks for posting this. You need to get the photo file size down to 500 kb or a bit more for them to be accepted - Adobe Photoshop Elements is what I use but there must be other ways.

Best wishes
 
Good luck with the build. It's good to see the motor up and running!
 
Top