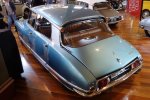
Resurrecting a Goddess.......Twice

Episode 24: Finding Some Bounce

Always happy to help Paul.


For a while now I've had a feeling something is not quite right with the front suspension. It has always seemed to be pretty stiff even with rebuilt spheres but I've nothing to really compare it to. The weird part is that the drivers side felt stiffer than the passenger. Asking the question on the main Citroen forum threw up some interesting ideas. Swapping spheres from sided to side produced the same result so the next place to look was the dampers. At least one diaphragm let go in the fire so it was possible that the dampers were full of debris. Step one is to remove them from the spheres
49476443657_30431aa48c.jpg
They looked fine but theres more to them
49475739388_70cdb8b964_c.jpg
Surprisingly they were perfectly clean.I originally had to build them up from a tub of parts as the spheres I managed to source were missing the dampers. Feeler gauges came out to check the shim thicknesses which confirmed all was well there so they were put back together and screwed into the spheres.


Figuring there was nothing to lose, I set my sights on the anti-roll bar linkages on the drivers side. Technically the whole wishbone assembly should come off but I'm trying to avoid that. Winding down the threaded sleeve was easy enough and allowed the wishbones to move freely without fighting the anti-roll bar. Note also that the suspension cylinder pushrod is disconnected.

49476220426_820268965e.jpg


The wishbone bearings are a bit stiff at the extremes of movement but are nice and smooth between those two points. The ball joints were very stiff and hard to rotate. At the very least new grease is needed but i went one further and took them apart to clean out all the old grease. This means ongoing the threaded collar that retains a spring.

49475736838_441fb3f13d.jpg


Some new grease and things are moving nicely now. I am curious if the trick of filling the wishbone bearing housings with gearbox oil is worth doing.


Foolishly I didn't measure the overall length of the anti-roll bar linkage and the manual is rather vague when it comes to the drives side. If anyone knows what it should be give me a shout
 
Last edited:
Foolishly I didn't measure the overall length of the anti-roll bar linkage and the manual is rather vague when it comes to the drives side. If anyone knows what it should be give me a shout

198mm, between centres, on both sides. The car should sit level when at normal ride height (measure height to ground from the jacking box sections) but don't be surprised by a little variation.
 
Thanks Nigel, that is what I figured but wasn't sure. I'll run the car up over the weekend and see how badly I've messed things up haha.
 
Episode 24: Life in the Slow Lane

Things have slowed down a lot whilst I await the return of the panels. I hadn't anticipated them taking this long but then they require a hell of a lot more work than first thought. Today we have had a breakthrough though! I present here the first panel to wear a shiny new coat of paint. Anyone care to guess the colour?

49647357946_d73c01392c.jpg


49646826403_f698d955a5.jpg

In other news, installation of the new carpet has begun by tackling the most problematic piece on the firewall. Fitting carpet to the hum is challenging to do without getting a crease somewhere due to the odd shape. I also found it a hell of a lot easier with the parking brake handle and ECU out of the way. There was a bit of a surprise when i opened the box from Germany and found that the light grey carpet I though I ordered had morphed into the dark grey carpet. It may not look it but it is significantly darker than what is on sill. Seeing it in the daylight and fitted, I prefer the dark grey which makes for a happy ending as postage back to Germany would have been horrific.

49603937291_e972dcba2e.jpg


49604190907_d3acd12b0e.jpg

This also meant that I could finally fit the NOS heater control panel and light that have been stashed in a cupboard for the last 12 months. It even came with the protective plastic still over the hot/cold indicator! There was a very brief period in 1970 where the heater lamp was blue and the space either side of the red / blue triangles was silver. Only lasted as long as the dash mounted mirror.

The sills got a layer of butyl sound deadener to replace the bitumen before having the new carpet glued into place. Definitely a 2 man job to keep things from going pearshaped.
49646837183_ee41da9573_c.jpg

The front bumper is back from being repaired and polished and reassembly has begun. I'll find a before and after photo of the central piece that copped a beating from 2 crowbars later.

49647370021_fb80f46d95.jpg


49647656982_6f7b3ffafd.jpg


While my back was turned, my dad decided to repaint the battery frame and voltage regulator. I have to say it does make a difference.

49603929591_0bae0f3c5d.jpg


49603933121_deb0d00882.jpg


And finally, the rubber boot on the height control lever has been replaced. We shall see how long the repro rubber lasts.....

49603931891_def38169ec.jpg
 
Good idea David, the rear one was done not that long ago but I've never touched the front one. The linkages all need to come apart on the passenger side to clean and grease the ball joints so I might tackle it then. What is the benefit to taking apart and cleaning the priority valve?
 
Episode 25: The eagle has landed

The time has come to put the roof on, mostly because its a bugger to store and I figured bolted to the car was as safe a place as any. A quick bit of prep is needed before the final deed can be done though. First thing was a trip to the guys at Vyfab in Moorabbin to stock up on some headlining material. They have foam backed velour that is nearly identical to the original headlining with the added benefit of not having to wait 3 weeks for shipping form Europe. The only catch is the fabric is 1220mm wide and really it needs to be 1300mm but it's workable once all the other trim is in place. As ever the job begins with some insulation, I found that doing all this is easiest with the roof upside down on the roof rail.

49693707197_531f9a0d92.jpg


49693723282_70cd903d8f.jpg


It takes about 2.5m of fabric to cover the roof and finding somewhere flat and clean to lay it out required a quick workshop tidy and locating some dust sheets. Vyfab stock a glue specifically for doing headlinings and it took most of the 1L can. Having done this a couple of times, I've found a stiff foam roller works best for applying the glue as there's no danger of bristles embedding glue into the foam backing. A spray glue is ideal but not many have a high enough temperature rating.

49692883438_e9dea7089f.jpg


49692882018_295f48bbb9.jpg


The fabric was laid as a rectangle and then cut into the right shape at the front after being glued down. As you can see, the fabric is ever so slightly to narrow to cover the roof from edge to edge in the middle. If placed carefully, you can hide this behind the roof rail trims be it it the pallas bolster or the rubber. Now for the fun part. Being a 1970 car the roof is of the bolted variety which makes the next few step a bit less stressful. A rubber seal runs around three sides of the roof and the back edge gets clamped down onto a seal glued to the frame over the rear screen. last job before moving the roof out of the way is fitting the stainless piece to the rear edge. I'ts held by 11 barbed clips that dig into the roof panel. You need to be pretty sure it's in the right place for 2 reasons, 1. its very hard to get off again and 2. fitting it takes chunks out of the paint.

For those who have wondered why the clips sold by the Euro parts supplies are not suitable for an aluminum roof here is why.

49693709282_4482e5b4e4.jpg


On the left is the aluminium roof clip and on the right is the fiberglass one. Unless you've picked up an aluminium roof panel it is hard to appreciate just how much thinner and lighter they are. The difference in the clips gives you an idea.

49692866243_c0bc101c3c.jpg


Turns out, it's extra long for a reason. It is supposed to wrap around over the top of the c pillar trims to meet the seal on the roof panel. They must have had issues sealing this area as there is a whole page in the bodywork manual on getting a watertight seal here.

Next up is filling the channel in the roof rail with sealant. There has been much discussion over the years on AF about what sealant to use. Most come down in favour of one of the Sikaflex industrial adhesives but I'm going to buck the trend and go for a skinning, non-setting mastic. Last time I did a roof using Sikaflex and it did seal well for a while but as the roof rail warped and twisted it eventually broke the sealant and the roof leaked. There is also no need of the adhesive component as there are 17 bolts to hold the roof in place.

49693778112_141cdaef1e.jpg


49692866093_2585a3eaf4.jpg


It takes a lot of sealant in the front corners to get a good seal. One benefit to the mastic is that it doesn't have a 30min curing time like all the polyurethane adhesives so there is no mad rush to get the roof in place, bolted down and cleaned up. I went a bit mad and bought all new stainless steel fixings as the original M7 bolts were knackerd the last time and the firehoses didn't improve that situation.

49693708887_f952f94744.jpg


49693709207_3b8d0bbdb9.jpg


Couldn't resist putting yet more shiny bits back on. Polishing the soot off them was a fun job but they have come up brilliantly. They were so black you can barely make them out in this photo

32299781167_f45bd53810.jpg


I think this post is long enough so I'll leave it there till the next one. Suddenly it's looking like a car again!

Has anyone been able to guess what the colour is? I'll give you a hint, it was only offered on the 1970 EFI DS
& Dsuper


Lovely to see - as usual Faulksy. Fitting that roof really is a significant milestone, isn't it.

I won't spoil the fun of your game re: colour.

Budge/ Paul
 
BTW - thanks again for posting
Its looking great Faulksy
Ramon
 
Give that man a medal! got it in one Ramon

It was seeing that car at Motorclassica last year that finally tipped the scales for me. For some reason Bleu Platine looks very different in photos and rel life.

Thanks for the kind words, hopefully i'll be able to post some more soon. In the meantime how about a game of name that part. Anyone care to guess what this piece is? it's unique to early 1970

49751293243_c61ca91860.jpg
Mirror bracket for the dash. Come on. Give us a hard one
 
Haha, challenge accepted Peter

49760352361_c40afefcf0.jpg


You'll only find this on 3rd front cars

The stainless bumper was fixed by a metal polisher in Moorabbin as part of having the whole bumper polished. You'd never know how mangled it was after the firemen's crowbars.

49760698342_bccdcd372f_c.jpg


49759842093_51afcc868b_c.jpg
 
Last edited:
Well. Your mystery part has got me stumped. i've got a third nose car and don't recognise that. Maybe I've just not taken that bit apart yet :)
 
I had a car that the spheres all bench tested as correctly gassed but still didn't ride well. I measured and checked the damper sets and all were as should be. I did, however, flip the damper discs. Result, I car that floated as it should.
 
That's an interesting thought DS. Supposedly the shims are conical but damned if I could tell which was the high side. I'll keep that in mind if greasing the passenger side ball joints as well doesn't sort it out.

As for the mystery piece, I can tell you where it goes but no idea of its function.
 
You have stumped me faulksy. After reassembling my 3rd nose I have little idea. Best guess is rubber grommet for bumper
 
Episode 26: Come In and Have a Seat

Given the current state of things it's unlikely I'll make it to the car for a while. This brought me round to the thought of insurance, a quick phone call to Shannon's and all is sorted. They did however request photos of the car to prove it wasn't still a rusted, burnt out wreck. After some discussion I decided the car needed to look as complete as possible so the car was loaded up with parts and a hasty trip to the workshop arranged. An hour later and you could almost call the interior complete

49768810362_91d09b1dfb_c.jpg


49751898586_db1834f3d5_c.jpg


49751355803_6ed04b8d4a_c.jpg


49752220847_62bc460680_c.jpg


49752217082_80eba35e99_c.jpg


49752215322_be2d4a61a5_c.jpg


49752207812_aa572dce38_c.jpg


The pallas roof trim is just held in with gravity for the moment as I'm missing all the clips. If anybody knows where to source them along with the light lenses I'd love to know.

Entries for the mystery part close tomorrow....
 
Top