Congratulations. I imagine the goal of getting there, spurred you on.

You are using an out of date browser. It may not display this or other websites correctly.
You should upgrade or use an alternative browser.
You should upgrade or use an alternative browser.
Resurrecting a Goddess.......Twice
- Thread starter faulksy
- Start date
Thanks Budge, it certainly helps to have a date to aim for with these projects. Now I can slow down a bit and take some time fitting the last of the trim.
An update on the roof leak: The rain finally stopped long enough for the car to dryout yesterday so I grabbed some of the windscreen mastic and an icypole stick and shoved some into the roof seal. The weird thing was, the roof lining was damp around the bolt holes at each front corner. Last time the roof leaked, you could see rivers coming from between the roof seal and the cant rail, not this time though.
Pulling back the rubber seal reveals the edge of the roof panel. This is what the joint between the steel band and the fiberglass should look like.

This is what it looks like at the front corners
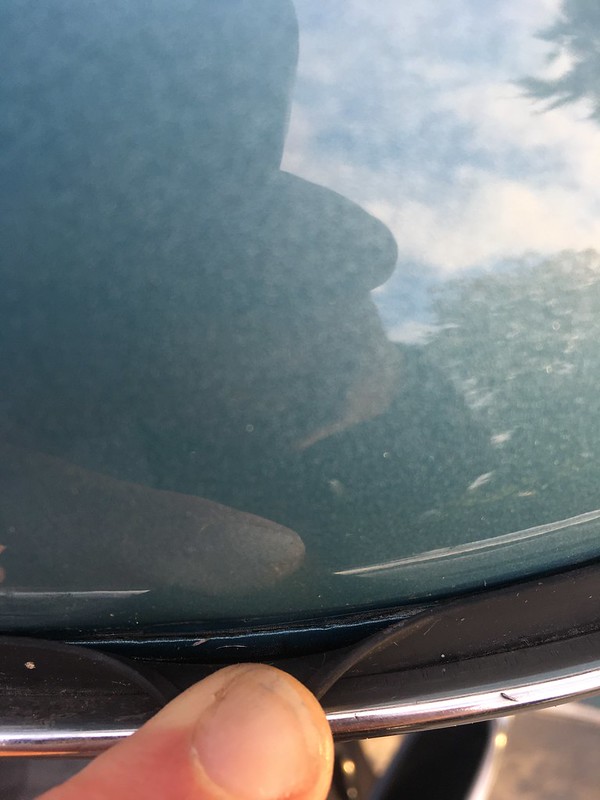

There is a clear gap between the fiberglass panel and the steel band which means water can sneak through the joint and more importantly, can get to the raw edge of the fiberglass. It's possibly caused by overtightening the retaining bolts. An icypole stick works a treat for shoving mastic in to cover the gap and hopefully seal things up again.
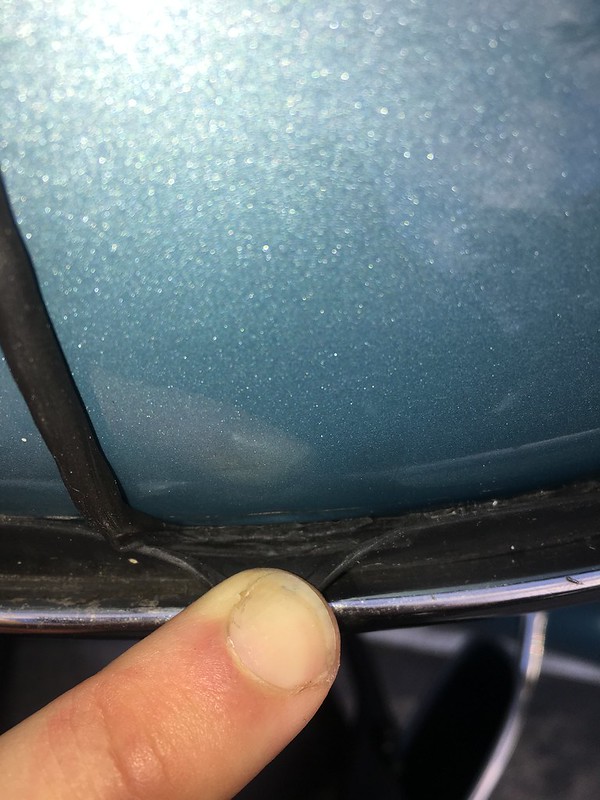
A bit of massaging to get the rubber seal to lay flat against the roof panel again and you'd never know there was anything under it. I'll report back next time it rains
An update on the roof leak: The rain finally stopped long enough for the car to dryout yesterday so I grabbed some of the windscreen mastic and an icypole stick and shoved some into the roof seal. The weird thing was, the roof lining was damp around the bolt holes at each front corner. Last time the roof leaked, you could see rivers coming from between the roof seal and the cant rail, not this time though.
Pulling back the rubber seal reveals the edge of the roof panel. This is what the joint between the steel band and the fiberglass should look like.
This is what it looks like at the front corners
There is a clear gap between the fiberglass panel and the steel band which means water can sneak through the joint and more importantly, can get to the raw edge of the fiberglass. It's possibly caused by overtightening the retaining bolts. An icypole stick works a treat for shoving mastic in to cover the gap and hopefully seal things up again.
A bit of massaging to get the rubber seal to lay flat against the roof panel again and you'd never know there was anything under it. I'll report back next time it rains
On my previous car with a bolt-down roof, I used windscreen sealant (a thick, sticky, but runny liquid) to wick into the gaps. did the trick.
As you say, Citroen vote pages to fixing roof leaks. I begin to suspect that the front roof edges at the corners do not follow the same profile as the gutter there on any car. I wonder whether, with the roof pulled down in all other areas, there is still a deeper gap remaining in those corners that the roof seal does not easily fill? Clamping the bolts down in an attempt to close any remaining gap there could then pull the crimp off.
As you say, Citroen vote pages to fixing roof leaks. I begin to suspect that the front roof edges at the corners do not follow the same profile as the gutter there on any car. I wonder whether, with the roof pulled down in all other areas, there is still a deeper gap remaining in those corners that the roof seal does not easily fill? Clamping the bolts down in an attempt to close any remaining gap there could then pull the crimp off.
I think you’re onto something there Paul. All three roof panels I’ve had on this frame never fitted properly at the front corners. With one of them you could see daylight through the gap and water certainly doesn’t need that much of a gap to sneak through.
When I fitted this one it got most of a tube of non-setting mastic squeezed into the cant rail first. It seems to have done the job. I’ve been trawling manuals and there doesn’t appear to be a torque figure for the roof bolts. You can certainly do them up pretty tight but I’d imagine at some point the steel band will separate from the fibreglass
When I fitted this one it got most of a tube of non-setting mastic squeezed into the cant rail first. It seems to have done the job. I’ve been trawling manuals and there doesn’t appear to be a torque figure for the roof bolts. You can certainly do them up pretty tight but I’d imagine at some point the steel band will separate from the fibreglass
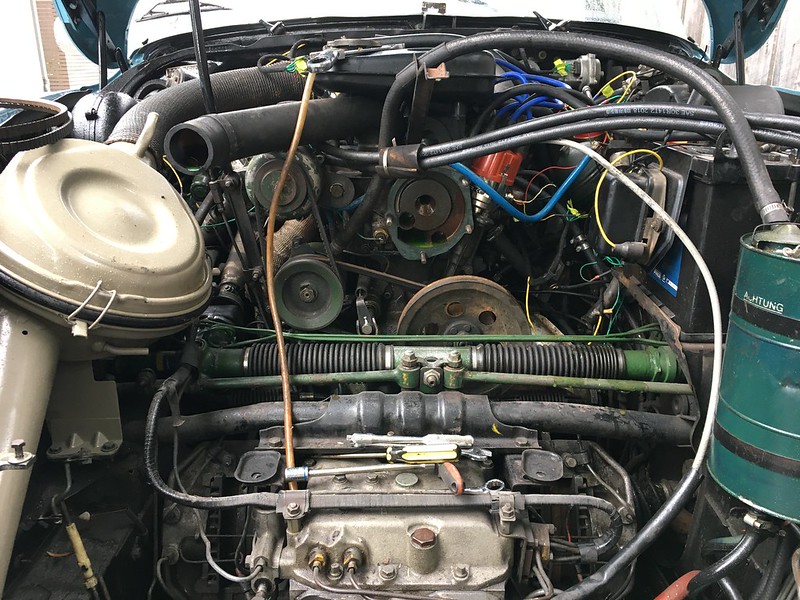
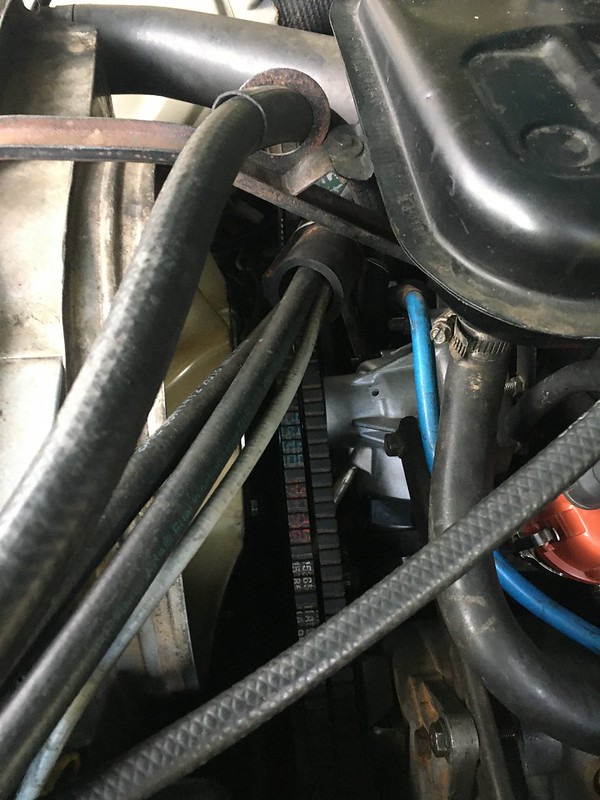
This weekend turned into a voyage of discovery. Most of last week was plagued with ignition problems causing me to stop frequently and adjust the points. The engine would run perfectly for a while and then slowly start to get rougher before becoming dangerous to drive. One one occasion it stalled as I slowed for a left turn, fortunately I was going fast enough to roll start it which is not something usually done with a BVH. Thoroughly fed up I decided it was time to fit the 123 distributor. First things first, the pin needs to be inserted in the timing hole buried under all the injection coolant hoses and alternator.
The only access is through the gap between the alternator, fuel lines and sphere. It's not possible to actually see the timing hole either without removing the alternator.

On this car the pin locks the engine at 8°30' BTDC which makes for some fun maths later on to get to 11° total camshaft advance. This is where the rotor winds up with the pin engaged in the flywheel

With that done, the pin is removed and the retaining bolt on the left side of the distributor is removed. The distributor now just pulls out, so far so easy. As a side note, the retaining bolt can also be loosened to allow for fine adjustments to the timing as the hole in the bracket is slotted.


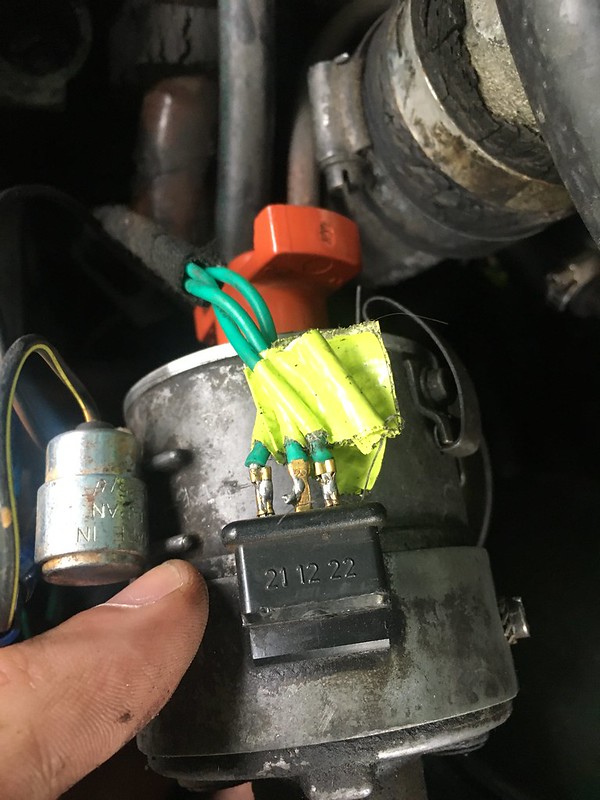
Seeing as i've not got the white connectors on any of the EFI wiring the next part is a bit more complicated. I had to make a note of which terminal was which before taking the wiring off. All the numberd tags are still on each wire so it's not to bad. The spade terminal on wire 22 snapped off so a new one had to be crimped and soldered into place. The other important thing is to swap over the distributor retaining plate onto the 123

From there it's pretty simple, drop in the distributor and tighten the retaining bolt but leave the clamp loose so the distributor can be rotated. I did have to take the o-ring off to get the 123 to engage with the drive cog without hammering it in. The red wire is then connected to the coil + terminal and the ignition switched on to bring on the timing LED inside the 123. I only had to rotate it a could of mm to turn the LED off.

The EFI trigger wires were connected and the black wire to coil neg. It seems I forgot to take phots at this point so I'll grab some later and put them up.
I then got my dad to do take the hot seat and much to our amazement the engine started first try! For now the timing is roughly set by ear for max rpm at idle and then backed off a touch as it was pinking under load. So far the improvement is vast! I was able to lower the idle from 1100rpm to 950 and the slow idle down to 800ish which is almost the factory spec. The real benefit is that it no longer stalls when coming to a stop.
The only access is through the gap between the alternator, fuel lines and sphere. It's not possible to actually see the timing hole either without removing the alternator.
On this car the pin locks the engine at 8°30' BTDC which makes for some fun maths later on to get to 11° total camshaft advance. This is where the rotor winds up with the pin engaged in the flywheel
With that done, the pin is removed and the retaining bolt on the left side of the distributor is removed. The distributor now just pulls out, so far so easy. As a side note, the retaining bolt can also be loosened to allow for fine adjustments to the timing as the hole in the bracket is slotted.
Seeing as i've not got the white connectors on any of the EFI wiring the next part is a bit more complicated. I had to make a note of which terminal was which before taking the wiring off. All the numberd tags are still on each wire so it's not to bad. The spade terminal on wire 22 snapped off so a new one had to be crimped and soldered into place. The other important thing is to swap over the distributor retaining plate onto the 123
From there it's pretty simple, drop in the distributor and tighten the retaining bolt but leave the clamp loose so the distributor can be rotated. I did have to take the o-ring off to get the 123 to engage with the drive cog without hammering it in. The red wire is then connected to the coil + terminal and the ignition switched on to bring on the timing LED inside the 123. I only had to rotate it a could of mm to turn the LED off.
The EFI trigger wires were connected and the black wire to coil neg. It seems I forgot to take phots at this point so I'll grab some later and put them up.
I then got my dad to do take the hot seat and much to our amazement the engine started first try! For now the timing is roughly set by ear for max rpm at idle and then backed off a touch as it was pinking under load. So far the improvement is vast! I was able to lower the idle from 1100rpm to 950 and the slow idle down to 800ish which is almost the factory spec. The real benefit is that it no longer stalls when coming to a stop.
Last edited:
Good work. Keep us posted as to whether that solves your intermittent problem.
A minor status update, things have deteriorated rapidly! I’m thinking it’s my fault though rather than the car.
Setting off for work this morning started well, ended badly and got worse this evening. Looking at the fuel gauge I knew I was pushing it but figured I’d at least make it to a servo. Round the corner from home it started hiccuping so the trip to work was abandoned and the ds was left at the station carpark. There is probably still 5-10l in the tank.
Got the car started this evening but only on 2, maybe 3 cylinders and adding 20l from a jerry can made no difference. It has zero pickup but isn’t backfiring so I’m thinking the fuel filter is blocked with rubbish from the bottom of the tank. Just goes to show how dodgy the efi fuel pickup is. Might need to adjust the fuel gauge needle.......
Hopefully just a teething problem. But why would a blocked fuel filter cause it to run on some cylinders only? Sure it's not electrical? Could you (in a safe way) run a fuel line directly from a jerry can to rule in/ out a fuel filter problem?
Hopefully a temporary glitch Budge, I think a new filter will fix it.
The EFI system expects a constant fuel pressure and if the filter is blocked the pump will struggle to maintain it especially under acceleration. At idle the engine runs alright but when you open the throttle, the computer opens the taps on all 4 injectors and the fuel pressure falls through the floor. The net result is that the injectors don't actually spray any fuel and you start losing cylinders, but not always the same ones.
I did find that the engine would eventually pick up to 3000+ rpm on all 4 cylinders but it took a good few seconds to get there.
That makes more sense. EFI cars are a mystery to me.
The plot thickens. I’ve temporarily bypassed the fuel filter and it’s made no difference. I suppose the next step is to put the old distributor back in and see if things improve.
Any ideas what the symptoms of a failing 123 are?
Any ideas what the symptoms of a failing 123 are?
Sorry. No. People talk of 123s packing up, but I've never heard of any gradual symptoms of failing. Are you sure you have the DS 123 suitable for efi cars? And, if it's like the 123 for carb cars, have you checked you set the selector to the right position. In both cases, I'm sure you will have been through all of that but it's worth checking.
Of course in refitting the mechanical dizzy, you unplug and then re-establish electrical connections. so if it's simply a poor connection, you might wrongly attribute it to 123.
Of course in refitting the mechanical dizzy, you unplug and then re-establish electrical connections. so if it's simply a poor connection, you might wrongly attribute it to 123.
I feel as though the 123 either works or it doesn’t, like most digital circuits. there’s no in between. It’s definitely an EFI version and they’re preset with the advance curve.
I’ve fitted the Bosch dizzy and it’s giving exactly the same symptoms which is encouraging but also frustrating. It suggests the 123 is fine and the problem lies elsewhere in the efi system. I’ll chuck a fuel pressure gauge on tomorrow and see what that reveals
I’ve fitted the Bosch dizzy and it’s giving exactly the same symptoms which is encouraging but also frustrating. It suggests the 123 is fine and the problem lies elsewhere in the efi system. I’ll chuck a fuel pressure gauge on tomorrow and see what that reveals
Success!! It Only took tearing apart and testing the fuel injection system, a new set of plugs, new fuel filter, putting the old dizzy back in and finally putting the 123 back! The good news is, it’s now running nicely again a
The bad news is that the water pump bearings have totally collapsed and coolant is pouring out the front of the pump. I knew it was on the way out but certainly not that bad. Can’t have everything I suppose.....
The bad news is that the water pump bearings have totally collapsed and coolant is pouring out the front of the pump. I knew it was on the way out but certainly not that bad. Can’t have everything I suppose.....
Good to hear mate. All I can say is that once you have sorted the gremlins from years of neglect, they are totally reliable. You must be getting closeSuccess!! It Only took tearing apart and testing the fuel injection system, a new set of plugs, new fuel filter, putting the old dizzy back in and finally putting the 123 back! The good news is, it’s now running nicely again a
The bad news is that the water pump bearings have totally collapsed and coolant is pouring out the front of the pump. I knew it was on the way out but certainly not that bad. Can’t have everything I suppose.....
I reckon fixing the water pump will be child's play for you !!Success!! It Only took tearing apart and testing the fuel injection system, a new set of plugs, new fuel filter, putting the old dizzy back in and finally putting the 123 back! The good news is, it’s now running nicely again a
The bad news is that the water pump bearings have totally collapsed and coolant is pouring out the front of the pump. I knew it was on the way out but certainly not that bad. Can’t have everything I suppose.....
BTW what sort of fuel filter did you use Faulksy ?
Thanks Peter, I think I’m winning the battle finally.I reckon fixing the water pump will be child's play for you !!
BTW what sort of fuel filter did you use Faulksy ?
The fuel filter is a ryco z200, stocked by repco etc. Assuming you still have 8mm fuel lines it’ll drop straight in.
I will have to make a video to show you guys just how bad the pump bearings are. You can move the shaft a good 5mm
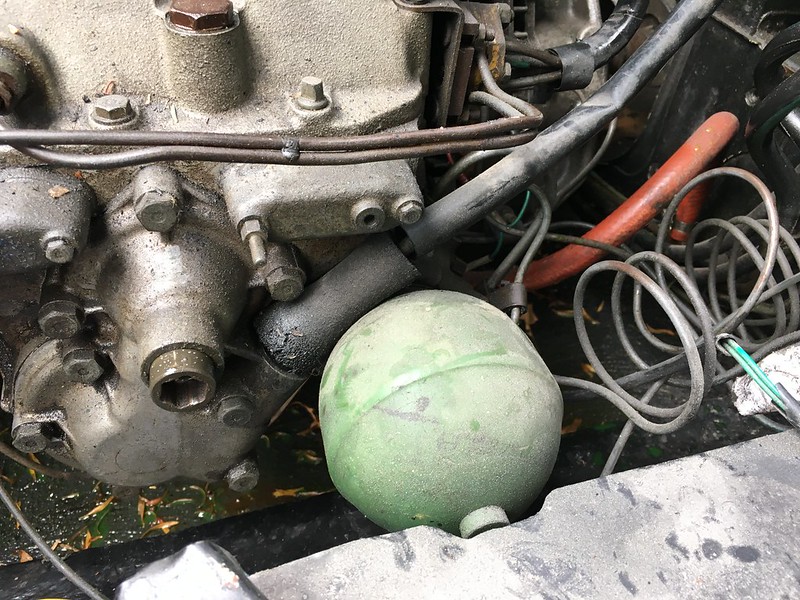
The new water pump arrived on Friday so it is finally time for a job that should have been done months ago. You can get the water pump off with the radiator in place but life is a lot easier if you remove it and the alternator. This also gives easy access to the clutch slave, which is once more leaking, and the gearbox.
Up with the bonnet and out with the radiator ducting

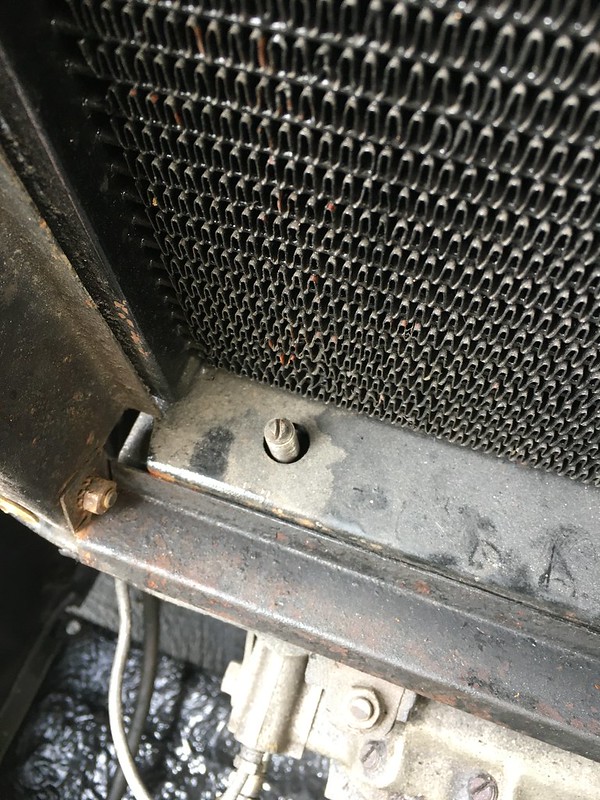
The hardest part is unwinding the two bolts that hold the radiator onto the brackets. The slots cut into the ends make it easier, you just have to watch the screwdriver doesn't slip and put a hole in the radiator. Been there done that.......

The alternator straddles the metal section of the lower radiator hose so it came out as well. It's not necessary but saves a lot of frustration when trying to reconnect the rubber hose to the pump outlet.

Even with the radiator out, access to the two 14mm bolts at the base of the alternator bracket is very limited. The front one only needs to be loosened but the rear one has to come all the way out. I'm sure there's a reason Citroen used a 50mm long bolt but having to undo it a quarter turn at a time is just tedious. Pro tip, take note of the insulating washers and nuts on the alternator terminals before undoing.
The lower hose took some persuading to let go of the pump outlet but finally yielded when threatened with a stanley knife. Getting to all the 12mm nuts is easy enough. I left the fan attached. To get the pump out, pull all the way forward to get it off the lower studs then rotate anticlockwise so the outlet points up. The pump should then clear the cam pulley and come off.
For those wondering why I'm doing this, here is a video showing the condition of the old pump.
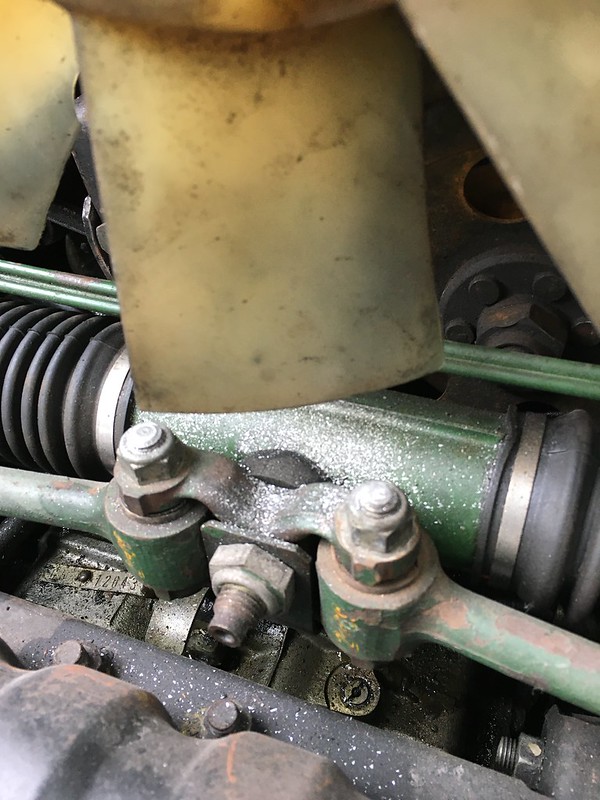
The bearings had totally collapsed and coolant was pouring out the front. There was metal dust all over the top of the steering rack presumably from the pump housing shredding.
Before fitting a new pump, the clutch slave needed to come out to get a new o-ring and dust boot. You can see the river of LHM flowing out the front of it and down the gearbox.

This will be the third time this year I've had to replace the o-ring. The parts books are very unclear what size the factory used and it's further complicated by their being 5 different versions of the clutch slave but no way of knowing which you have till it's apart. Last time all I had on hand was 22.3x3mm o-rings which are only .2mm smaller ID than the piston. This time I ordered a few different sizes but all with an ID of 22mm which is .5mm smaller than the piston. Any smaller and there isn't enough stretch in the o-ring to get the piston in. A few were tried and the best option seemed to be 22x3.5mm, we shall see how long it works for.

The return spring is a pig to get back onto the rear hook with the radiator in place. Much easier when you can actually wee what you're doing! The adjusting bolt is wound almost all the way in, does that mean the clutch is almost knackered or brand new?
Fitting the new pump and getting the radiator back in is pretty straight forward
The final job was to swap the gearbox end cover for one with a reverse light switch. Simply unbolt one and fit the other.

The irony is that the wires I had run up to the gearbox seem to have vanished. They were there last time the bonnet was up but seem to have been jettisoned at some stage. That would explain why there was a pair of bullet connectors hanging out of the firewall. Stupidly i pushed them back through the hole and thought nothing more of them. Fishing them back out won't be fun and will most likely require the dash to come out.
The new pump has made a world of difference! the engine no longer sounds like a tractor and is barely audible when the bonnet is closed. Between that and the 123 distributor it's a totally different car to drive.
One thing I wasn't prepared for after reassembling everything was a charge warning lamp that would't go out. Clever clogs here somehow managed to lose and then totally forget about the insulating washer on the R terminal of the alternator.

That terminal is supposed to be insulated from the alternator casing but I'd managed to short it to the casing. You can see the plastic insulator around the post where it passes through the casing. It doesn't stop the alternator from charging the battery but it does mean the charge lamp is permanently on.
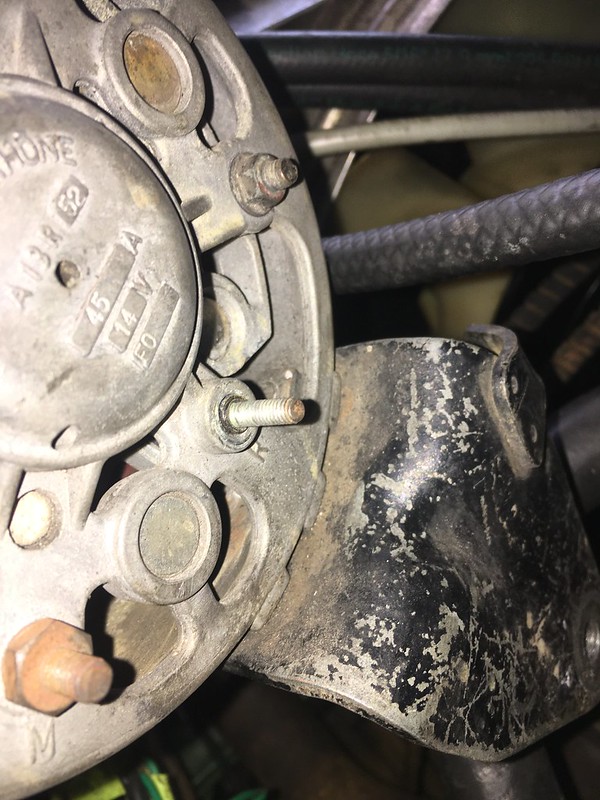
A trip to Jaycar for some mounting hardware and all is back to normal operation.

A trip to the servo confirmed a few things, 1. the windscreen wipers are useless, 2. The roof leak seems to have fixed itself and 3. the fuel gauge is more accurate than I give it credit for.
Up with the bonnet and out with the radiator ducting
The hardest part is unwinding the two bolts that hold the radiator onto the brackets. The slots cut into the ends make it easier, you just have to watch the screwdriver doesn't slip and put a hole in the radiator. Been there done that.......
The alternator straddles the metal section of the lower radiator hose so it came out as well. It's not necessary but saves a lot of frustration when trying to reconnect the rubber hose to the pump outlet.
Even with the radiator out, access to the two 14mm bolts at the base of the alternator bracket is very limited. The front one only needs to be loosened but the rear one has to come all the way out. I'm sure there's a reason Citroen used a 50mm long bolt but having to undo it a quarter turn at a time is just tedious. Pro tip, take note of the insulating washers and nuts on the alternator terminals before undoing.
The lower hose took some persuading to let go of the pump outlet but finally yielded when threatened with a stanley knife. Getting to all the 12mm nuts is easy enough. I left the fan attached. To get the pump out, pull all the way forward to get it off the lower studs then rotate anticlockwise so the outlet points up. The pump should then clear the cam pulley and come off.
For those wondering why I'm doing this, here is a video showing the condition of the old pump.
The bearings had totally collapsed and coolant was pouring out the front. There was metal dust all over the top of the steering rack presumably from the pump housing shredding.
This will be the third time this year I've had to replace the o-ring. The parts books are very unclear what size the factory used and it's further complicated by their being 5 different versions of the clutch slave but no way of knowing which you have till it's apart. Last time all I had on hand was 22.3x3mm o-rings which are only .2mm smaller ID than the piston. This time I ordered a few different sizes but all with an ID of 22mm which is .5mm smaller than the piston. Any smaller and there isn't enough stretch in the o-ring to get the piston in. A few were tried and the best option seemed to be 22x3.5mm, we shall see how long it works for.
The return spring is a pig to get back onto the rear hook with the radiator in place. Much easier when you can actually wee what you're doing! The adjusting bolt is wound almost all the way in, does that mean the clutch is almost knackered or brand new?
Fitting the new pump and getting the radiator back in is pretty straight forward
The final job was to swap the gearbox end cover for one with a reverse light switch. Simply unbolt one and fit the other.
The irony is that the wires I had run up to the gearbox seem to have vanished. They were there last time the bonnet was up but seem to have been jettisoned at some stage. That would explain why there was a pair of bullet connectors hanging out of the firewall. Stupidly i pushed them back through the hole and thought nothing more of them. Fishing them back out won't be fun and will most likely require the dash to come out.
The new pump has made a world of difference! the engine no longer sounds like a tractor and is barely audible when the bonnet is closed. Between that and the 123 distributor it's a totally different car to drive.
One thing I wasn't prepared for after reassembling everything was a charge warning lamp that would't go out. Clever clogs here somehow managed to lose and then totally forget about the insulating washer on the R terminal of the alternator.
That terminal is supposed to be insulated from the alternator casing but I'd managed to short it to the casing. You can see the plastic insulator around the post where it passes through the casing. It doesn't stop the alternator from charging the battery but it does mean the charge lamp is permanently on.
A trip to the servo confirmed a few things, 1. the windscreen wipers are useless, 2. The roof leak seems to have fixed itself and 3. the fuel gauge is more accurate than I give it credit for.
You are probably okay with your efi. The parts catalogues show the water pump studs as all being 9mm diameter, whereas on my 60s car, only one is 9mm. The rest are 8mm. The upshot of this is that replacement pumps are a fairly loose fit on my car, with scope for lateral movement - especially if tugged sideways by the pulley belt.
Clutch fork adjustment. When its adjusted like that, it's starting to run out of useful adjustment. My adjuster is right at the end. Even though gearbox and engine are out of the car, but back together, I'm going to pull them apart again and fit a new old stock clutch fork - as I suspect that might be my problem. Easier to replace it now than pull the engine again later on.... If my adjustment problem is not the clutch fork, then the only other thing i can think of is bent fingers on the clutch release mechanism? But the chance of all three bending seems unlikely.
Clutch fork adjustment. When its adjusted like that, it's starting to run out of useful adjustment. My adjuster is right at the end. Even though gearbox and engine are out of the car, but back together, I'm going to pull them apart again and fit a new old stock clutch fork - as I suspect that might be my problem. Easier to replace it now than pull the engine again later on.... If my adjustment problem is not the clutch fork, then the only other thing i can think of is bent fingers on the clutch release mechanism? But the chance of all three bending seems unlikely.
I’m a bit lost with the first part of your message Paul
it wouldn’t surprise me if the clutch was just about worn out. I have no idea when or if it has been replaced. There’s a few oil leaks that can only be fixed with the engine out so might tackle it all together.
in the meantime it’s made it to work and back twice this week without problem.
it wouldn’t surprise me if the clutch was just about worn out. I have no idea when or if it has been replaced. There’s a few oil leaks that can only be fixed with the engine out so might tackle it all together.
in the meantime it’s made it to work and back twice this week without problem.