Renault Floride body rebuild.

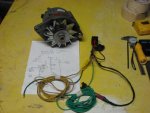
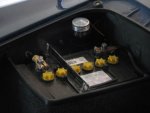
Hi Graham, as I am slowly in the process of restoring my wifes Caravelle I was interested in your under car shots. 1. the heating tube, did you source that locally or was sourced from a specilty supplier and 2. do you have a photo that show the gear lever mounting hole a little clearer as I fear that the one on our car has been badly butcherd. Unfortunatley I showed my wife your handy work and I have now been given the hurry up.
Thanks
Peter
 
Hi Peter,

The heater ducting was found on ebay..see below.


The pic of the gear lever below is the best I can do...hope it helps. Good luck with your Caravelle and let me know if you need me to email a parts manual for the R1133.


icon1.gif
Heater ducting.
I recently purchased some heater ducting for my Floride, I couldn't find any locally so I resorted to ebay and there it was and cheap as chips, a 3 meter length cost me $60.18 landed at my front door and took two weeks to arrive.

Visit store:Diesel Heaters&Spares


!Bin!(KwBGk~$(KGrHqMH-EUEs9E6Mub,BLP7Hc7M2Q~~_35.JPG

Please wait
 

Attachments

  • IMG_3244.jpg
    IMG_3244.jpg
    38.2 KB · Views: 1,809
Last edited:
The hardtop part 3..the hood lining.

So I asked myself.."how hard could it be to do my own hood lining?"...Answer: "Tricky".


I had the wire bows and some thermal insulation and sourced some hood lining material from the United States which was a very close match.

Out came the sewing machine and some rod pockets sewn up for the bows


Attachments

  • 031.jpg
    031.jpg
    98.8 KB · Views: 1,600
  • 035.jpg
    035.jpg
    98.7 KB · Views: 1,629
  • 044.JPG
    044.JPG
    90.2 KB · Views: 1,607
  • 046.JPG
    046.JPG
    91 KB · Views: 1,631
  • 049.JPG
    049.JPG
    92.8 KB · Views: 1,645
Last edited:
Continued...

The rear windscreen was marked before removal to aid re-installation.

The new hood lining was laid out and secured right around with contact adhesive and bulldog clips after stretching into place.

The lining was wrapped over the fin that holds the rear windscreen and glued up before re-installing the glass.

Getting the last few creases out is a challenge and requires patience and persistance..apparently.

Cost all up $56.00

To be continued...


Attachments

  • 038.JPG
    038.JPG
    84.2 KB · Views: 1,842
  • 002.JPG
    002.JPG
    95.5 KB · Views: 1,658
  • 008.JPG
    008.JPG
    93.9 KB · Views: 1,578
  • 014.jpg
    014.jpg
    33.5 KB · Views: 1,571
  • 016.jpg
    016.jpg
    39.5 KB · Views: 1,539
  • 019.JPG
    019.JPG
    77.5 KB · Views: 1,558
Last edited:
So I asked myself.."how hard could it be to do my own hood lining?"...Answer: "Tricky".

You nailed it, that looks like a bought one.

Now with your new found skills how would you like to tackle the folding sunroof lining on my project?

Cheers
Chris
 
You nailed it, that looks like a bought one.

Now with your new found skills how would you like to tackle the folding sunroof lining on my project?

Cheers
Chris

Ah that would be no...But I can hem your new jeans if you like.

I'm thinking seriously about making a new soft top for the Floride though. Just for the practice.
 
Ah that would be no...But I can hem your new jeans if you like.

I'm thinking seriously about making a new soft top for the Floride though. Just for the practice.

Let's try again, that was the wrong answer, don't worry about the jeans I like that fuzzy worn I don't care look. I have the vinyl and the old lining as a template you know you want to do this. For the record the correct answer is "yes Chris, I'd be delighted".

OT/ I do know of a DS that is unofficially on the market PM if you have any interest.

Cheers
Chris
 
Hardtop final...

Finished...

I can understand why motor trimmers don't like doing hood linings...and I had the advantage of turning the roof upside down.

I managed to get most of the creases out and it looks fabulous, like a bought one as Greenblood would say. Maybe the remaining creases will shrink out over time or the Pixies might come and take them away.


This is a new lifting apparatus I have been working on because the hardtop is too heavy for a solo lift and damage to the paintwork is certain...so is shaggers back.


Attachments

  • 006.jpg
    006.jpg
    102.1 KB · Views: 1,576
  • 015.JPG
    015.JPG
    84.7 KB · Views: 1,518
  • 017.jpg
    017.jpg
    39.4 KB · Views: 1,594
  • 023.JPG
    023.JPG
    83.3 KB · Views: 1,579
  • 006.jpg
    006.jpg
    43.4 KB · Views: 1,680
Last edited:
Finished...

I can understand why motor trimmers don't like doing hood linings...and I had the advantage of turning the roof upside down.

I managed to get most of the creases out and it looks fabulous, like a bought one as Greenblood would say. Maybe the remaining creases will shrink out over time or the Pixies might come and take them away.


This is a new lifting apparatus I have been working on because the hardtop is too heavy for a solo lift and damage to the paintwork is certain...so is shaggers back.

You possibly will get a little shrinkage over time to tighten things up, but I'd be happy to pay money for that as it is. Nicely done.

The lifting gizmo is a smart move too, if you add a slippery slide that launches you into the drivers seat you'd be set. :eek: :tongue:

Cheers
Chris
 
Hopefully those creases will disappear after it gets parked in the sun a few times. I have heard people recommend leaving the material in the sun before fitting a bit like windscreen rubbers.

KB
 

Attachments

  • 005.jpg
    005.jpg
    45.8 KB · Views: 642
  • 030.jpg
    030.jpg
    101.6 KB · Views: 1,806
  • 003.jpg
    003.jpg
    37.1 KB · Views: 679
Graham,
I've just gone back though this thread, it's just brilliant, and now the first sticky in the 'Restoration Forum' :)

A perfect demonstration of what can be achieved in a home workshop. So much information both specific to the Floride and general restoration techniques. A real credit to you and a real asset to the forum. Bravo!!

Cheers
Chris
 
Dontya just hate folk who make a first class job of everything?? :mad:

:cheers:

Mike.

Graham,
I've just gone back though this thread, it's just brilliant, and now the first sticky in the 'Restoration Forum' :)

A perfect demonstration of what can be achieved in a home workshop. So much information both specific to the Floride and general restoration techniques. A real credit to you and a real asset to the forum. Bravo!!

Cheers
Chris

Well done and put Chris, I second all the above.


Thanks for the kind words gentlemen I am glad others enjoy what I am doing as well, and since I've learned so much from the Aussiefrog fraternity it is only right that I document and share in my progress.

I still have other things to add to this thread though and as some would know, restoring an old car is always a work in progress .....always something to do.

I am also glad my thread has been elevated to the lofty heights of stickiness, what an accolade.

Thankyou Chris
 
Some soft furnishings..

I haven't added anything in a while so here's the new trunk interior, it's some carpet from bunnings and an old suitcase from an op-shop to house my tools, jack and spares...I just added the stickers.


attachment.php
 

Attachments

  • 029.JPG
    029.JPG
    74.2 KB · Views: 573
  • 030.JPG
    030.JPG
    81.3 KB · Views: 590
  • 035.jpg
    035.jpg
    100.1 KB · Views: 1,291
Top