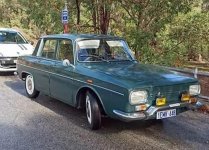
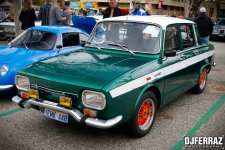
Yes, he's really good at composition. Photographed the R8 in ways I'd never thought of.Just had a great surprise the "Green Beast" has had a feature on FB Classic and Modern Show Cars AU.
The man is a fantastic photographer of his cars, and I am honoured for my car to be shown by him. Thank you. Pictures taken at CC&C July 5th.
View attachment 207662View attachment 207663View attachment 207664View attachment 207665

You are using an out of date browser. It may not display this or other websites correctly.
You should upgrade or use an alternative browser.
You should upgrade or use an alternative browser.
Ray's Grenouille Verte R10 !!!!
- Thread starter geckoeng
- Start date
OK Eventually I have reached the end of Stage 1 with Grenouille Verte. I have all the mags and tyres assembled properly and ensured fitment to the car, and now fitted and road tested today.
What a difference the mags and tyres make to the feel of the car. It is a long time since I drove an R8/10 with real wheels on, and it is great the feel and feedback. So now I am happy. Not fancy tyres, as it is not a race car.
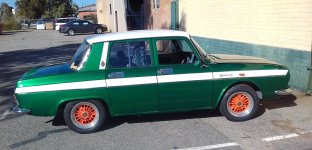
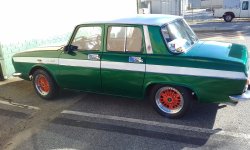
What a difference the mags and tyres make to the feel of the car. It is a long time since I drove an R8/10 with real wheels on, and it is great the feel and feedback. So now I am happy. Not fancy tyres, as it is not a race car.


Nice one Ray, loving those red wheels. 
Grenouille Vert – Phase 2
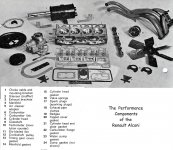
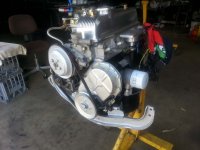
Phase 2 on my R10 Alconi, is the motor and gearbox.
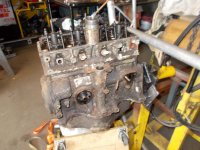
The motor is going to be a 810 1300cc. As I was not able to find a proper R10-1300 in Australia, I found a complete R12 1300 and gearbox in a friend’s back yard. It looked very “unloved”, but checking the oil on the dipstick, it was clean and not smelling. Took off the rocker cover, no sludge and no smell and what oil was around the valve springs seemed very good. So we take a chance, and it was put on the back of the Rodeo.
Got it to the workshop and it was made into pieces, and first thing was to get the block and crank clean. The reason the block was so dirty, was that the rocker cover gasket had never been changed, and it was one perpetual oil leak from the top of the motor. The crank was checked and found to be in very good condition. So I started by “touching” the cross drilled oil holes and remove forging flashing and sharp edges. It was sent to the machine shop for the keyway on the snout to be extended for a full length key, and balancing.
Now that the block had been fully cleaned, I did a bit of deburring. Chamfer all the bolt holes. Drilled out the ali plugs for the oil gallery, tapped the holes 3/8” BSP, and modified grub screws to fit flush in the block. This also allows cleaning on the gallery, and even this block that seemed very clean had grey sludge after hot tanking. Because I am using a R5 cam for my motor, the R12 block needs to have a “cam bearing” installed in the flywheel end of the cam gallery. The water pump drive snout is cut off the cam and a blanking core plug is fitted in the end of the cam gallery.
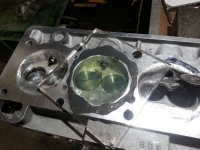
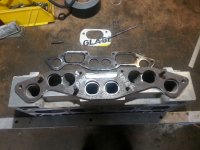
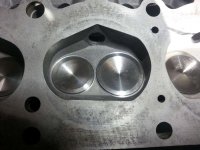
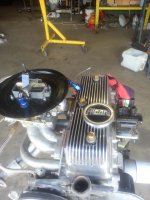
The head of the Alconi motor is the most important part of the project. I had the remains of a proper Alconi 1300 head. 2 chambers and ports were still in good condition. So I could duplicate what was there into the standard head from the rebuild motor. I was not able to get the proper valves from South Africa to match the proper Alconi ones, but found a motorcycle company in the USA that had exact valves to the Alconi, so first work on the head was new valves and seats. I wanted to run a compression ratio of 9.7:1 as I want to run on 91 octane fuel. Once combustion chambers were calculated and adjusted, head went for skim and the final combustion chamber volumes were adjusted. The Alconi inlet manifold was then matched to the cylinder ports. The rocker shaft had ali collars made to replace the springs.
Because Renault motor are pressed pin pistons and rods. I make them fully floating. So pistons and rods are separated. The rods are sent for honing for sliding pins and the pins are shortened 2 mm to fit in circlip pistons. I have a tool for my lathe so I can machine circlip grooves. All the pistons and rods are then balanced to within 0.5 grams of each other.


Part 2 :
As I wanted to use the R5 Alpine duplex timing chain and pulleys for my Alconi motor, I had to make a timing cover with a oil seal hole so I can have a timing cover pulley. For this I use an R5 Alpine timing cover and graft on a R10 oil seal part. I have made tooling for location of the parts relative to crank and block, to tack weld the bits in position. Others have made a ali spacer plate to mount the seal further out from the block, but there are problems with the sump arch seal area, and nobody is making a casting to do the trick.
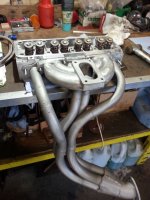
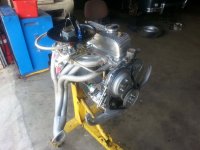
The exhaust manifold. I had an original “bunch”, but it has been off a running motor for so long it was very rotten. The last versions of them from Alconi/Renault were a 4 into 1, and I believe and felt they performed better. So I had some bends done, made up a flange and got started. One thing, I prefer my exhaust flange to be one piece. It stops warpage and leaks when it moves with heat. I then put the inlet manifold against that with good gasket material, and no leaks. The exhaust and inlet match well, very happy with the outcome.
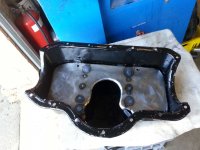
The sump was next project. I wanted to run a windage tray and swing door baffles inside, a bit of sheet metal work and my old templates and it was short work.
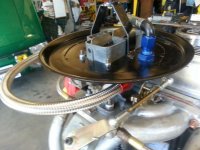
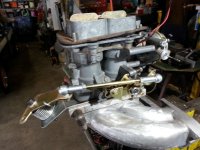
Played with the air cleaner base a bit so I could get a good crank case vent working properly. Some old racing fittings and it was done.
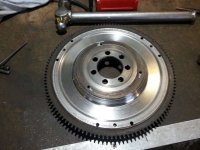
Then I put the flywheel in the lathe and started taking material off. When the measuring got to the final limits, that was sent off for Blanchard grinding the face, and then for balancing.
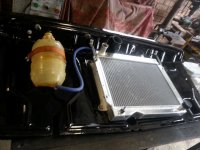
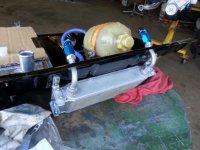
My next task was cooling. I had bought a ali radiator, from Europe at a decent price. When it arrived it was very good, so the rad panel was started. I intend to run a 4 blade Renault fan, and I have incorporated an electric fan to assist in slow running conditions in summer. The rad panel also has a oil cooler mounted right in the air flow of the grill. They have worked well here in the past, so it is a start.
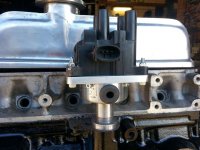
Last thing of importance to make for the motor is the mock distributor. As the motor will use a Nodiz electronic ignition I thought it nice to fit the “multi-coil” in place of the actual distributor. This also includes an extension into the motor to keep the oil pump drive in position.
It was then time to put it all together.
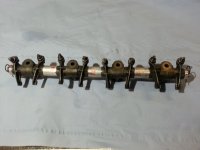
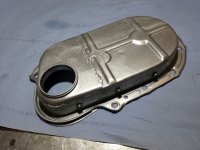


My Big4Speed Gearbox
It is a long time since I have done a gearbox for myself. But I have recently done for John and Clin in their R8, and one for Julian for his R8G.
I bought a R16 TS box quite a while ago, as it came out of a low milage car that was very damaged in the rear. I had not opened it, and it sat under my parts shelf for a good 4 years, before being pulled out, cleaned and stripped. The funny thing is, at the same time you have a mass of 330 parts all over the work areas of the workshop, as well. But I am quite particular of the R16 parts, and they go into a specific work tray.
All the extra bits had already been made, so they are also brought out and associated with the R16 parts.
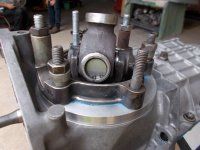
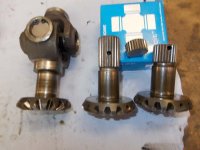
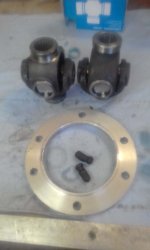
The first thing I attack is the diff housing. It needs stripping and cleaning, and the sun gears removed for modification. The splines need to be shortened 14mm. Once done and cleaned the diff can be reassembled. The carrier bearings from the R16 box were in very good condition, so they were removed from the adjuster rims and attached to the correct bearing they were mated with.
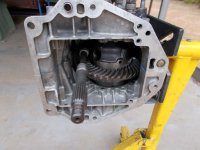
My next task is to clean and de-burr all the mating surfaces. I have a ground stock block I use with 320 grit wet and dry. I also use an assortment of files for cleaning all the edges. It is a tedious task but it helps keep oil leaks from old boxes. I fix a 330 side carrier to the LH casing and sit the crown wheel and carrier in the bearing. This shows me where I need to grind clearance for the crown wheel. I have a piece of 2.5mm plastic that I use as a gauge for the clearance. Some take quite a bit of die grinding.
It is now time to do the technical work. Doing the pinion depth setting. I have a copy of the Renault tool for this and it works very well. If you have to shim the pinion, up or down. Once this is done you can lock up the end nut again. I next work to get the crown-pinion backlash as close as possible, as that makes the diff bearing settings much easier to get to. All my settings are done to the Renault workshop manual. Gasket thicknesses are most important to do and so keep very close to the thickness that comes off the stripped box. I normally make all my gaskets myself. All surfaces are cleaned with meths and then a thin coate of Permatex Blue is applied to all gaskets on assembly.
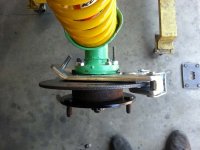
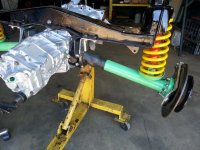
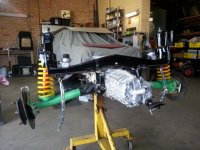
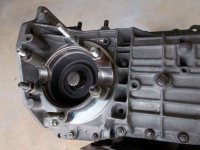
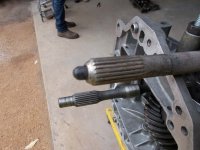
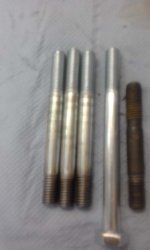


Some great photos there Ray, for which many thanks. You've been busy!My Big4Speed Gearbox
It is a long time since I have done a gearbox for myself. But I have recently done for John and Clin in their R8, and one for Julian for his R8G.
I bought a R16 TS box quite a while ago, as it came out of a low milage car that was very damaged in the rear. I had not opened it, and it sat under my parts shelf for a good 4 years, before being pulled out, cleaned and stripped. The funny thing is, at the same time you have a mass of 330 parts all over the work areas of the workshop, as well. But I am quite particular of the R16 parts, and they go into a specific work tray.
All the extra bits had already been made, so they are also brought out and associated with the R16 parts.
The first thing I attack is the diff housing. It needs stripping and cleaning, and the sun gears removed for modification. The splines need to be shortened 14mm. Once done and cleaned the diff can be reassembled. The carrier bearings from the R16 box were in very good condition, so they were removed from the adjuster rims and attached to the correct bearing they were mated with.
My next task is to clean and de-burr all the mating surfaces. I have a ground stock block I use with 320 grit wet and dry. I also use an assortment of files for cleaning all the edges. It is a tedious task but it helps keep oil leaks from old boxes. I fix a 330 side carrier to the LH casing and sit the crown wheel and carrier in the bearing. This shows me where I need to grind clearance for the crown wheel. I have a piece of 2.5mm plastic that I use as a gauge for the clearance. Some take quite a bit of die grinding.
It is now time to do the technical work. Doing the pinion depth setting. I have a copy of the Renault tool for this and it works very well. If you have to shim the pinion, up or down. Once this is done you can lock up the end nut again. I next work to get the crown-pinion backlash as close as possible, as that makes the diff bearing settings much easier to get to. All my settings are done to the Renault workshop manual. Gasket thicknesses are most important to do and so keep very close to the thickness that comes off the stripped box. I normally make all my gaskets myself. All surfaces are cleaned with meths and then a thin coate of Permatex Blue is applied to all gaskets on assembly.
View attachment 238371View attachment 238372View attachment 238373View attachment 238374View attachment 238375View attachment 238376View attachment 238377View attachment 238378View attachment 238379View attachment 238380
I like the windage plate in the sump, I will be copying that, and those gearbox pics are very helpful to refresh the memory. The aly radiator is a good upgrade.
