I recently bought a 2006 307 with a DW10BTED4 2.0 Hdi 100kW/136hp engine and a 6 speed manual ML6CL gearbox.
After owning it for a few days I noticed that if left idling for a minute or two it would develop a rattle from the gearbox.
A quick google turned up info on many Peugeot forums and I became aware of a thing called a dual mass flywheel (DMF) that is fitted to the 2.0 HDi Peugeot's (and many other vehicles). These flywheels differ from traditional single mass flywheel's (SMF) in that the damping usually carried out by the springs in the friction plate of a SMF clutch is instead carried out by the flywheel being split into two 'masses' that are internally dampened by springs. When these springs fail the two masses will cause the rattle or tapping noise I was hearing. From what I could tell it seems that leaving the car idle allows the two masses to slow sufficiently, relative to each other, that they start to bang into each other causing the rattle. Depressing the clutch would stop the noise as the friction plate was no longer slowing down the 'mass' that is in contact with it.
Naturally my next question was how to fix the problem. I found many threads on replacing the DMF with a SMF with arguments fore and against. Most of the against arguments were to do with losing the damping the DMF gives. I think that if you were to simply swap the flywheels over then this would be a valid point as the friction plate in a DMF clutch is NOT sprung. However if you swap the whole clutch over to a SMF using a full kit you get a sprung friction plate which will take care of this problem.
By this stage I was pretty much convinced that I didn't want to put another DMF in with an unknown life span.
I called around to clutch places to get some ideas on cost... A DMF kit was an astonishing $1200 (parts only) so off to ebay UK for some reasonable prices I went.
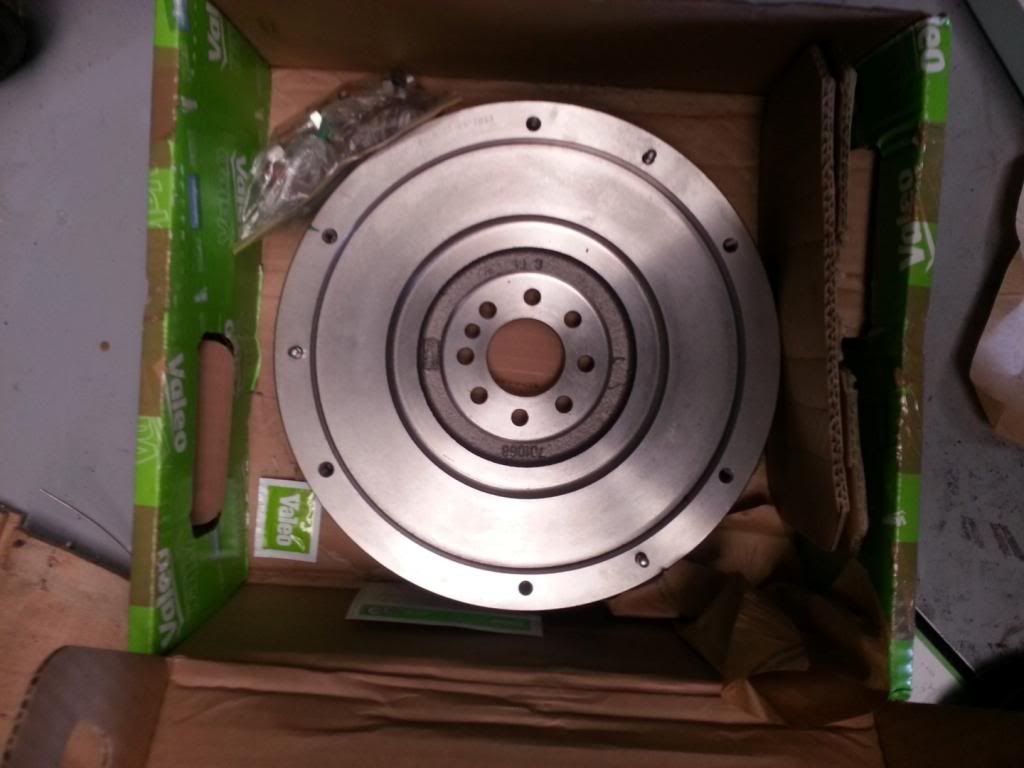
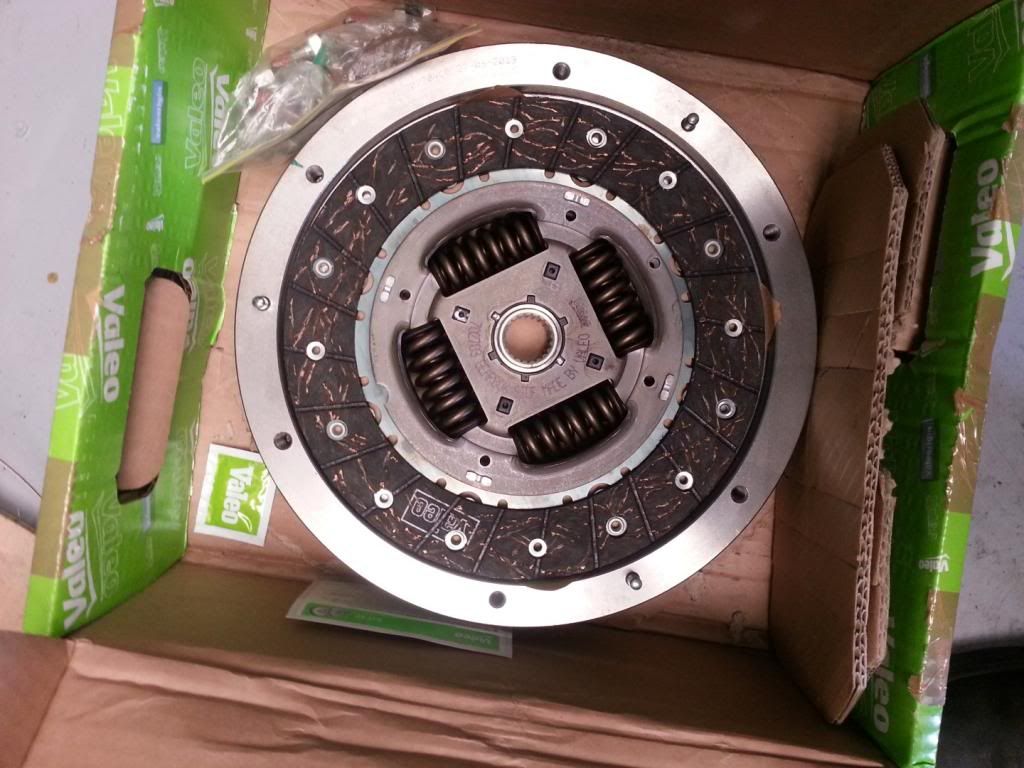
I found Valeo make a 'Kit 4P' for many vehicles to swap DMF to SMF that includes 4 parts (hence the 4P) which include: SMF, sprung clutch plate, pressure plate and release bearing (also all mounting bolts and some grease).
For the 307 with the 2.0 100kW/136hp engine there are two different kits depending on build date - the change over was 09/2006.
The Valeo part 415 0225 10 or 835068 is for the pre 09/2006 where the 415 0320 10 is for post 09/2006 models.
Later when I was looking at gearbox oil info (on this site) I found that there are two different types of ML6CL gearbox (one with cooling fins and one without) that require different volumes of oil.

I assume the difference in clutch kits corresponds with the gearbox change over.
In any case the difference between the pre 09/2006 and post 09/2006 307's, according to a clutch specialist in the UK that I asked, is this:
The difference is the "pot depth" between the two flywheels. In other words on one flywheel the driving face is flush with the outside edge, on the other it is recessed by 15mm.
In the end the cheapest I could get a pre 09/2006 kit I required was from the link below - a seller on ebay in Italy. Total cost was $AU 543 + $AU 100 shipping and it arrived in under a week. Even if I had ordered a DMF kit locally at $1200 it was going to take 2 weeks!
835068 Kupplungssatz Peugeot 407 SW 6E 2 0 HDI 135 136HP 2004 Valeo | eBay
Below is a list of things I used to do the repair. It's not an exhaustive list - just what I needed that I think worth mentioning.
Before I get into the repair steps I should point out one thing I tried to do differently to the Haynes manual. I read that the gearbox could be removed without dropping the sub-frame and while I did manage to get it out (just) there was no way I could have got the box back in with the sub-frame fitted. Maybe other variants of the 307 model range can have the box removed with the sub-frame in but for the 136hp / 6 speed combo I'd suggest it must be dropped out (as the manual says). Leaving the sub-frame also cost me a few hours extra time in removing the gearbox as it obscures several bracket mounting bolts.
I'll write this as though I did take out the sub-frame first so some of my photo's will show it where I've already described taking it out.
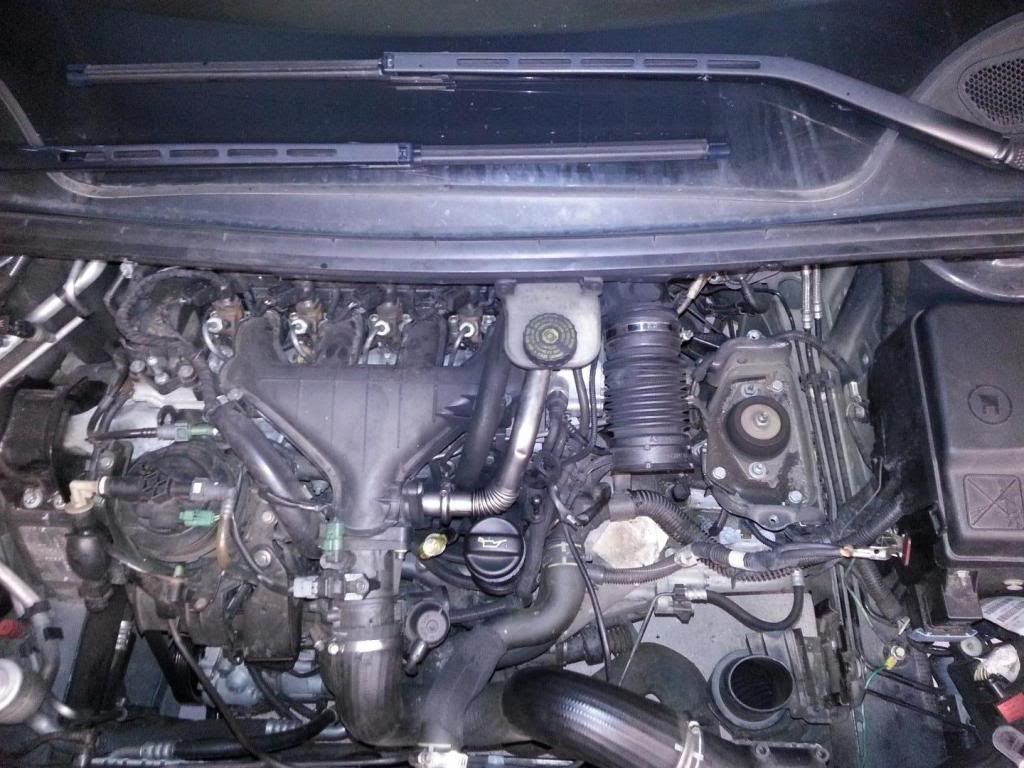
First up the battery tray and air box can come out.
This is a straight forward process that doesn't really need much explanation.
Once they are removed the gearbox mount and various attachments are visible.
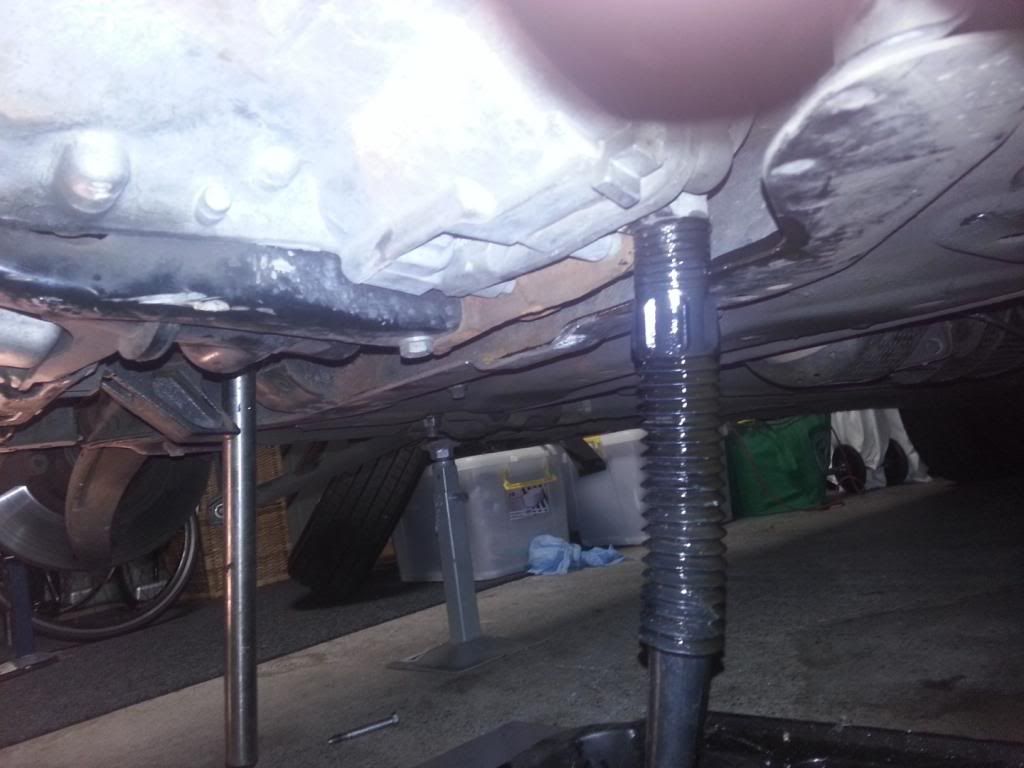
Jack up the car and support it on stands at the jack points. I chocked the stands with wood as per the Haynes manual tip.
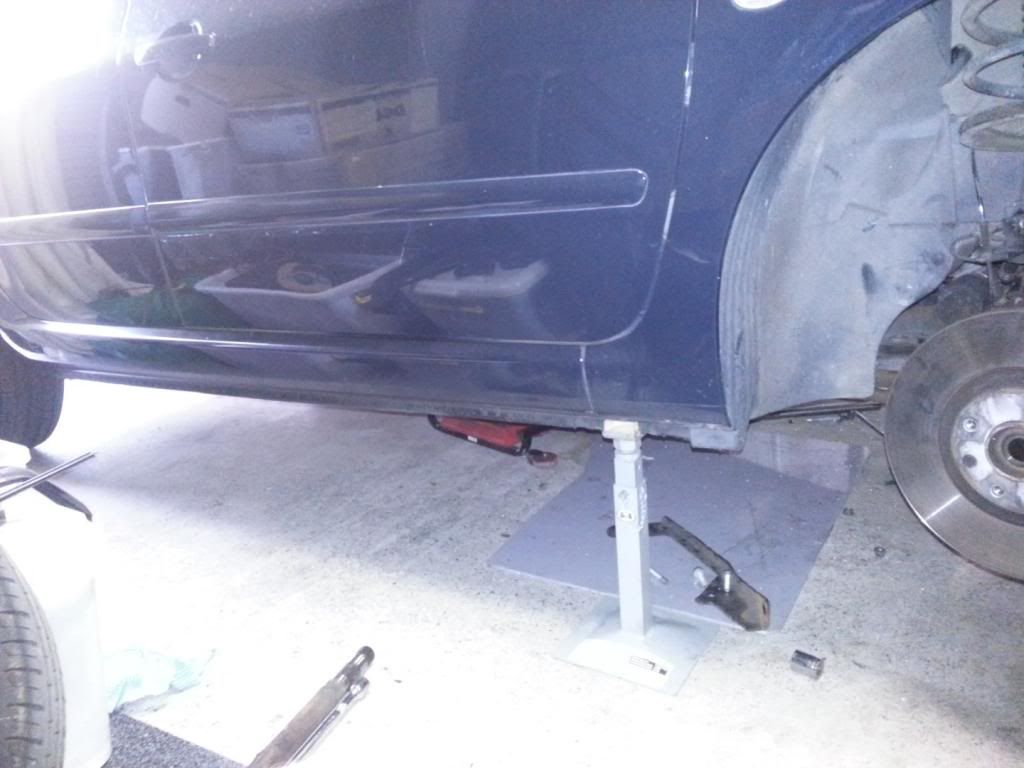
Remove the front wheels and inner guard liner on the left hand side wheel arch.
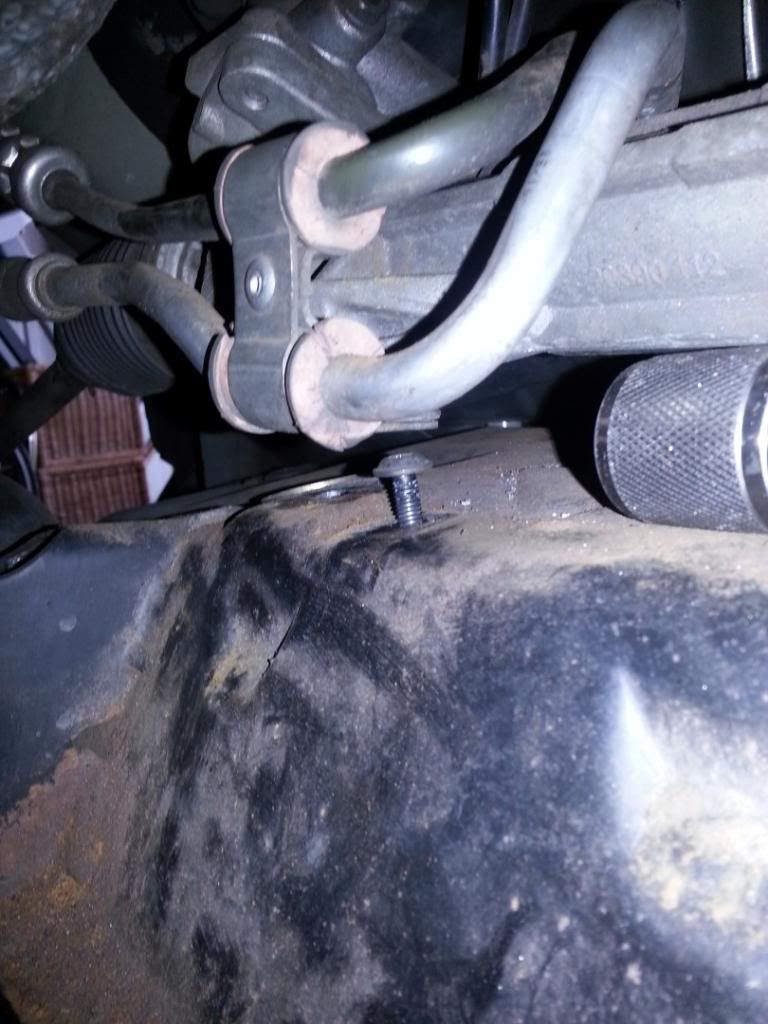
Remove the clutch slave cylinder and lower intercooler hose and associated pipe work under the engine.
Remove the lower engine mount bolt to allow engine to move forward. This allows easier access to the gearbox drain plug.
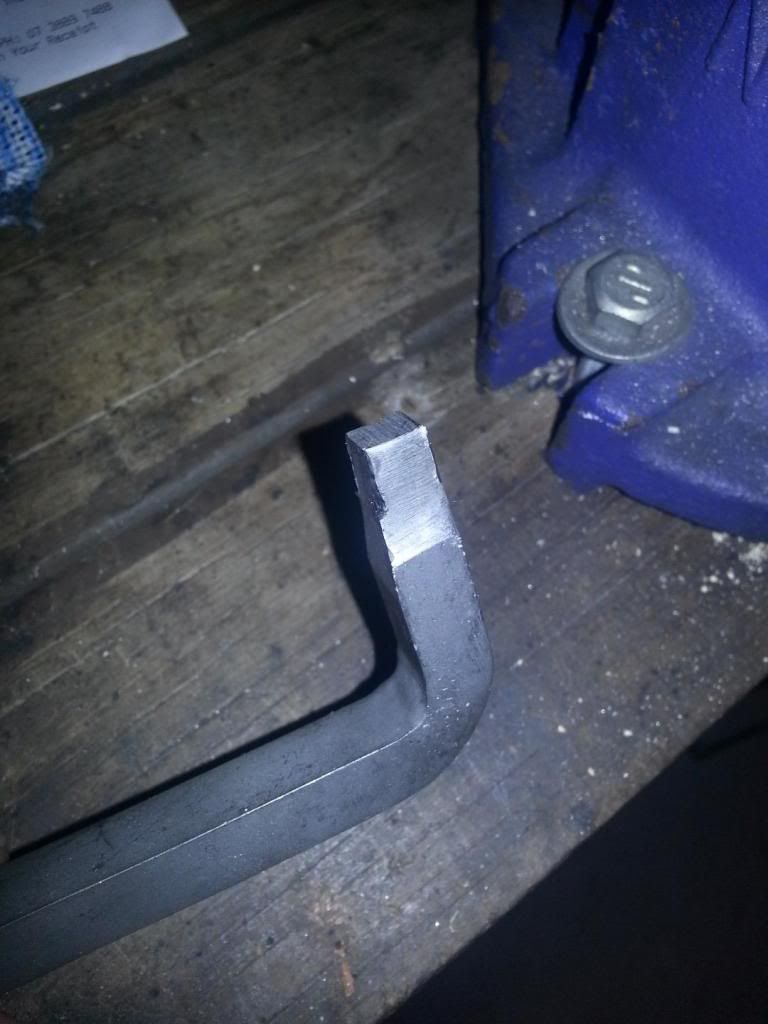
An 8mm square male fitting is needed to undo the drain plug. I had to make one as the only one I could find locally was part of a $70 set.
I drained the box while it was still hot so it would drain more easily. Use some sort of funnel to direct the oil past the sub-frame once the plug is removed. Refit the plug when drained.
Next comes the drive shafts, ball joints and sway bar connection.
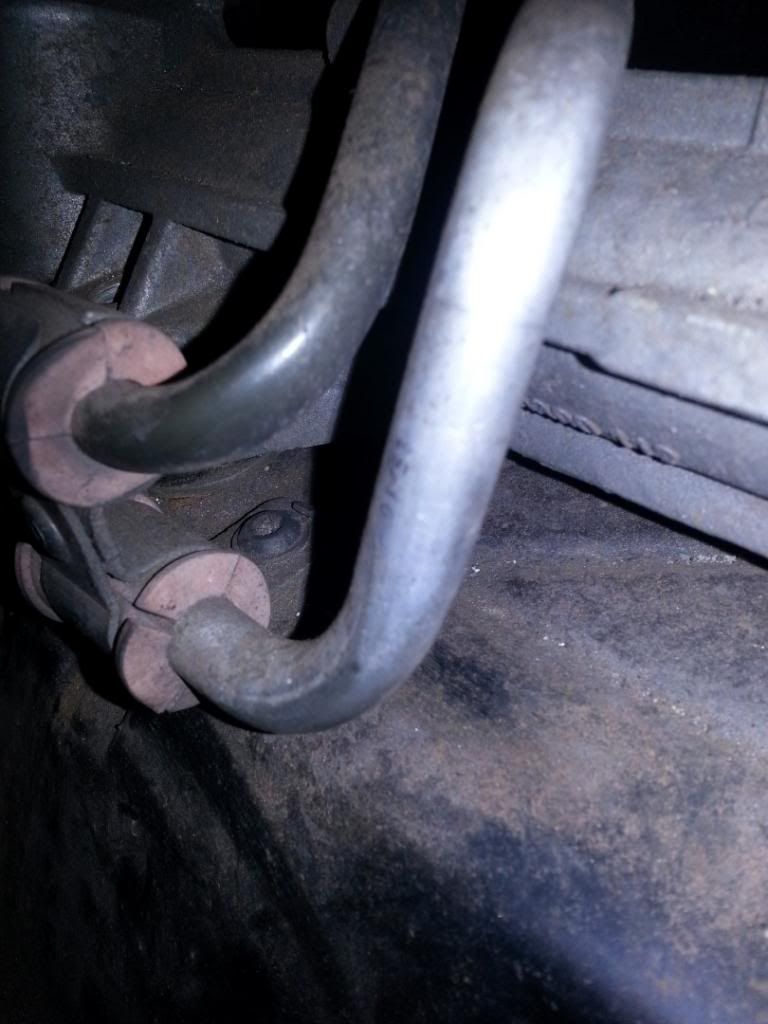
The sway bar connections are disconnected to allow the sub-frame to drop out in the next stage. There is an allen head in the bolt of the sway bar connection to stop it turning when the bolt is removed.
Remove drive shaft nuts by taking out the clips and the covers the clips hold on. I used an impact wrench and the nuts came off without needing to hold the hubs.
Undo ball joints and split using a puller taking care not to damage the tread while doing so.
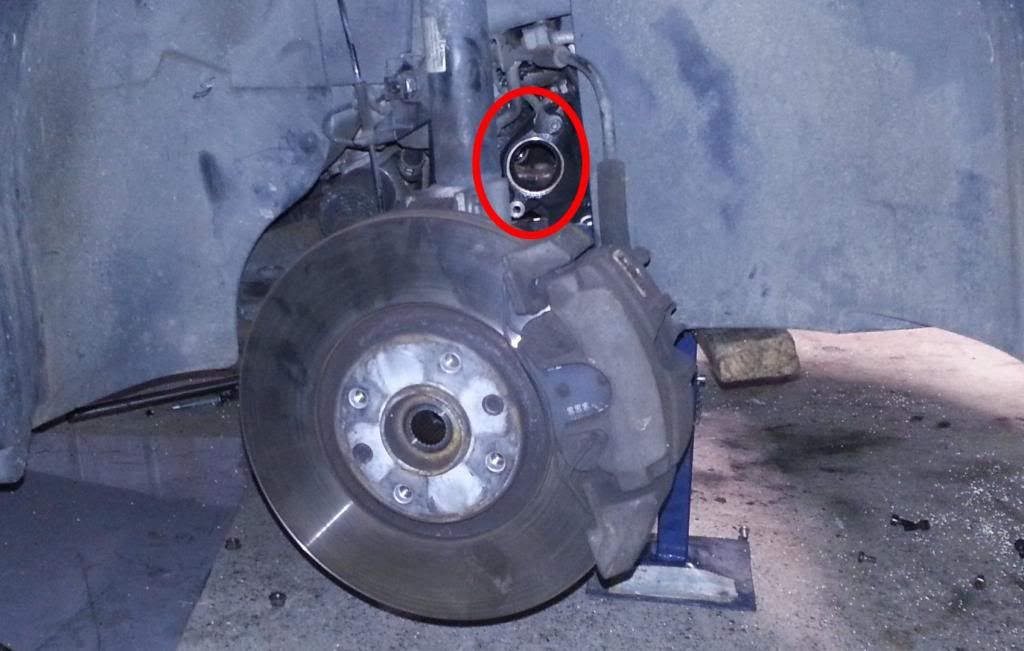
The left hand drive shaft came be removed now but the right hand side needs a clip held in by a torx bolt removed. The pic below shows the clip location once the shaft is out of the way.
To drop the sub-frame out:
Undo an AC hose bracket held on by a torx bolt in a bugger of a spot in front of the steering box on top of the sub-frame.
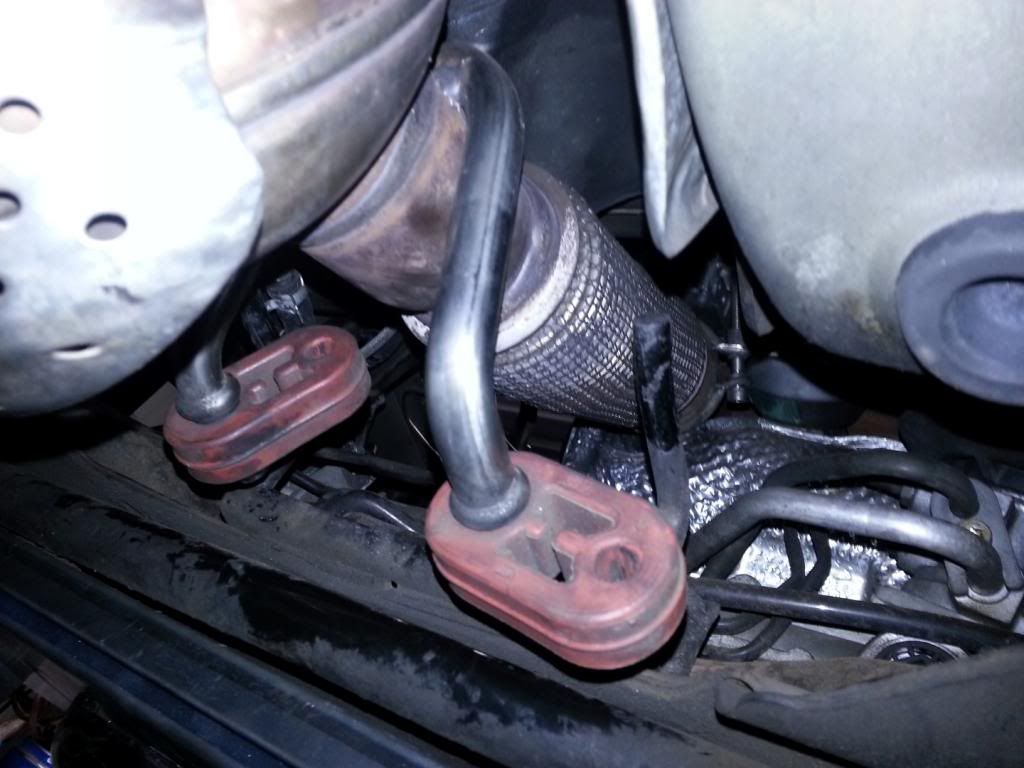
Remove the exhaust hangers/rubbers from the sub-frame mounts.
Undo the two bolts that hold the steering box to the sub-frame. These are supposed to be nuts on a stud that threads into the steering box but mine came out of the steering box like a bolt. Support the steering box - I used a cable tie to hold it up while the sub-frame was out.
Support the sub-frame with the trolley jack and undo the four bolts that hold the sub-frame to the car.
Two are at the rear behind the swaybar mounts and two are up in the wheel arch behind the strut.
Drop the sub-frame down on the jack when the bolts are out.
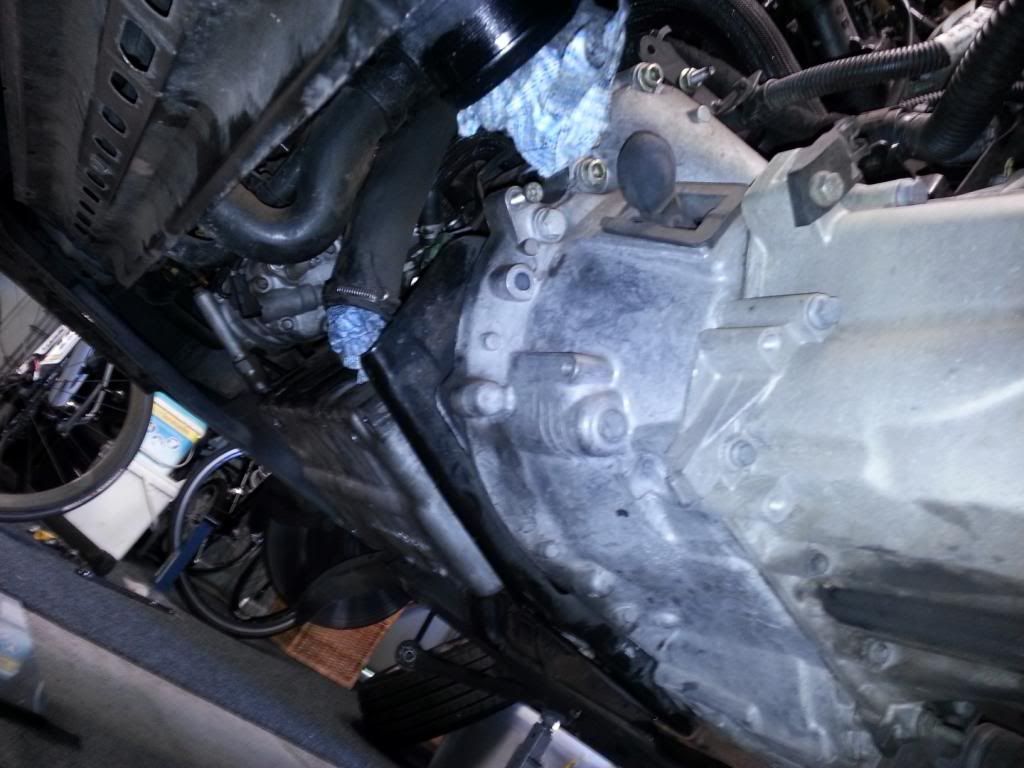
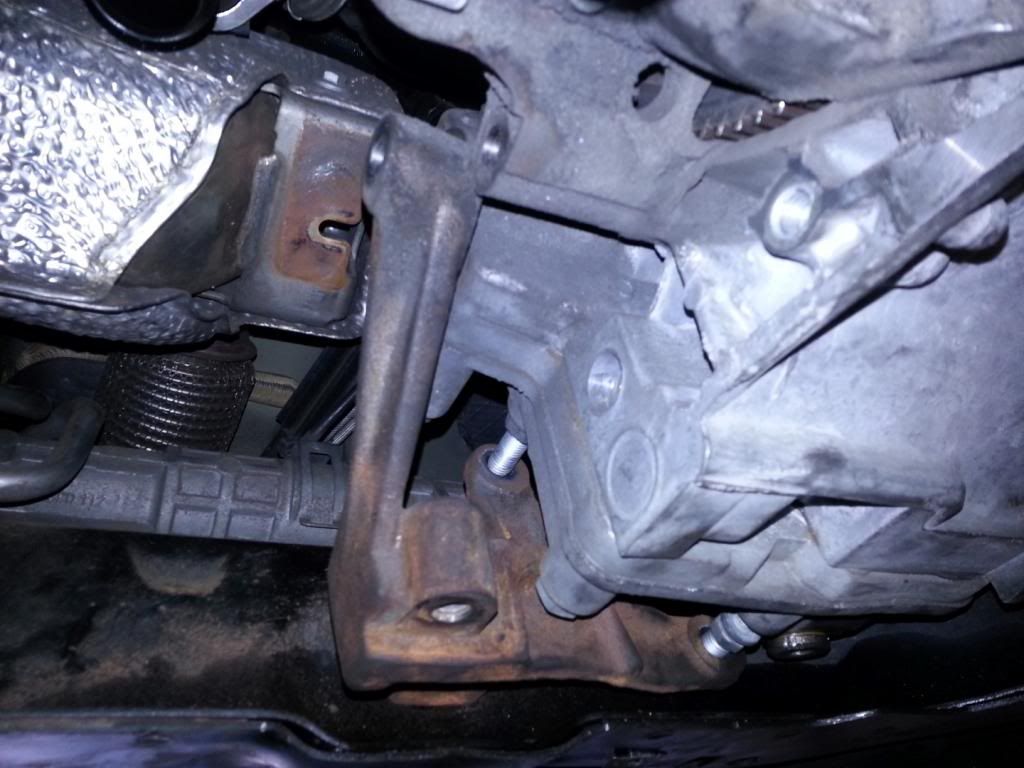
Remove the brackets under the engine that support the gearbox.
There are three brackets (2 x cast and one steel) that need to come out before the gearbox can be removed. When I removed mine I still had the sub-frame in and it slowed me down because the brackets can't be removed as the foul on the sub-frame.
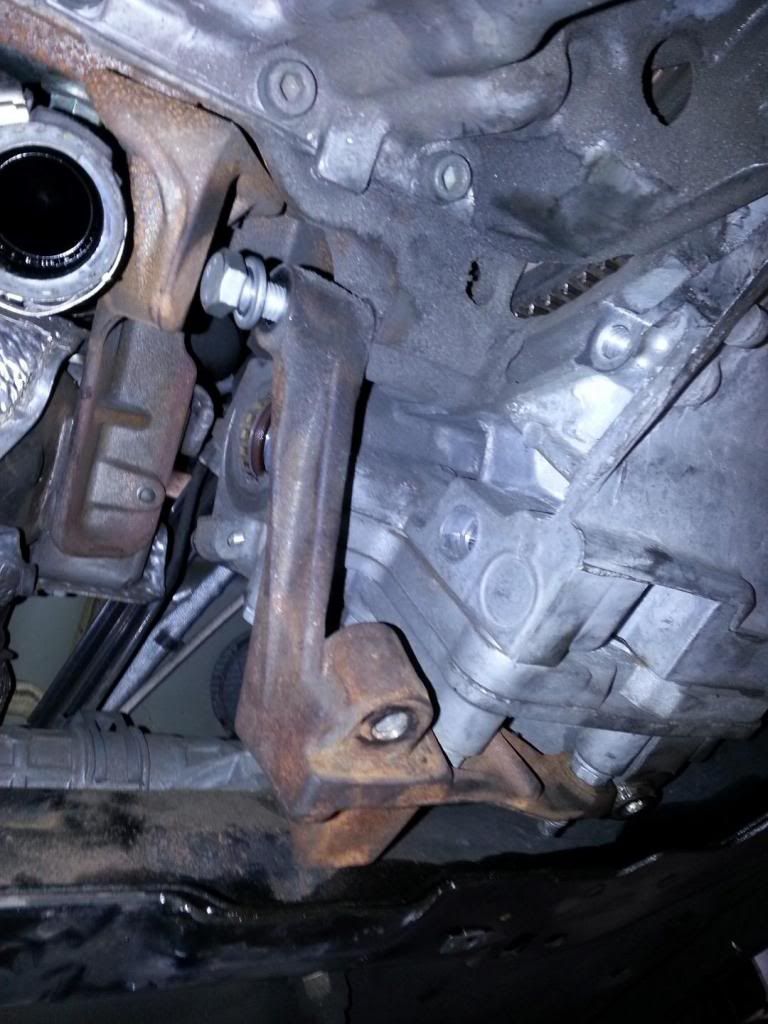
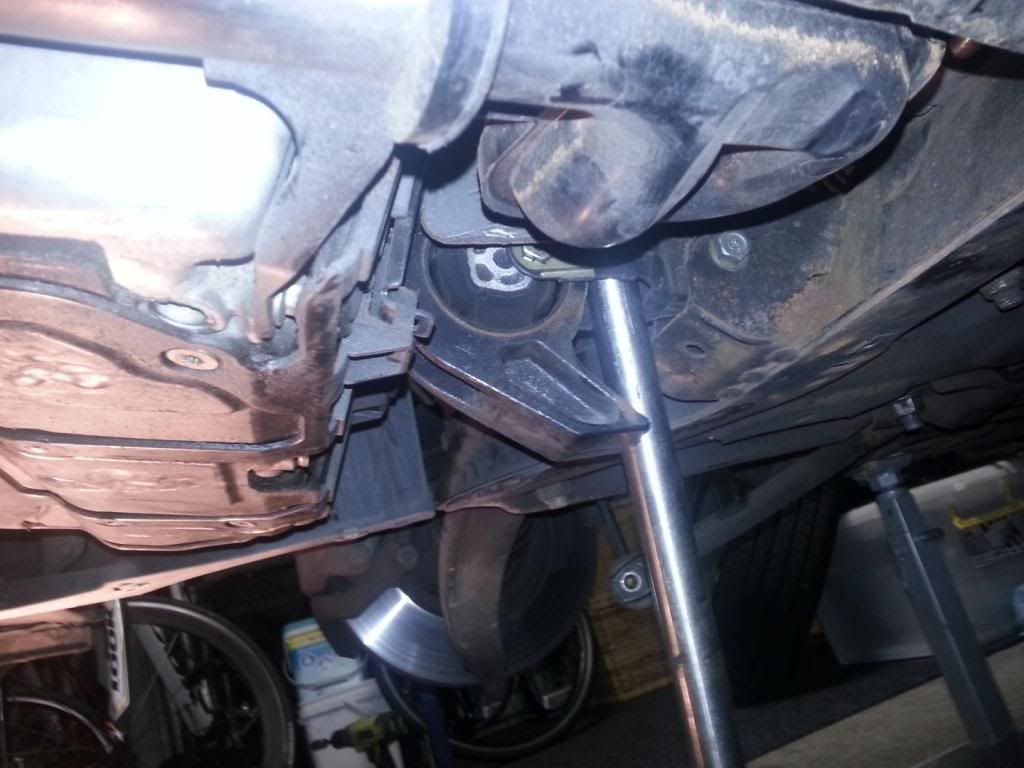
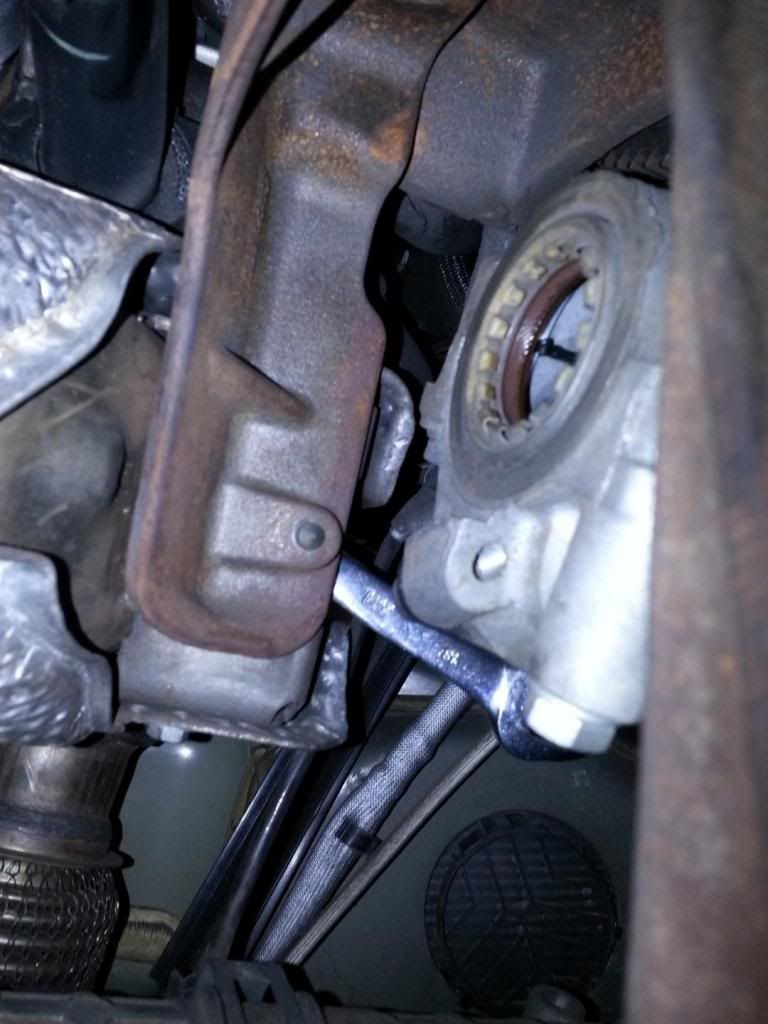
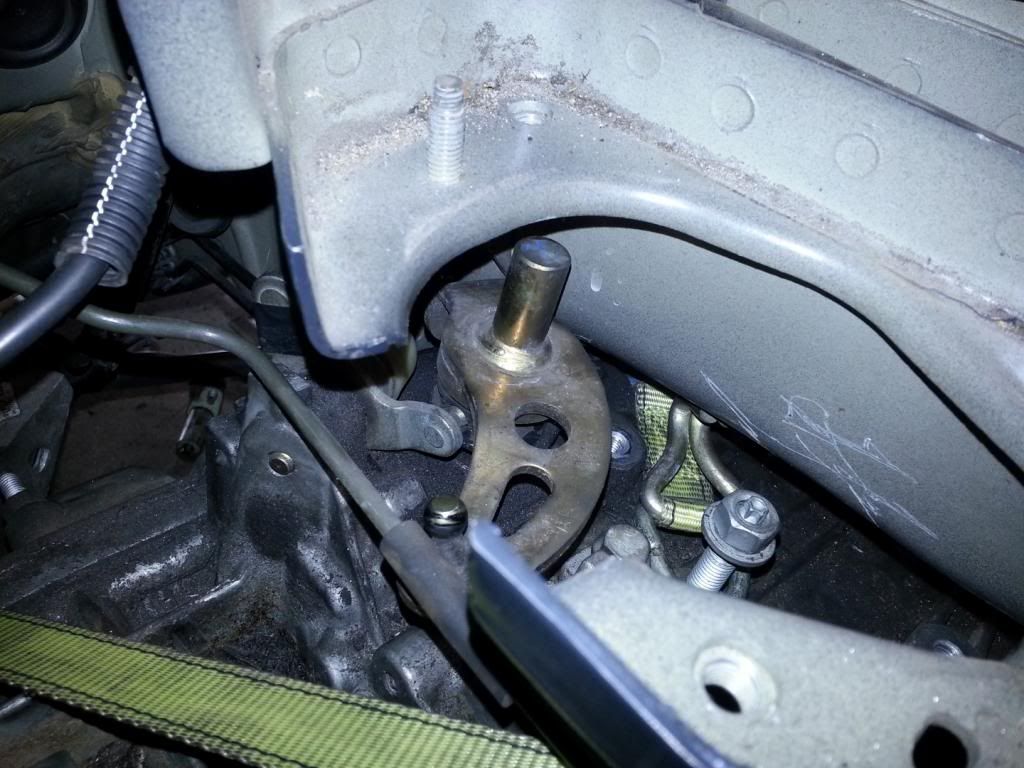
There is a tricky 13mm bolt that must be loosened to allow the bracket that supports the exhaust manifold to be removed. Having the drive shafts out is also an advantage at this point. In the pic below the stubby spanner is on the bolt that needs to be loosened.
In this pic you can see that even after the nuts are undone the bracket hasn't enough room to clear the studs due to the sub-frame.
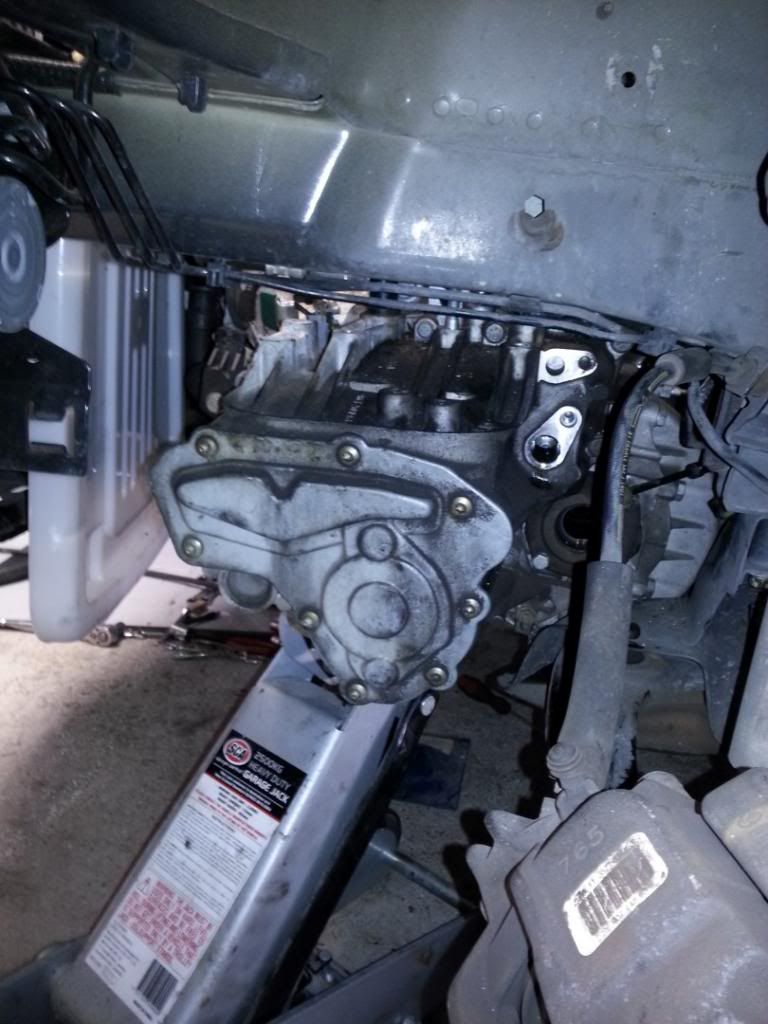
Before the gearbox mount can be removed you need to support the engine. I used a jack stand and block of wood (as described in the Haynes manual)
Remove the gearbox mount under battery tray - there are a number of bolts to take out but its a straight forward process.
Disconnect other gearbox connections – reverse switch, speedo drive, gear selector, counter weight.
The counter weight can be seen in the pic below. I didn't remove mine for removal as I didn't really know what part it was based on the Haynes manual description. It gives more clearance on the gearbox for removal and refitting.
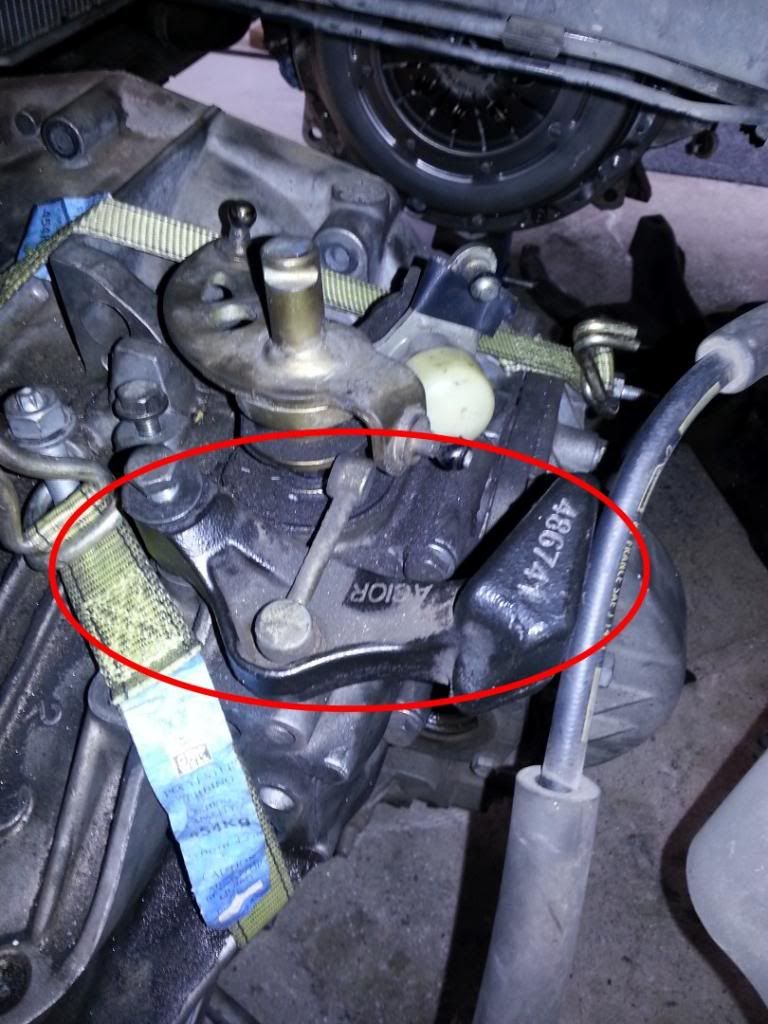
Here you can see the clearance issues the counter weight causes if gearbox is removed with it fitted.
Remove the starter motor - 3 x large allen head bolts.
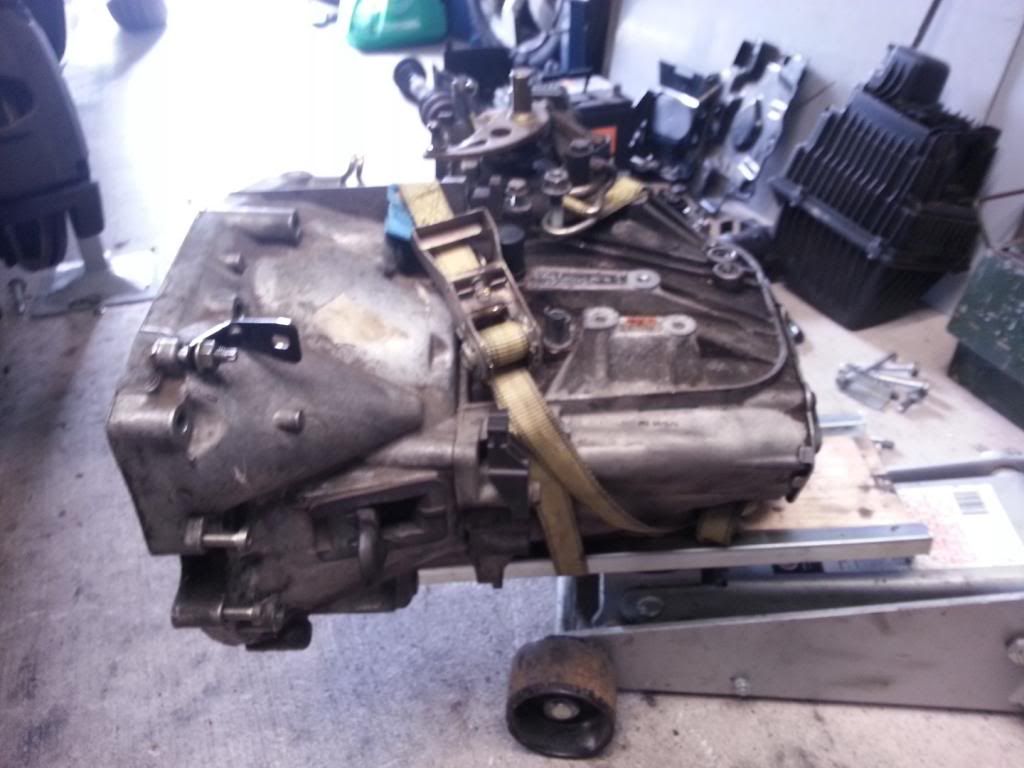
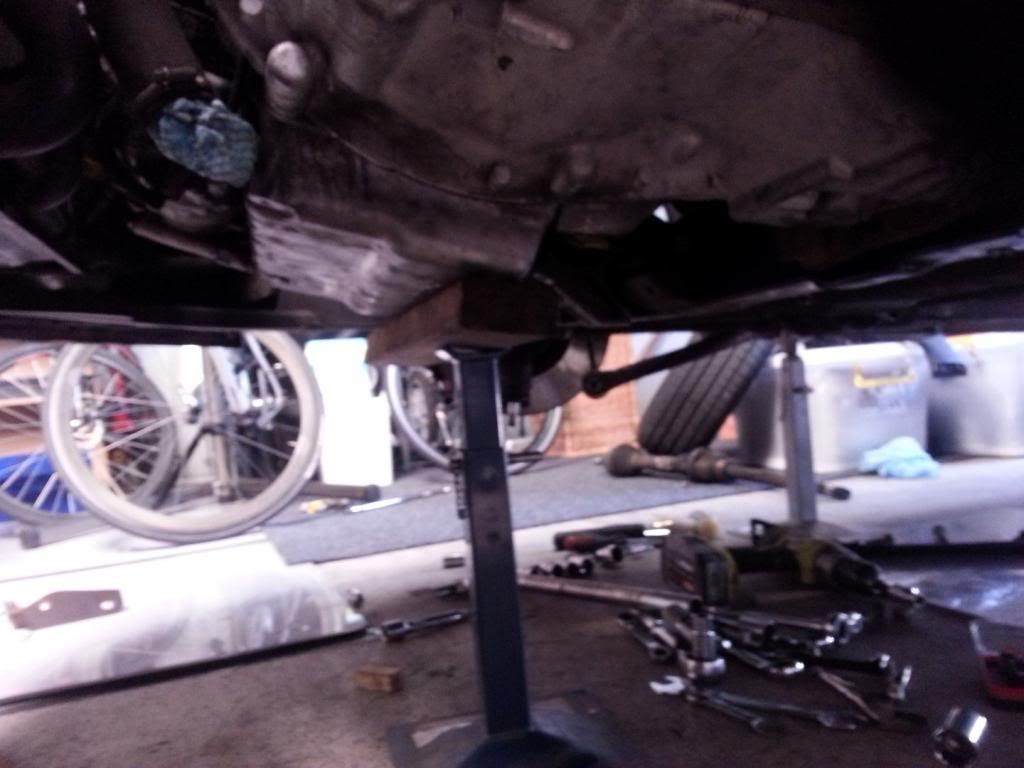
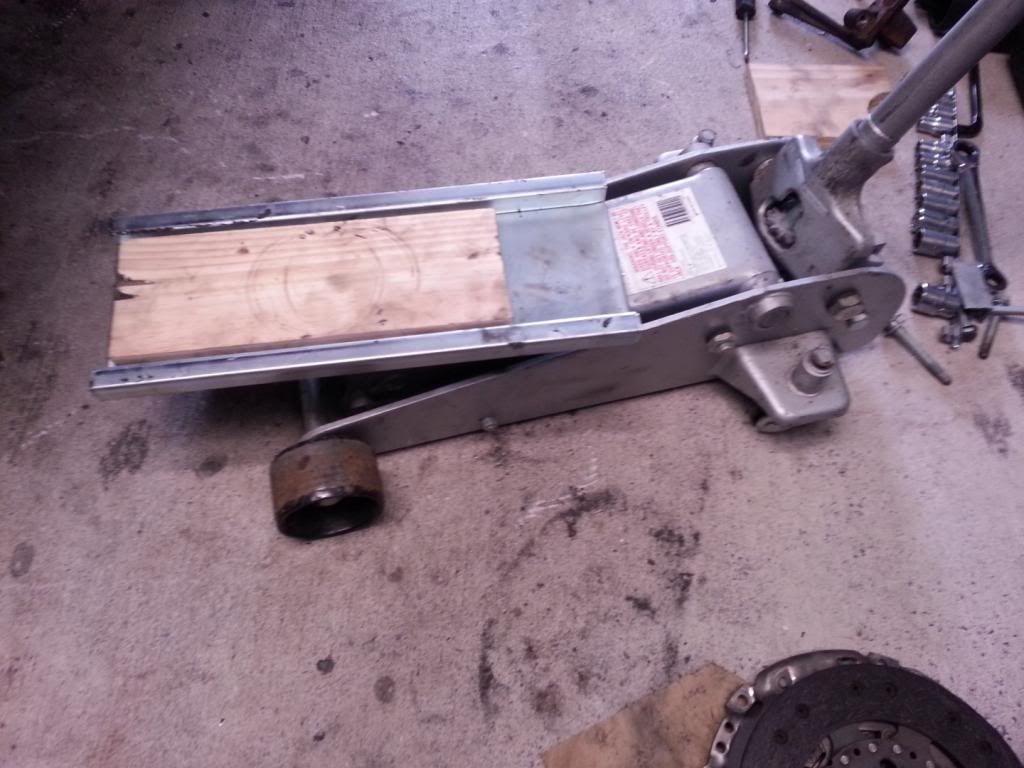
Position the trolley jack under gearbox ready for removal. I'd suggest strapping it down if possible - I didn't on removal but found it really helpful when re-installing.
This is my DIY gearbox mount for my trolley jack. I created it when doing the clutch/flywheel on my '94 Toyota Hilux underneath the wood the tray is bolted to the trolley jack. The gearbox and transfer case on the Hilux is 90kg so you need it supported well. The Peugeot gearbox is a baby by comparison - probably only around 40kg.
Number the bolts that hold gearbox to engine (to track length) before you remove them - or just keep track of where they come from. Doing this now saves time on re-installation. There is one bolt up under and to the rear of the engine / gearbox that is easily missed.
Use something to protect intercooler / radiator in case of gearbox twisting and accidentally hitting them on removal.
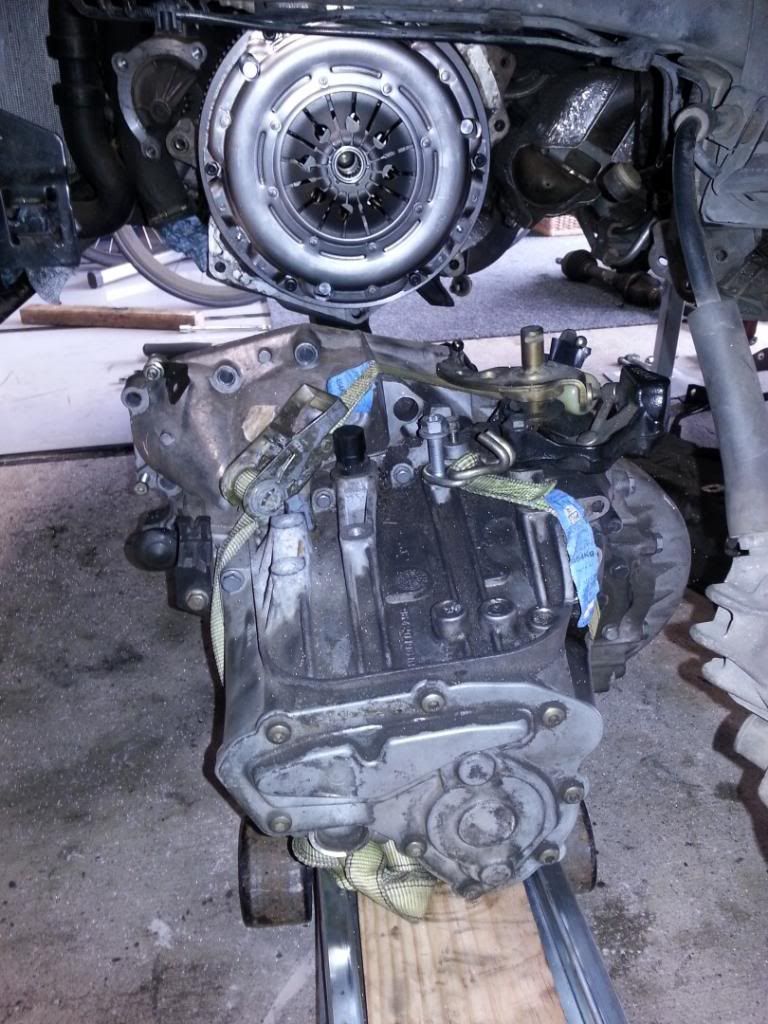
Pries gearbox from engine with a large flat head screwdriver or similar. Once it separates from the engine use the trolley jack to pull it back and lower taking care tha the gearbox shaft has cleared the clutch.

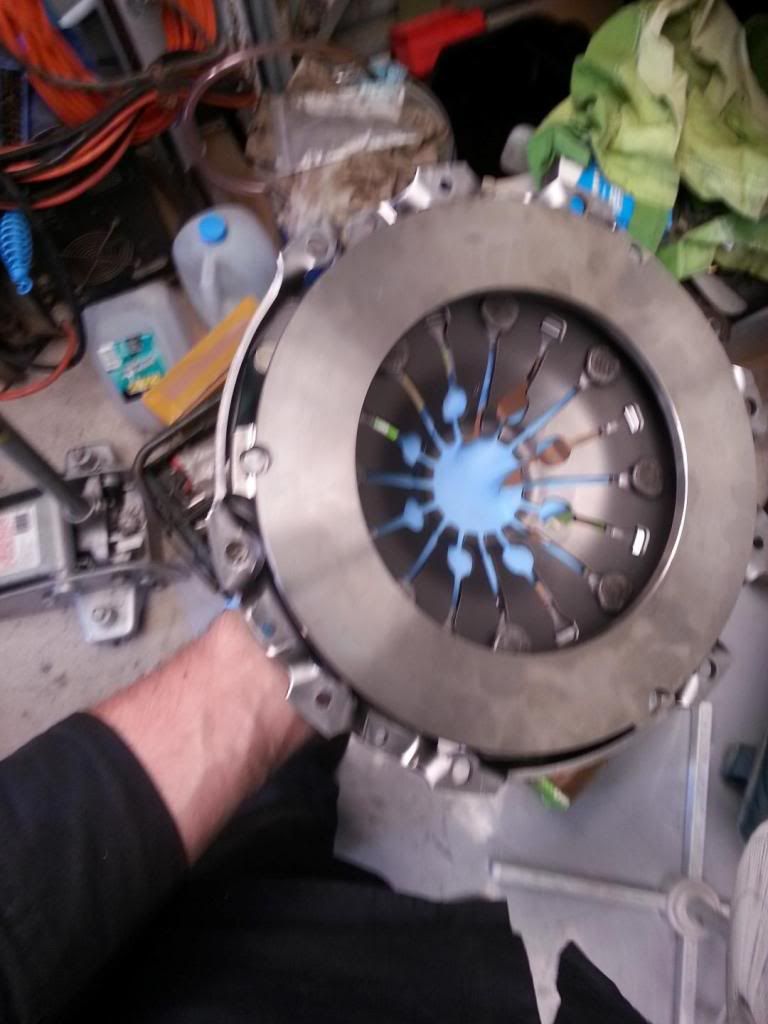
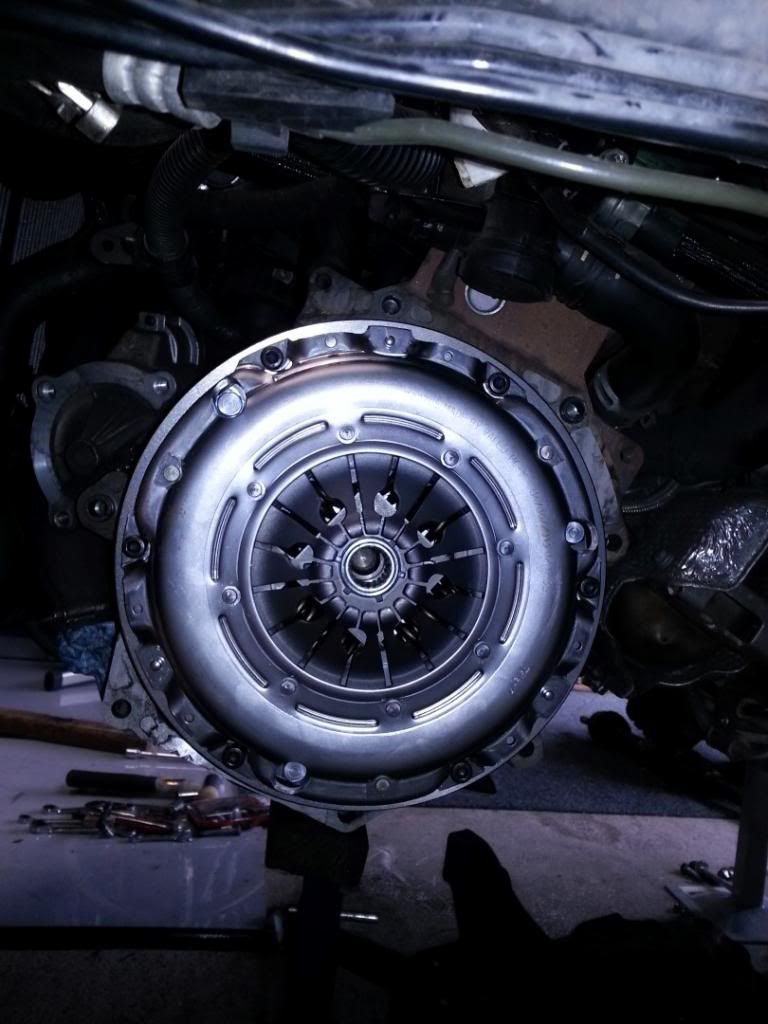
Once the gearbox is out remove the old clutch to expose the flywheel.
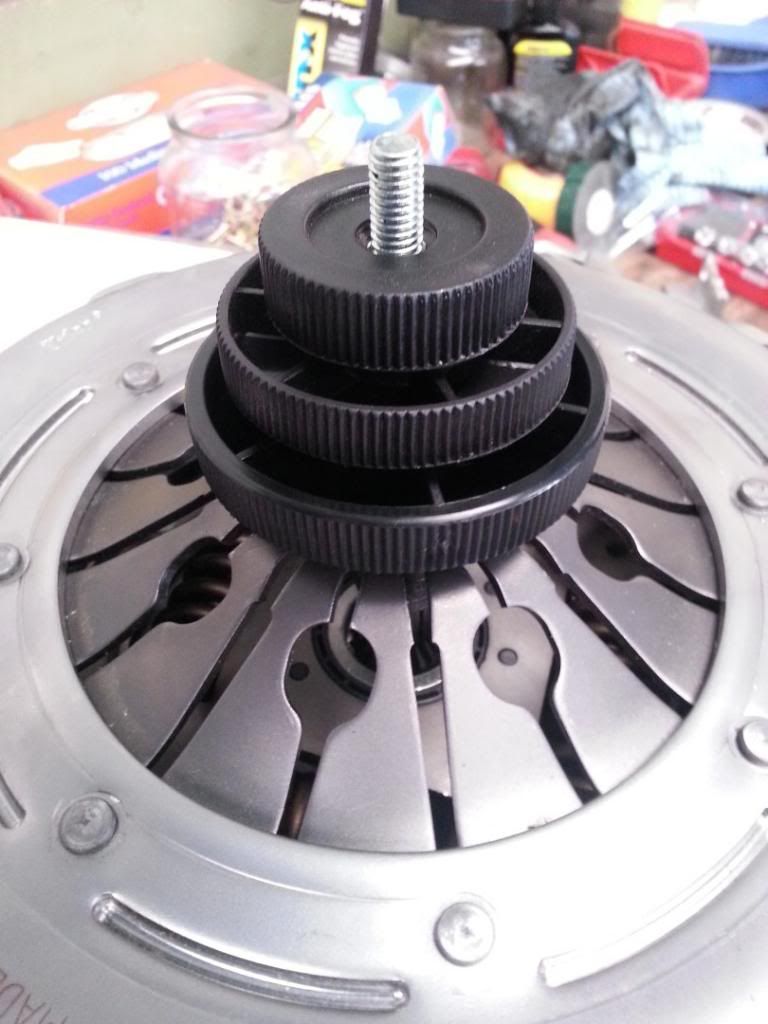
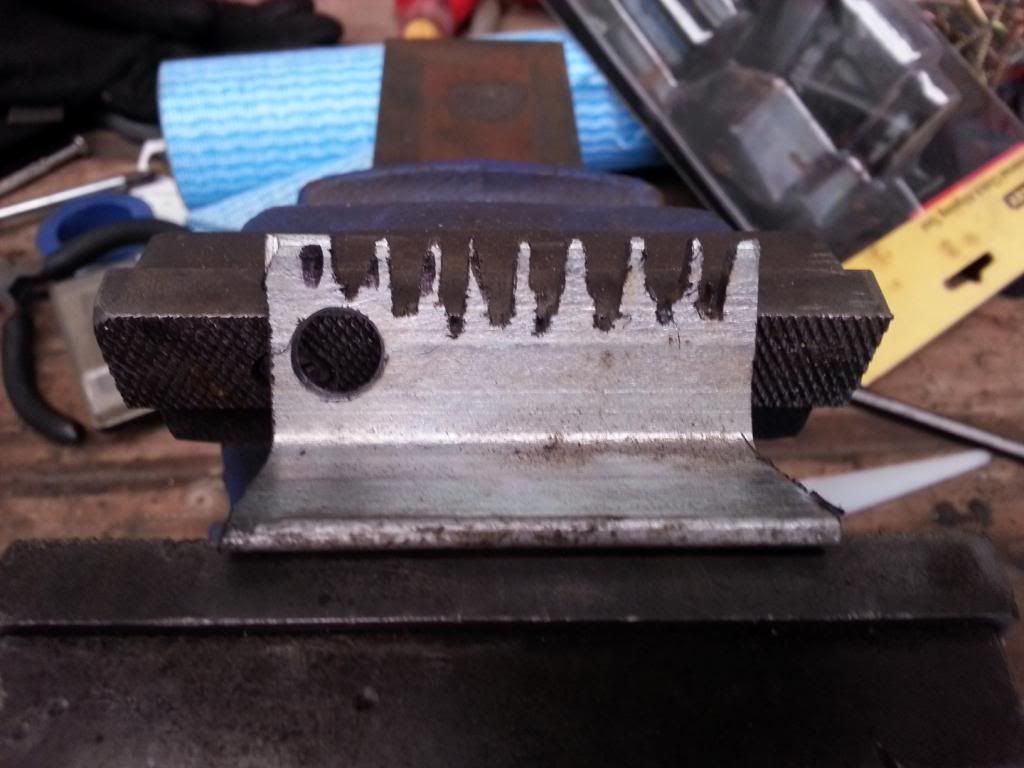
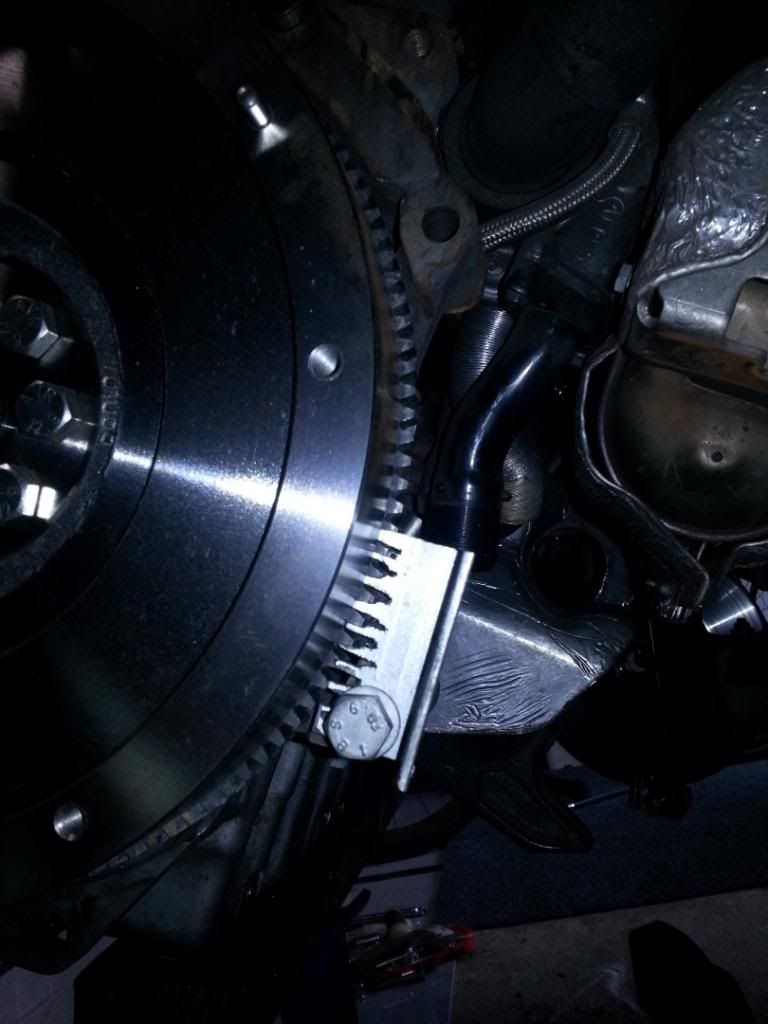
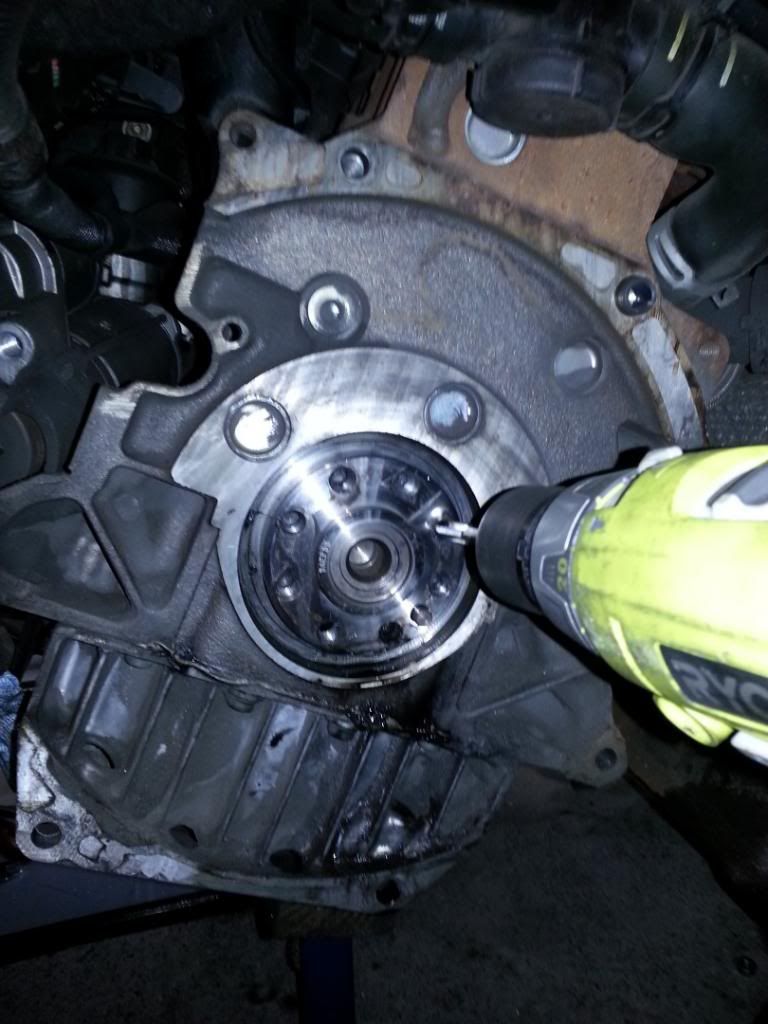
If you have a impact wrench then removing the flywheel is fairly easy. The LUK one that I was removing was held on by torx head bolts. The flywheel is fairly heavy so be ready when you pull it off. If you don't have an impact wrench make up a flywheel holder - a holder is required for installing the new flywheel anyway.
Here is my work of art - it worked well enough.
This is a video of my DMF 'operating' when I took it off. I'm fairly sure it is supposed to resist movement instead of flow around like this!
[video]http://s1115.photobucket.com/user/bill_clarke1/media/Peugeot/Flywheel/VID_20130927_143444.mp4.html[/video]
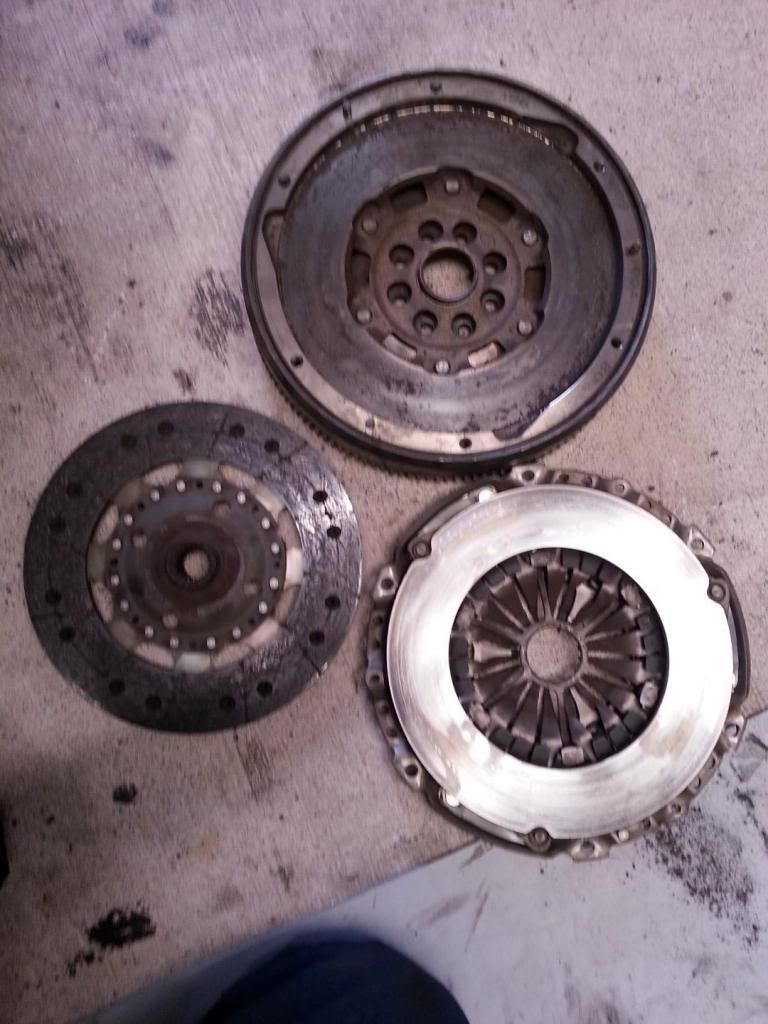
Here are the old clutch parts and DMF
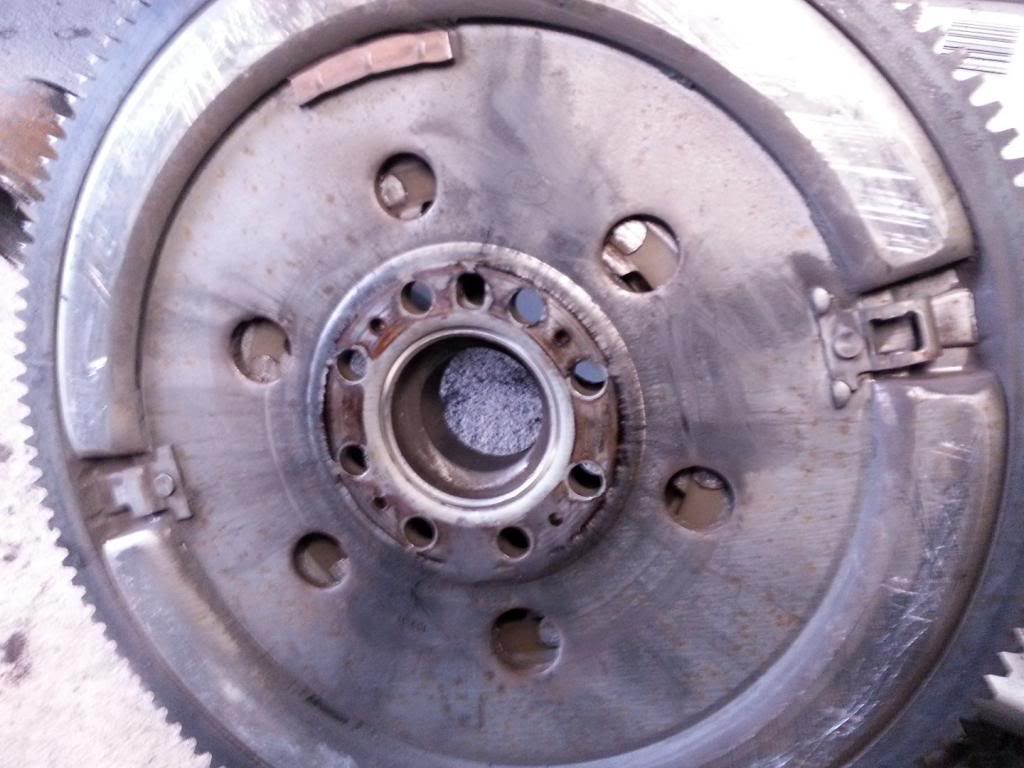
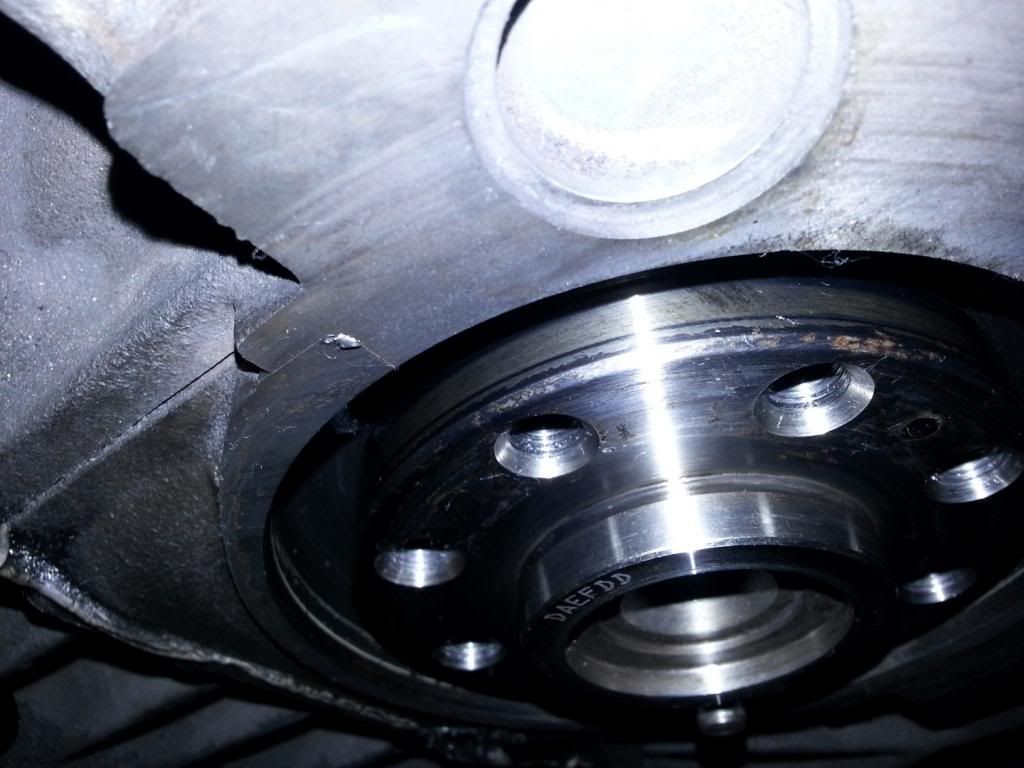
Check the 'rear' main crank seal for any sign of leakage. Many people say that now is the time to replace it regardless if it is leaking or not as the work required to get to it makes the cost of the seal insignificant.
Mine was leaking very slightly. There is oil visible on the back of the flywheel and I found traces of oil on the flywheel bolts.
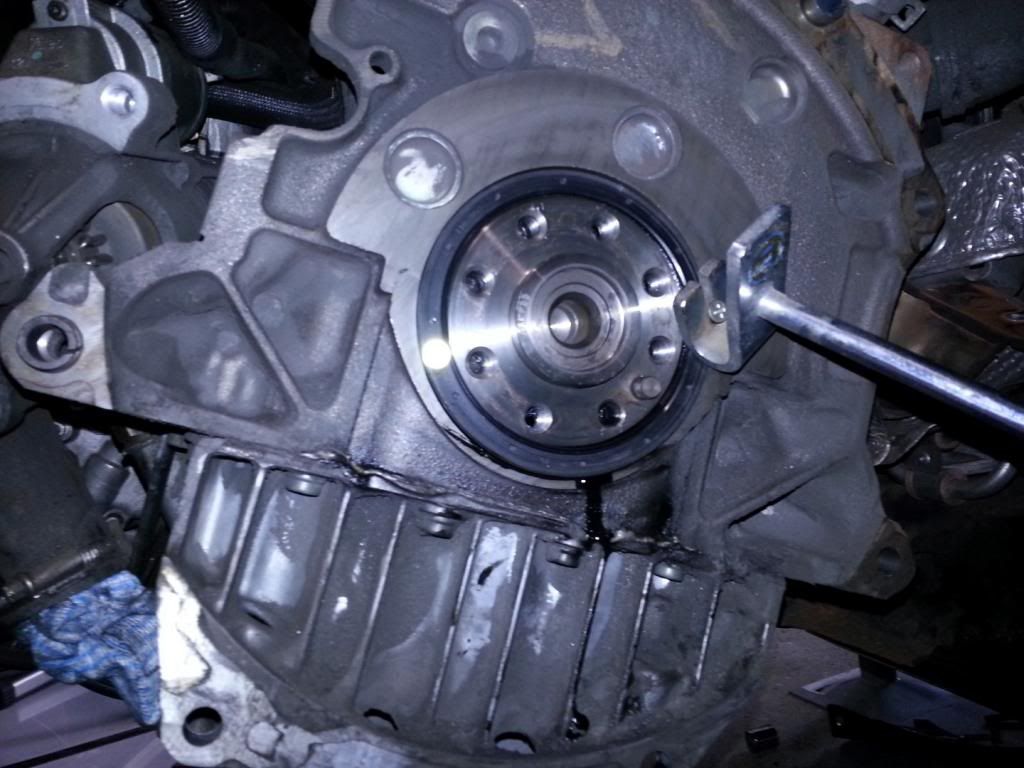
Remove the crank seal by screwing into it to get a grip.
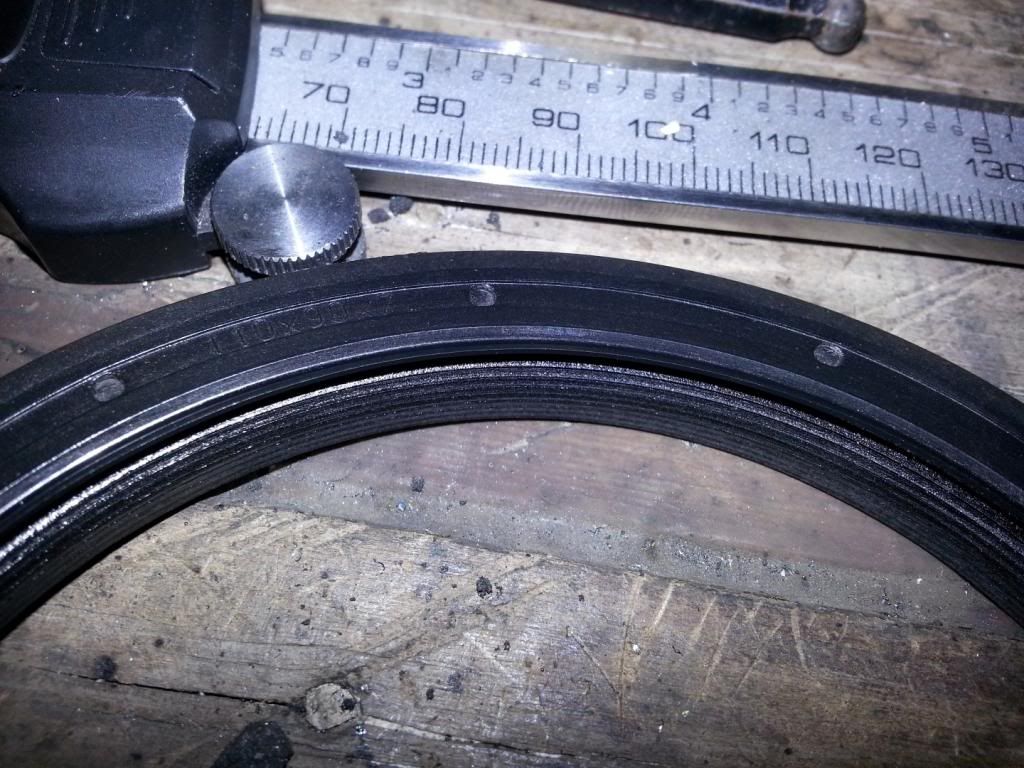
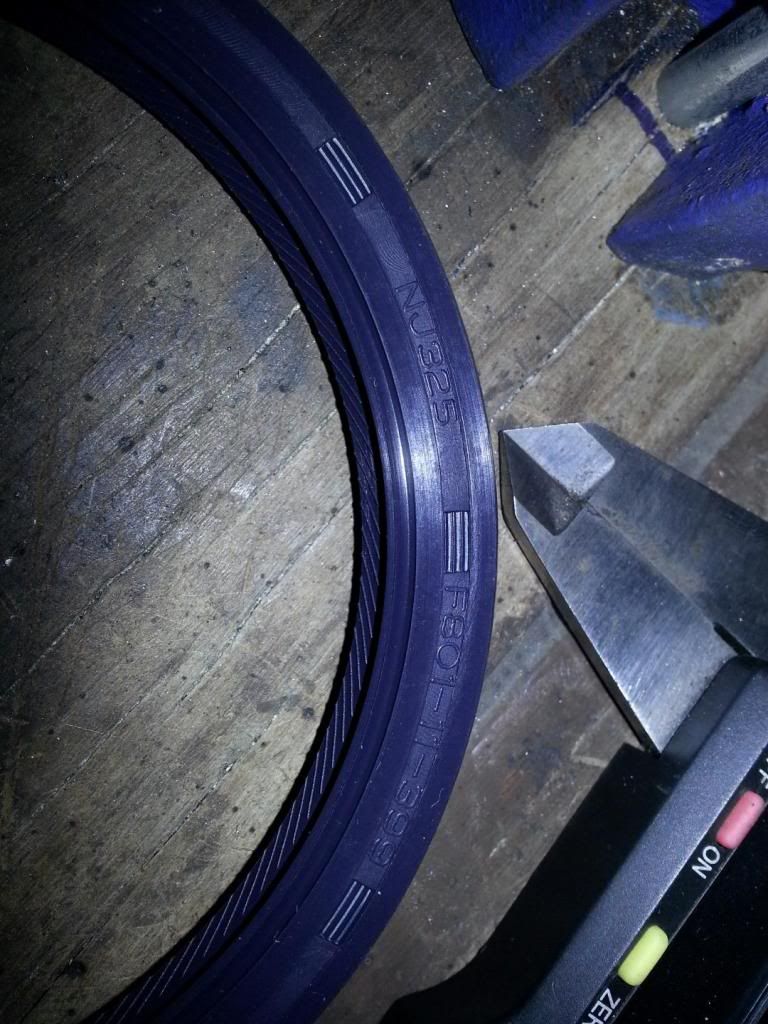
The rear main crank seal is a 90x110x7 according to the factory specs but the aftermarket one I was supplied (which was specified to suit the car) was a 90x110x9.
Peugeot wanted $110 for a genuine seal but I got an aftermarket one from Consolidated Bearings in Brisbane for $22.
The differences between the two seals is shown below.
Original
Aftermarket
Check the crank shaft surface where the seal runs for grooves or pitting (you can get a sleeve if it is really bad).
When putting the new seal in make sure it goes in square - I used a block of wood to tap it in straight.
Clean the treads of the flywheel bolt holes with brake cleaner and a tap as specified in the Haynes. This helps the tread lock on the new bolts to work.
After owning it for a few days I noticed that if left idling for a minute or two it would develop a rattle from the gearbox.
A quick google turned up info on many Peugeot forums and I became aware of a thing called a dual mass flywheel (DMF) that is fitted to the 2.0 HDi Peugeot's (and many other vehicles). These flywheels differ from traditional single mass flywheel's (SMF) in that the damping usually carried out by the springs in the friction plate of a SMF clutch is instead carried out by the flywheel being split into two 'masses' that are internally dampened by springs. When these springs fail the two masses will cause the rattle or tapping noise I was hearing. From what I could tell it seems that leaving the car idle allows the two masses to slow sufficiently, relative to each other, that they start to bang into each other causing the rattle. Depressing the clutch would stop the noise as the friction plate was no longer slowing down the 'mass' that is in contact with it.
Naturally my next question was how to fix the problem. I found many threads on replacing the DMF with a SMF with arguments fore and against. Most of the against arguments were to do with losing the damping the DMF gives. I think that if you were to simply swap the flywheels over then this would be a valid point as the friction plate in a DMF clutch is NOT sprung. However if you swap the whole clutch over to a SMF using a full kit you get a sprung friction plate which will take care of this problem.
By this stage I was pretty much convinced that I didn't want to put another DMF in with an unknown life span.
I called around to clutch places to get some ideas on cost... A DMF kit was an astonishing $1200 (parts only) so off to ebay UK for some reasonable prices I went.
I found Valeo make a 'Kit 4P' for many vehicles to swap DMF to SMF that includes 4 parts (hence the 4P) which include: SMF, sprung clutch plate, pressure plate and release bearing (also all mounting bolts and some grease).
For the 307 with the 2.0 100kW/136hp engine there are two different kits depending on build date - the change over was 09/2006.
The Valeo part 415 0225 10 or 835068 is for the pre 09/2006 where the 415 0320 10 is for post 09/2006 models.
Later when I was looking at gearbox oil info (on this site) I found that there are two different types of ML6CL gearbox (one with cooling fins and one without) that require different volumes of oil.
I assume the difference in clutch kits corresponds with the gearbox change over.
In any case the difference between the pre 09/2006 and post 09/2006 307's, according to a clutch specialist in the UK that I asked, is this:
The difference is the "pot depth" between the two flywheels. In other words on one flywheel the driving face is flush with the outside edge, on the other it is recessed by 15mm.
In the end the cheapest I could get a pre 09/2006 kit I required was from the link below - a seller on ebay in Italy. Total cost was $AU 543 + $AU 100 shipping and it arrived in under a week. Even if I had ordered a DMF kit locally at $1200 it was going to take 2 weeks!
835068 Kupplungssatz Peugeot 407 SW 6E 2 0 HDI 135 136HP 2004 Valeo | eBay
Below is a list of things I used to do the repair. It's not an exhaustive list - just what I needed that I think worth mentioning.
- -Jack stands - I used 4 at various points (2 for the car, 1 for engine support and another under gearbox or sub-frame at various times.
-Trolley jack with decent reach - mine is 400mm.
-8mm square fitting to remove the gearbox sump - never seen one of these before and ended up making my own.
-Torx fittings - various sizes. I'm used to Jap cars and didn't have these so had to but some.
-Gearbox oil - 75w-80 APIGL4+ 1.9L or 2.6L depending on model.
-Hose to refill the gearbox through the breather - I had some 1/2" hose that worked fine.
-Rear main crank seal - not essential but good practice and if its leaking you'll be stopped till you can get one.
-35mm socket to get the drive shaft off the hub - I had this from removing the rear wheel on a Yamaha R1 I used to own but I'd imagine most people won't have a socket this size lying around.
-Tool to hold the flywheel when torquing the new flywheel bolts (or removing if no impact wrench) - I made my own which can be seen further on.
-Clutch centering tool.
-Puller to split the lower ball joints - I had a 3 arm gear puller which worked fine.
-What I'd consider standard metric sockets, spanners etc - ratcheting spanners are a real help if you have them.
-I had an 500Nm air impact wrench which helps with undoing the flywheel and the other high torque bolts.
-I also had the Haynes manual which I read prior to doing this. The written steps are quite clear but it lacks photos for many of the steps.
Before I get into the repair steps I should point out one thing I tried to do differently to the Haynes manual. I read that the gearbox could be removed without dropping the sub-frame and while I did manage to get it out (just) there was no way I could have got the box back in with the sub-frame fitted. Maybe other variants of the 307 model range can have the box removed with the sub-frame in but for the 136hp / 6 speed combo I'd suggest it must be dropped out (as the manual says). Leaving the sub-frame also cost me a few hours extra time in removing the gearbox as it obscures several bracket mounting bolts.
I'll write this as though I did take out the sub-frame first so some of my photo's will show it where I've already described taking it out.
First up the battery tray and air box can come out.
This is a straight forward process that doesn't really need much explanation.
Once they are removed the gearbox mount and various attachments are visible.
Jack up the car and support it on stands at the jack points. I chocked the stands with wood as per the Haynes manual tip.
Remove the front wheels and inner guard liner on the left hand side wheel arch.
Remove the clutch slave cylinder and lower intercooler hose and associated pipe work under the engine.
Remove the lower engine mount bolt to allow engine to move forward. This allows easier access to the gearbox drain plug.
An 8mm square male fitting is needed to undo the drain plug. I had to make one as the only one I could find locally was part of a $70 set.
I drained the box while it was still hot so it would drain more easily. Use some sort of funnel to direct the oil past the sub-frame once the plug is removed. Refit the plug when drained.
Next comes the drive shafts, ball joints and sway bar connection.
The sway bar connections are disconnected to allow the sub-frame to drop out in the next stage. There is an allen head in the bolt of the sway bar connection to stop it turning when the bolt is removed.
Remove drive shaft nuts by taking out the clips and the covers the clips hold on. I used an impact wrench and the nuts came off without needing to hold the hubs.
Undo ball joints and split using a puller taking care not to damage the tread while doing so.
The left hand drive shaft came be removed now but the right hand side needs a clip held in by a torx bolt removed. The pic below shows the clip location once the shaft is out of the way.
To drop the sub-frame out:
Undo an AC hose bracket held on by a torx bolt in a bugger of a spot in front of the steering box on top of the sub-frame.
Remove the exhaust hangers/rubbers from the sub-frame mounts.
Undo the two bolts that hold the steering box to the sub-frame. These are supposed to be nuts on a stud that threads into the steering box but mine came out of the steering box like a bolt. Support the steering box - I used a cable tie to hold it up while the sub-frame was out.
Support the sub-frame with the trolley jack and undo the four bolts that hold the sub-frame to the car.
Two are at the rear behind the swaybar mounts and two are up in the wheel arch behind the strut.
Drop the sub-frame down on the jack when the bolts are out.
Remove the brackets under the engine that support the gearbox.
There are three brackets (2 x cast and one steel) that need to come out before the gearbox can be removed. When I removed mine I still had the sub-frame in and it slowed me down because the brackets can't be removed as the foul on the sub-frame.
There is a tricky 13mm bolt that must be loosened to allow the bracket that supports the exhaust manifold to be removed. Having the drive shafts out is also an advantage at this point. In the pic below the stubby spanner is on the bolt that needs to be loosened.
In this pic you can see that even after the nuts are undone the bracket hasn't enough room to clear the studs due to the sub-frame.
Before the gearbox mount can be removed you need to support the engine. I used a jack stand and block of wood (as described in the Haynes manual)
Remove the gearbox mount under battery tray - there are a number of bolts to take out but its a straight forward process.
Disconnect other gearbox connections – reverse switch, speedo drive, gear selector, counter weight.
The counter weight can be seen in the pic below. I didn't remove mine for removal as I didn't really know what part it was based on the Haynes manual description. It gives more clearance on the gearbox for removal and refitting.
Here you can see the clearance issues the counter weight causes if gearbox is removed with it fitted.
Remove the starter motor - 3 x large allen head bolts.
Position the trolley jack under gearbox ready for removal. I'd suggest strapping it down if possible - I didn't on removal but found it really helpful when re-installing.
This is my DIY gearbox mount for my trolley jack. I created it when doing the clutch/flywheel on my '94 Toyota Hilux underneath the wood the tray is bolted to the trolley jack. The gearbox and transfer case on the Hilux is 90kg so you need it supported well. The Peugeot gearbox is a baby by comparison - probably only around 40kg.
Number the bolts that hold gearbox to engine (to track length) before you remove them - or just keep track of where they come from. Doing this now saves time on re-installation. There is one bolt up under and to the rear of the engine / gearbox that is easily missed.
Use something to protect intercooler / radiator in case of gearbox twisting and accidentally hitting them on removal.
Pries gearbox from engine with a large flat head screwdriver or similar. Once it separates from the engine use the trolley jack to pull it back and lower taking care tha the gearbox shaft has cleared the clutch.
Once the gearbox is out remove the old clutch to expose the flywheel.
If you have a impact wrench then removing the flywheel is fairly easy. The LUK one that I was removing was held on by torx head bolts. The flywheel is fairly heavy so be ready when you pull it off. If you don't have an impact wrench make up a flywheel holder - a holder is required for installing the new flywheel anyway.
Here is my work of art - it worked well enough.
This is a video of my DMF 'operating' when I took it off. I'm fairly sure it is supposed to resist movement instead of flow around like this!
[video]http://s1115.photobucket.com/user/bill_clarke1/media/Peugeot/Flywheel/VID_20130927_143444.mp4.html[/video]
Here are the old clutch parts and DMF
Check the 'rear' main crank seal for any sign of leakage. Many people say that now is the time to replace it regardless if it is leaking or not as the work required to get to it makes the cost of the seal insignificant.
Mine was leaking very slightly. There is oil visible on the back of the flywheel and I found traces of oil on the flywheel bolts.
Remove the crank seal by screwing into it to get a grip.
The rear main crank seal is a 90x110x7 according to the factory specs but the aftermarket one I was supplied (which was specified to suit the car) was a 90x110x9.
Peugeot wanted $110 for a genuine seal but I got an aftermarket one from Consolidated Bearings in Brisbane for $22.
The differences between the two seals is shown below.
Original
Aftermarket
Check the crank shaft surface where the seal runs for grooves or pitting (you can get a sleeve if it is really bad).
When putting the new seal in make sure it goes in square - I used a block of wood to tap it in straight.
Clean the treads of the flywheel bolt holes with brake cleaner and a tap as specified in the Haynes. This helps the tread lock on the new bolts to work.