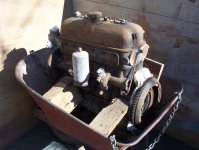
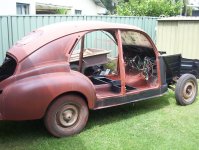
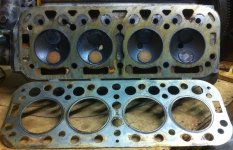
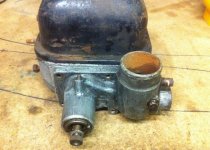
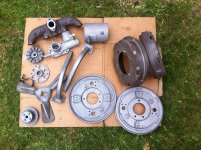
Outa the shed, in the shed and on the bench.

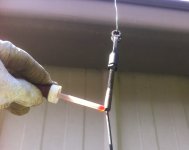
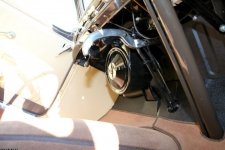
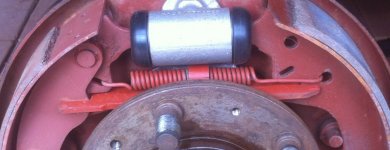
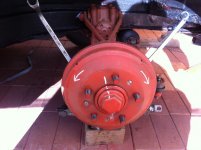
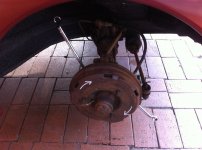
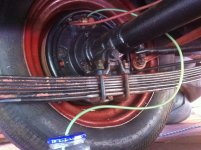
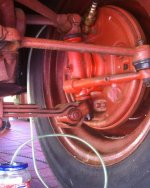
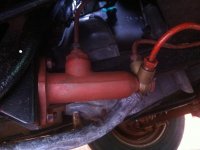
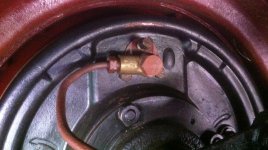
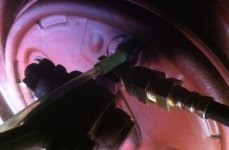
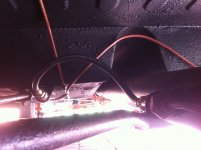
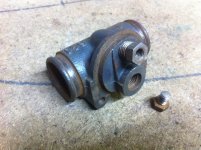
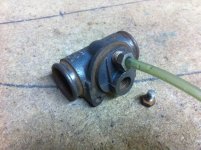
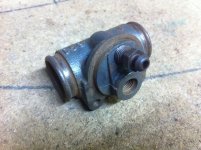
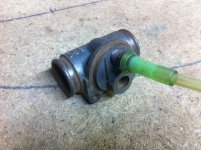
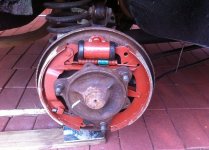
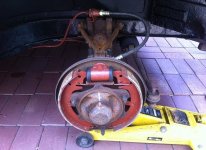
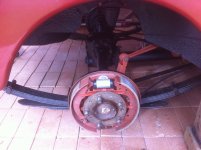
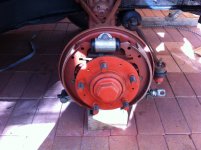
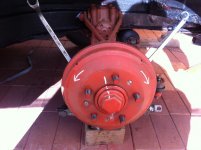
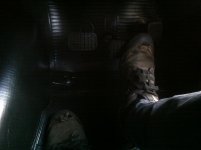
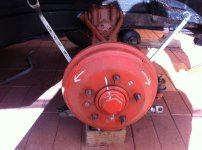
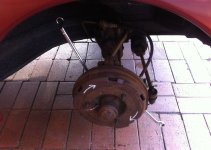
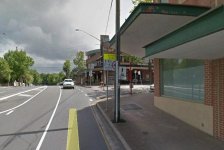
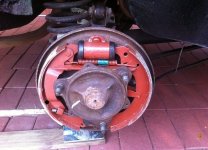
With post #13, if the adjuster square is in good shape and with good movement one has a choice of leaving as is, and keeping the squared out wheel nut in the car tool box for when it's needed. As the first image in this post shows, this adjuster is pretty well flogged, so no option here but to weld the wheel nut to the adjuster stump. Have to grind or cut the wheel nut to a depth that meets the end of the stump so you get a good strong weld here, as will be under a bit of stress when being turned. The third image shows how much space one has to do this with the road wheel attached. Fourth image shows the type of repair kit that was once available many moons ago. To be continued,,,,,,,View attachment 218023View attachment 218024View attachment 218025View attachment 218026
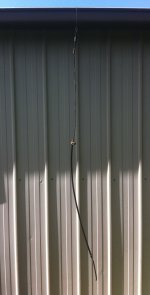
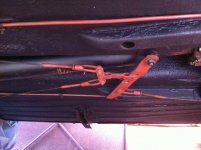
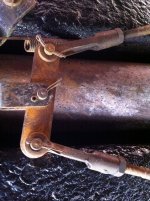
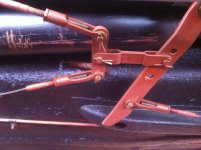
Once all the brake shoe adjusters are operating as they should with the help of the squared out wheel nuts there are 2 more items that need to be checked as well, these being the 2 handbrake cables. Over the years they tend to stiffen up in their movement due to all the crud that finds its way in between the cable and outer sheath. The only way to free them up is to pull them off and give them a good soak overnight 1n. clean up the cable..JPG1o. oil up the cable..JPG1p1.Handbrake activated, cables need adjusting..jpg1q. cable needs adjustment..JPG1q1. tighten up clockwise..JPG1q2. Handbrake connecting link..JPG, (diesel does a good job). Next day, out of the bath, grab a few rags and whilst pulling the cable back and forth in its sheath keep wiping until the cable is clean. Next, hang em up, and with an eye dropper, run some clean oil down the length of exposed cable and leave for an hour, this should be enough time for the oil to find its way through the length of the sheath. Wipe the excess off and re assemble to the back plate and equalizer bar. Depending on how far the handbrake handle travels in it's pull-on motion, if it's wanting to go close to the dashboard in its pull up motion before any resistance is felt, adjustment is needed. This is done by pulling the pins from the 'equalizer bar' on both cables to clear the connecting cable yokes so they can be turned in a clockwise motion to tighten up the cables. This can be very 'fiddley' to get both rear wheels 'tight as' when the handbrake lever is activated. 1 cable yoke might need a few more turns than the other to achieve the desired result due to possible uneven wear in the 2 handbrake connecting links between the rear shoes.
 
Once all the brake shoe adjusters are operating as they should with the help of the squared out wheel nuts there are 2 more items that need to be checked as well, these being the 2 handbrake cables. Over the years they tend to stiffen up in their movement due to all the crud that finds its way in between the cable and outer sheath. The only way to free them up is to pull them off and give them a good soak overnightView attachment 218418View attachment 218419View attachment 218420View attachment 218421View attachment 218422View attachment 218423, (diesel does a good job). Next day, out of the bath, grab a few rags and whilst pulling the cable back and forth in its sheath keep wiping until the cable is clean. Next, hang em up, and with an eye dropper, run some clean oil down the length of exposed cable and leave for an hour, this should be enough time for the oil to find its way through the length of the sheath. Wipe the excess off and re assemble to the back plate and equalizer bar. Depending on how far the handbrake handle travels in it's pull-on motion, if it's wanting to go close to the dashboard in its pull up motion before any resistance is felt, adjustment is needed. This is done by pulling the pins from the 'equalizer bar' on both cables to clear the connecting cable yokes so they can be turned in a clockwise motion to tighten up the cables. This can be very 'fiddley' to get both rear wheels 'tight as' when the handbrake lever is activated. 1 cable yoke might need a few more turns than the other to achieve the desired result due to possible uneven wear in the 2 handbrake connecting links between the rear shoes.
Previously should have mentioned, when ready to re connect cables to the equalizer bar after the cable end1q3. Wedge between the lever and brakeshoe..JPG2. Cables adjusted up.JPG7k direction of front & rear adjustment 203..JPG7n. direction of front ajustment on 403 setup..JPGyoke adjustments, put a wedge in between the handbrake activating arm and its brake shoe, (black dot in first image), this will take up most, but not all of the slack between those two, saves tugging against the cable return spring on the arm whilst getting those pesky little connecting pins back through the yoke and into the equalizer bar after that wedge has taken up most of the slack between the arm and brake shoes connecting link. After re connecting both cables, pull the wedges out and put the rear drums back on, then turn the adjusters fully on. Same with the front, drums on and adjusters fully on, as there's no need for the wheel cylinders to move when bleeding the system. This bleed is from bone dry, as all the hard lines had been taken off the car/s, flushed out and hung out to dry then re connected. It's now time for the bleed, looking for that rock hard pedal at the end of the bleeding sequence, without any squishiness in the pedal, a telltale that air is still in the system, or there is a leak somewhere, always a chance with hydraulics when everything has been totally pulled apart and then put back together again. To be continued,,,,,,,,,
 
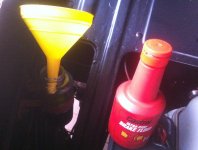
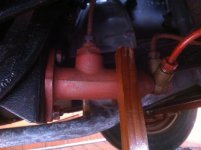
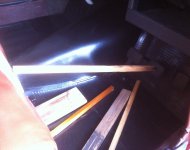
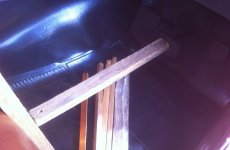
Time to find the brake fluid and get started. Half fill the reservoir bottle and watch for bubbles to rise from the nipple hole. This is to prime the master so it's full of fluid. To be sure it's full of fluid, whilst viewing the bottle from underneath (image), give the master body a few taps with a piece of timber (image), to tease any last bits of air up to the reservoir. Once that's done, fill the bottle, and if one is by oneself, which most of us invariably are while doing work on the old crates, it's time to improvise and find 2 or 3 different lengths of stick and a block of wood (image) to use as your leg to wedge the brake pedal down towards the floor, so one can then hop under the car to open and close the appropriate bleeder. There's the choice of letting gravity do the job initially by opening up all 4 bleeders and having 4 bottles at the ready (images) to collect the first dribbles. This saves a stack of of moving between wedging the pedal down and diving under the car to open and close bleeders umpteen times. Whilst under the car, and with the 4 collection bottles placed so that they are all within view, one can 10f. Reservoir half full..JPG11. view of reservoir from under..JPG12. Teasing out air in the master cylinder..JPG12f. Bottles at the rear..JPG12g. Bottles at the front..JPG12e. Brake pedal  to the left of Master..JPG12h. Long to shorter sticks with block..JPGtickle the brake pedal (image) by hand a smidgen to speed things up a little on the gravity trick. Looking up from underneath, check the bottle level as your tickling the brake pedal, making sure to keep it topped up, and when there's a good show in all 4 collection bottles it's time to close off all 4 bleeders, then start the bleed by the usual sequence, from furthest to nearest. There's plenty of U tube videos on how to bleed old style brakes, so needn't ramble on any further but, to be continued,,,,,,,,,,
 
As the bleeding progresses, it's a necessity to look around and check for weeping or leaks on every joint and coupling, because as air is expelled out of the system more pressure is building up every time the brake pedal is pushed down and held and therefore will be looking for weak points. Everything on a visual has to be bone motherless dry. (images). As for the bleeders, on the early girls maybe up to, and including early '52s, they are of the female type, where a 6mm O.D. tube is inserted to do the bleed. Later types are the male type, where you need a 6mm I.D. tube to squeeze over the nipple 12h1. Check for any sign of weeping..JPG12h2. Check all unions.JPG12h2a. Rear couplings..JPG12h3. Early type bleeder..JPG12h4. 6mm O.D. tube..JPG12h5. Later type bleeder..JPG12h6. 6mm I.D. tube..JPGhead to do the bleed. To be continued,,,,,,
 
As the bleeding progresses, it's a necessity to look around and check for weeping or leaks on every joint and coupling, because as air is expelled out of the system more pressure is building up every time the brake pedal is pushed down and held and therefore will be looking for weak points. Everything on a visual has to be bone motherless dry. (images). As for the bleeders, on the early girls maybe up to, and including early '52s, they are of the female type, where a 6mm O.D. tube is inserted to do the bleed. Later types are the male type, where you need a 6mm I.D. tube to squeeze over the nipple View attachment 219046View attachment 219047View attachment 219048View attachment 219049View attachment 219050View attachment 219051View attachment 219052head to do the bleed. To be continued,,,,,,
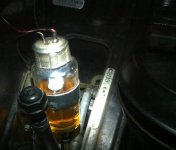
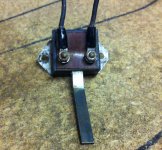
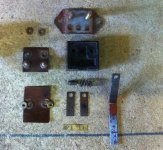
Finally, after X amount of stick work on the pedal with the bleeding on all 4 lines we've got a nice hard pedal with next to no free play, as all the adjusters had been locked hard on. Next up, slacken off all 4 adjusters so the drums are just skimming the linings, then taking them off 1 at a time to do a visual on the wheel cylinders, checking for any signs of weeping. All being well, they should be 'bone motherless dry' considering they've been re sleeved and had new rubbers inserted. With all the drums back on and adjusted by feel on the linings, it's finally time to sit in the driver's seat and use one's foot to see how the pedal feels under pressure. Should still be hard as even after around 30mm of take up to the linings. New linings will take some bedding in, so have to keep it in mind for some more adjustment later down the track. One of the last few12m4.JPG12n. sedan rear. All drums off to check for leaks..JPG12o. sedan front.JPG12p. commercial rear.JPG12q. commercial front.JPG12r. All drums back on and adjusted..JPG12r1..JPG13. Top up bottle when done..JPG14. Brake switch.JPG14a. Break switch components..JPG tricks, check the level in the tin can/bottle, the other being the brake switch. These little buggers do get clogged up with crud over the years being in the low down position they are. The only weak point in them is the actuating spring. If there's crud in there or it's broken it won't push on the lever to make the contact,, no brake lights! 1 more post left to go on the subject,,,,,,,
 
Finally, after X amount of stick work on the pedal with the bleeding on all 4 lines we've got a nice hard pedal with next to no free play, as all the adjusters had been locked hard on. Next up, slacken off all 4 adjusters so the drums are just skimming the linings, then taking them off 1 at a time to do a visual on the wheel cylinders, checking for any signs of weeping. All being well, they should be 'bone motherless dry' considering they've been re sleeved and had new rubbers inserted. With all the drums back on and adjusted by feel on the linings, it's finally time to sit in the driver's seat and use one's foot to see how the pedal feels under pressure. Should still be hard as even after around 30mm of take up to the linings. New linings will take some bedding in, so have to keep it in mind for some more adjustment later down the track. One of the last fewView attachment 219406View attachment 219407View attachment 219408View attachment 219409View attachment 219410View attachment 219411View attachment 219412View attachment 219413View attachment 219414View attachment 219415 tricks, check the level in the tin can/bottle, the other being the brake switch. These little buggers do get clogged up with crud over the years being in the low down position they are. The only weak point in them is the actuating spring. If there's crud in there or it's broken it won't push on the lever to make the contact,, no brake lights! 1 more post left to go on the subject,,,,,,,
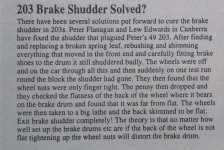
This little snippet out of one of Gordon Miller's newsletters from way back is again well worth keeping in mind if your 203/403 or 404 with drum brakes has got the 'shudders' when hitting the anchors. Maybe, the problem is all to do with the sedan road wheels only having 3 wheel nuts to hold them on. The spacing between the studs, (see images) compared to the 5 stud set up is substantial, and given the condition of the roads 40, 50, 60 years ago, and even now after the big wet, (plenty of decent size potholes), I'd imagine the 3 stud pattern wheels are more prone to distortion at the drum when put under that type of14b. Remember this!.JPG15. Commercial 5 stud..JPG16. Sedan 3 stud..JPG stress over a number of years.
 
This little snippet out of one of Gordon Miller's newsletters from way back is again well worth keeping in mind if your 203/403 or 404 with drum brakes has got the 'shudders' when hitting the anchors. Maybe, the problem is all to do with the sedan road wheels only having 3 wheel nuts to hold them on. The spacing between the studs, (see images) compared to the 5 stud set up is substantial, and given the condition of the roads 40, 50, 60 years ago, and even now after the big wet, (plenty of decent size potholes), I'd imagine the 3 stud pattern wheels are more prone to distortion at the drum when put under that type ofView attachment 219555View attachment 219556View attachment 219557 stress over a number of years.
Postscript 1: Here's a present day image looking north of the Pacific Highway and West street at Crowsnest, and by the lack of traffic, and by the shadows on the road, looks as though it could be an1. Pacific Hwy. and West St. Crowsnest, Sydney..jpg early Sunday morning. Your most likely thinking, well what in the blazes has this got to do with anything on the subject just covered. Well, if we rewind a number of decades, possibly quite a lot!
 
Postscript 1: Here's a present day image looking north of the Pacific Highway and West street at Crowsnest, and by the lack of traffic, and by the shadows on the road, looks as though it could be anView attachment 220371 early Sunday morning. Your most likely thinking, well what in the blazes has this got to do with anything on the subject just covered. Well, if we rewind a number of decades, possibly quite a lot!
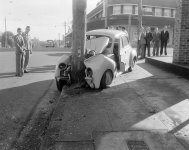
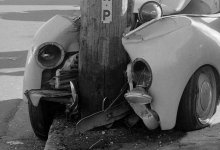
Postscipt 2: Time to rewind. Here we have another image looking north of the Pacific Highway and West Street at Crowsnest, and by the lack of traffic, and the shadows on the road, looks to be an early Sunday morning. By the grim look on some of the faces of these mid fifties trendsetters on their way to church, (just around the corner) things might not have worked out well for the occupant/s of the bent 2oh. Either being distracted by yacking on the fifties version of a mobile phone, or just frigging lousy BRAKES, this car has King hit the pole straight down the middle. I've never seen a 203 bumper bar totally hugging a telegraph pole like this one. Looks like some thoughtful person had picked up the headlight that had been forced out and put it on the mudguard. I don't know if the original N.S.W. club had the bent grill award going then, this one would have taken the cake! Anyway, timely reminder to keep a good eye on your braking system, especially with single circuit systems.1a. Not watching the road..png1b. Pacific Hwy. and West St. Crowsnest, back to the '50s..jpg1d. And the 'Bent Grille' award goes to,,,,.jpg
 
Postscipt 2: Time to rewind. Here we have another image looking north of the Pacific Highway and West Street at Crowsnest, and by the lack of traffic, and the shadows on the road, looks to be an early Sunday morning. By the grim look on some of the faces of these mid fifties trendsetters on their way to church, (just around the corner) things might not have worked out well for the occupant/s of the bent 2oh. Either being distracted by yacking on the fifties version of a mobile phone, or just frigging lousy BRAKES, this car has King hit the pole straight down the middle. I've never seen a 203 bumper bar totally hugging a telegraph pole like this one. Looks like some thoughtful person had picked up the headlight that had been forced out and put it on the mudguard. I don't know if the original N.S.W. club had the bent grill award going then, this one would have taken the cake! Anyway, timely reminder to keep a good eye on your braking system, especially with single circuit systems.View attachment 220374View attachment 220375View attachment 220376
 
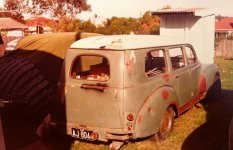
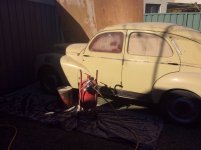
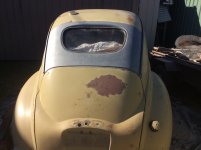
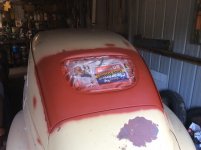
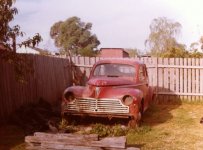
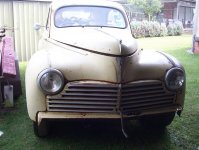
Time to get the finger out on some serious tidying up of these tired bodies, and some of the attached bits, starting out with how 1601811 and 1135478 presented themselves to the blaster. 1122625 joined in on the action as well, seeing now was a good a time as ever.a.JPGa1.JPGa2.JPGa7.JPG
 
Last edited:
Time to get the finger out on some serious tidying up of these tired bodies, and some of the attached bits, starting out with how 1601811 and 1135478 presented themselves to the blaster. 1122625 joined in on the action as well, seeing now was a good a time as ever.View attachment 224167View attachment 224168View attachment 224169View attachment 224170

Time to get the finger out on some serious tidying up of these tired bodies, and some of the attached bits, starting out with how 1601811 and 1135478 presented themselves to the blaster. 1122625 joined in on the action as well, seeing now was a good a time as ever.View attachment 224167View attachment 224168View attachment 224169View attachment 224170
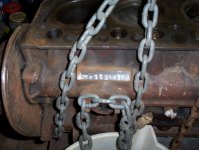
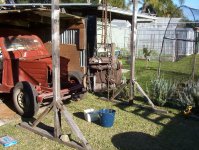
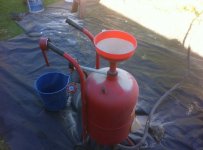
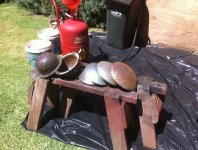
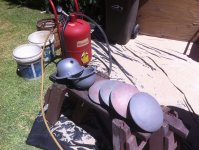
This was a weather permitting task, and with the initial setting up of all the gear, then getting into the blasting away of all the residue dregs of paint and surface rust. The cleanup was followed directly afterwards by primer over the area blasted to give it time to dry before sunset.b.JPGc.JPGc1.JPG1d.JPG1b.JPG1c.JPG All this only allowed for attacking approximately 1 sq. metre of metal per session. The number of inclement weather days lost on blasting were, (that's when I was in the mood to keep going) were/are filled in with all the other bits and pieces off the cars that needed to be checked over and/or tidied up. First things out of the cars and onto the bench for the big tear down were the motors.
 
This was a weather permitting task, and with the initial setting up of all the gear, then getting into the blasting away of all the residue dregs of paint and surface rust. The cleanup was followed directly afterwards by primer over the area blasted to give it time to dry before sunset.View attachment 224198View attachment 224199View attachment 224200View attachment 224203View attachment 224201View attachment 224202 All this only allowed for attacking approximately 1 sq. metre of metal per session. The number of inclement weather days lost on blasting were, (that's when I was in the mood to keep going) were/are filled in with all the other bits and pieces off the cars that needed to be checked over and/or tidied up. First things out of the cars and onto the bench for the big tear down were the motors.
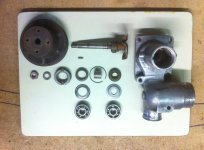
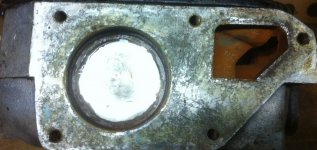
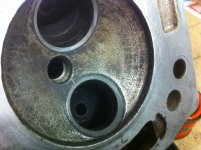
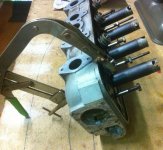
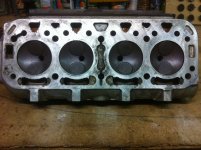
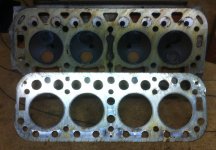
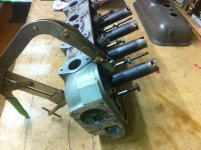
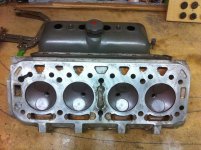
'Outa the shed'. Sunny days kept coming, so the blaster was on overtime for 5 straight days. Completed the turret and the rear of 1135478. After the daily clean ups, first thing on the agender directly after was a big Vegemite sanga and a cuppa. Tried to get in at least 1 good hour nightlyd2.JPG1f.JPG1g.JPG1h.JPG1ha.JPG on 1135478's motor waiting on the bench. First up, head off, water pump off, dismantle and clean. Check the bearings and carbon seal. Check the welch plug behind the pump for integrity.
 
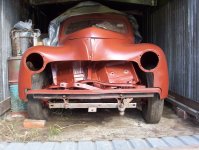
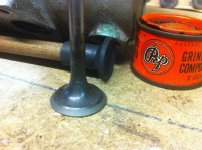
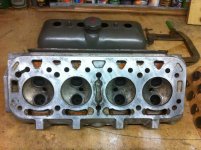
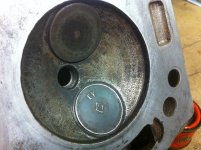
Outa the shed: A few more days going gang busters with the blaster, this time on the front end bits of 1601811, then hitting the sections with a coat of primer, rush to push her back into the shed before sunset. On the bench: After dark, it's time to look at what's waiting and get stuck in. Three hour sessionsd4.JPG1i.JPG1j.JPG1k.JPG1l.JPG for 3 nights to re seat all 8 valves on 1135478 head, then re assemble. Thankfully all exhaust valves healthy, no sign of weak spots.
 
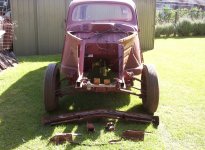
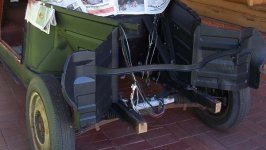
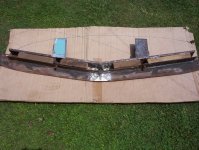
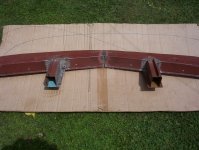
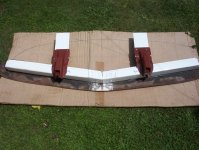
A few weeks have past and haven't been too idle, had to whip off the aprons on both 1135478 and 1601811 as they were just hanging on by a few square millimeters of healthy metal. Remake the bottom sections and reshape to the correct profile as both cars had been in dings on their corners which didn't do the shape of the aprons any favours. Used 2 good undamaged grilles as templatesd6.JPGd7.JPGd8.JPGd8a.JPGd9.JPGd10.JPGd11.JPG to get the correct angles.
 
This little snippet out of one of Gordon Miller's newsletters from way back is again well worth keeping in mind if your 203/403 or 404 with drum brakes has got the 'shudders' when hitting the anchors. Maybe, the problem is all to do with the sedan road wheels only having 3 wheel nuts to hold them on. The spacing between the studs, (see images) compared to the 5 stud set up is substantial, and given the condition of the roads 40, 50, 60 years ago, and even now after the big wet, (plenty of decent size potholes), I'd imagine the 3 stud pattern wheels are more prone to distortion at the drum when put under that type ofView attachment 219555View attachment 219556View attachment 219557 stress over a number of years.
Early VW Beetles with the large 5 stud pattern were prone to brake drum distortion too. To the point where if your car's brakes didn't shudder, but you wanted to take a drum/s off to check or service the brakes you left it bolted to the wheel, and removed them as an assembly. The smaller PCD 4 stud hubs fitted from '68 on (for the introduction of disc brakes) fixed the distortion problem with the rear drums at the same time..
 
A few weeks have past and haven't been too idle, had to whip off the aprons on both 1135478 and 1601811 as they were just hanging on by a few square millimeters of healthy metal. Remake the bottom sections and reshape to the correct profile as both cars had been in dings on their corners which didn't do the shape of the aprons any favours. Used 2 good undamaged grilles as templatesView attachment 225727View attachment 225728View attachment 225729View attachment 225731View attachment 225732View attachment 225733View attachment 225734 to get the correct angles.
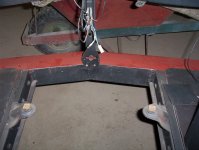
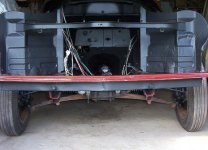
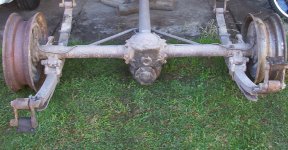
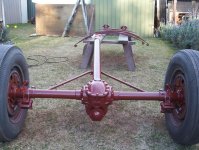
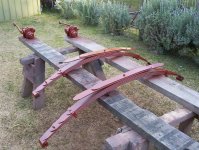
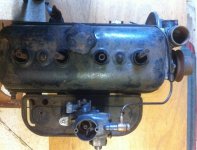
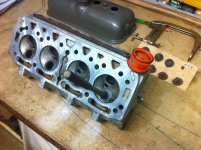
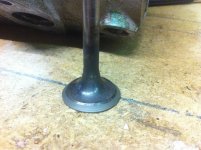
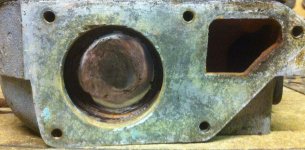
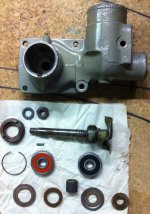
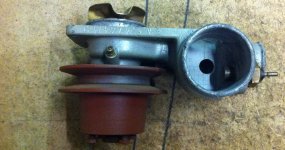
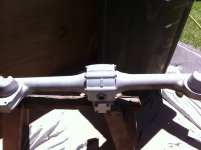
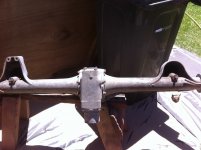
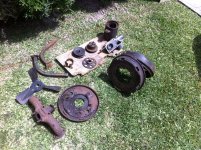
While the sun is shining it's time again for the blaster to get to work on anything that comes to hand from 1601811. This session it's the turn of the wagon rear end running gear. Plenty of crap hanging off the diff casing to chisel off first, then a good hit with the blaster, together with the springs, torque tube and rear shockers. A coat of primer directly after while the sun has still got some sting in it, then pushed under cover before the late arvo damp air sets in. Night time brings another few sessions starting with head off the motor, valves out and fingers crossed, don't find any burnt out exhaust valves. Luck held out, so just a case of re seating the 8 valves and throwing them alle.JPGe1.JPGf.JPGg.JPGh.JPG1.JPG2.JPG3.JPG4.JPG5.JPG back in. Next on the night list: the pull down of the water pump on this motor. Usual cleanup of all the crud from many years of motoring, shout it a pair of new bearings, check the carbon seal and mating face, clean out the 'gutter' and 'downpipe' directly behind the mating surface , very important parts not to overlook, as if there is any muck hiding in there, water won't be able to escape out the bottom and is going to find its way to the bearings quick smart if the carbon seal on it's mating surface starts to fail. Nobody likes a grumbling water pump.
 
While the sun is shining it's time again for the blaster to get to work on anything that comes to hand from 1601811. This session it's the turn of the wagon rear end running gear. Plenty of crap hanging off the diff casing to chisel off first, then a good hit with the blaster, together with the springs, torque tube and rear shockers. A coat of primer directly after while the sun has still got some sting in it, then pushed under cover before the late arvo damp air sets in. Night time brings another few sessions starting with head off the motor, valves out and fingers crossed, don't find any burnt out exhaust valves. Luck held out, so just a case of re seating the 8 valves and throwing them allView attachment 226181View attachment 226182View attachment 226183View attachment 226184View attachment 226185View attachment 226186View attachment 226187View attachment 226188View attachment 226189View attachment 226190 back in. Next on the night list: the pull down of the water pump on this motor. Usual cleanup of all the crud from many years of motoring, shout it a pair of new bearings, check the carbon seal and mating face, clean out the 'gutter' and 'downpipe' directly behind the mating surface , very important parts not to overlook, as if there is any muck hiding in there, water won't be able to escape out the bottom and is going to find its way to the bearings quick smart if the carbon seal on it's mating surface starts to fail. Nobody likes a grumbling water pump.
The last of the pics from previous post, couldn't squeeze them all in the frame.6.JPG7.JPG8.JPG9.JPG10.JPG11.JPG
 
One of my favourite cars - just love the 203. Back in the 'old days' when I was hill-climbing a 16TS up the dirt track at Echo Valley (South Toowoomba area) a mate of mine had a 203 with a 404 motor, he was untouchable up that hill. Didn't make a lot of noise and didn't even look all that fast, but when they called out the time everyone looked at each other and said "What!!!"
 
One of my favourite cars - just love the 203. Back in the 'old days' when I was hill-climbing a 16TS up the dirt track at Echo Valley (South Toowoomba area) a mate of mine had a 203 with a 404 motor, he was untouchable up that hill. Didn't make a lot of noise and didn't even look all that fast, but when they called out the time everyone looked at each other and said "What!!!"
There's an Echo Valley Hillclimb page on Facebook.
This 203 photo is off there. Might be worth a look if you haven't already, re-live some memories.🙂
The comments are guessing the driver is Barry Stennett or J Guthrie.🤷‍♂️

20230822_105030.jpg
 
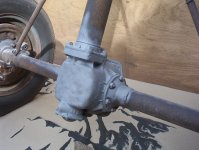
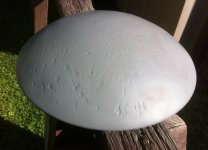
Outa the shed: Weather is behaving, so into it again with the blaster, this session is on 1135478's diff and axle housing, and some of her loose bits that came to hand. A quick squirt with undercoat on the hubcaps, light buckets and the other bits before oxidization sets in, and then the usual 1 hour cleanup afterwards. Still a long way to go with all the bits that need a hit, no short cuts when playing with rusty metal. Poor old hubcaps are beyond re chroming, but not to worry, they'll still come up respectable when all the moon craters are filled in! f1.JPGf2.JPGj.JPGk.JPGk1a.JPGk1b.JPGk2.JPG
 
Top