My new challenge - 1964 ID19F Safari

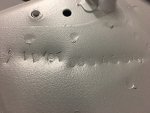
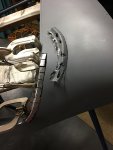
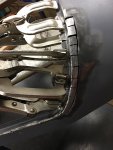
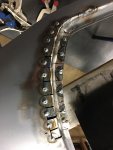
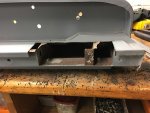
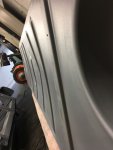
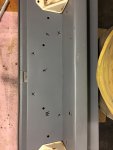
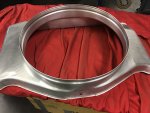
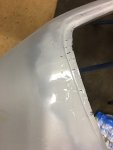
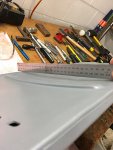
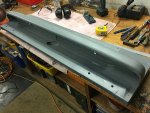
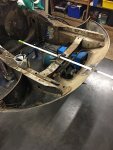
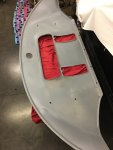
Front valance panel part 2: lucky I didn’t get too cocky and actually test fit the panel to the wheel well closing panels... crap: didn’t fit at all at first - the shape and angle of the fold was all out! So, had to hammer it all flat again and this time aligned the fold and radii with the closing panels - a fair bit of pushing and prodding was required, but now it fits quite well! Very pleased! After return from the sand blaster it needed a bit more fettling but now is ready for the final stage.
1BDD2BB4-5464-4171-A78A-89F8644938B0.jpeg
D95CFD53-037F-4876-A8DA-EA03DCB49200.jpeg

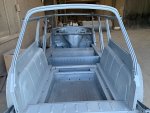
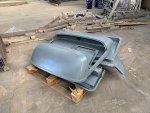
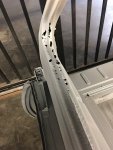
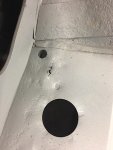
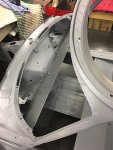
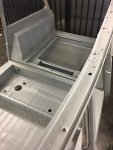
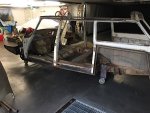
The chassis finally went off to the sand blaster as well as a range of interior panels, the small strapotin seats and the rear lid. Now I at least know where the holes are :). Sills and floor are certainly the main spots, as are the rear window frames on the rear lid and the right rear side.
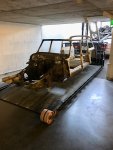
BF19F0D3-F46E-4129-8007-8F0764C6EA54.jpeg
A56BD02D-4441-4D07-9A5B-36A179FD91AF.jpeg
22CB8708-6CDB-4E99-B61D-4D5A8C439693.jpeg
073FA624-E3B0-4E54-8A2B-3643470F5BA1.jpeg
A1C5DD87-72FC-4BAC-BCE5-4DC3C0F6F9DC.jpeg

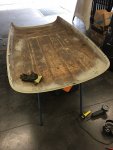
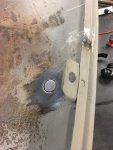
while the chassis was off site, I used the garage space to tidy up the roof - fill the antenna hole, a few minor weld spots to finish and a bit of panel beating - again now ready for the sand blaster.
BD630F06-22D3-49FC-8BFE-99E2740B0D1C.jpeg
D880299E-FB6A-4DB8-AE32-042610717B6E.jpeg

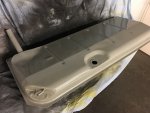
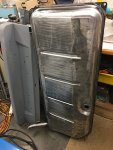
also stripped the fuel tank, treated a few rust spots and now have it ready for priming and painting
3E3DD729-68CF-4F8A-9DCE-D9AF29C84ED2.jpeg

Sven
 
Hello, thanks bleudanube, now I've got to get my Safari sandblasted! I may as well get it zinc sprayed at the same time.

Somehow, a wire brush and scraper doesn't appeal

safari.jpg
 
Babadec, can certainly recommend the blasting... even just stripping the tank with a wire brush was a PITA. And you would never get an as neat finish with a wire brush. And they primed the parts as well, so there is no concern it rusting further.
 
I put all the nuts, bolts and washer from my Safari in a bucket ready for plating. For no reason I sorted them into their respective sizes. There were 27 different types of washer! 27! Obviously hole size, outer diameter, thickness, internal or external serrations on the locking washers.
Was each washer specific to its task? Or did they drop all the boxes of washers, shovel them into buckets and then grab the first one that fitted?
 
If you swat up in the parts books, the sizes for particular washers and bolts tend to be specified. Nothing random about it!
 
27.... That’s quite funny.

That was before the days of lean manufacturing and purchasing optimisation. They probably had 27 purchasing officers... each responsible for one washer type :D
 
There are some very specific reasons and uses for washers.

For example the cylinder head on my DX engine didn't have washers under the 17 cylinder head bolts. It wasn't meant to have them. I sheared a few bolts getting the head off and replaced all the bolts with new on the exhaust side. The replacement bolts (as were the bolts on the later DX2 engine) are 3mm longer. They are designed to be used with thick washers (21mm OD, 10.3mm ID, 3mm deep if you must know!). If I'd tried to use the longer bolts without washers on my DX head (same on later engines for that matter), they'd bottom-out. That means I'd get a 'false' torque-reading and the head isn't sealed....
 
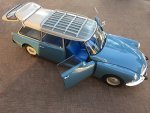
So I know what the car will be looking like one day, I bought myself a Norev 1/18 Safari model... quite cute, in Monte Carlo blue with blue upholstery. Happy Birthday to me :wink2:

790B2A0C-4617-4461-B8D7-F67C700F7937.jpeg

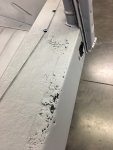
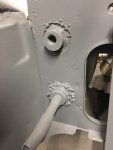
the sandblasting certainly revealed a few more holes: driver side sills are pretty bad, passengers a tad better. Rear window frames “lacy” as are some spots in the rear wheel arches. Assorted decay in the roof rails and front “tusks”... but all doable, will just take time!

17639EA8-559F-4CC1-8394-CF0A862B4DAB.jpeg
2E82D7FD-654E-4CEA-945E-BDA283E751A9.jpeg
0E810656-70C1-4E9F-9FCC-1B72CB7BD8CC.jpeg
798D7BDB-B7B6-4D58-9C90-ABA9F3C96630.jpeg
2FD5E7EF-D579-4A85-B74D-B940B9870493.jpeg


the nice thing is that the boot floors and axle box is all good, firewall as well and that the primed chassis is much easier to work on. The stamped chassis number is showing up nicely now as well: ID19F 3504 584

6DFB26C6-2F07-4804-AE5F-C9372486BBF4.jpeg

one point that looks odd is the weld quality around the front suspension mounting bolt holes.... surely the French welders didn’t create such poor quality work? I assume someone “repaired” those at some stage...!?

BA5109FA-B6A5-4F92-88A6-A0C19C188802.jpeg

anyway, onwards and upwards.

Sven
 
Did I say this will take time...? Took me most of Sunday to cut out a small section of the rear lid (under the window seal) that was badly rusted and fashion up a replacement piece. The first attempt of bending and folding this tight 3D shape didn’t work out too well - I just couldn’t get the radii and folds accurate enough.

8DF44456-6AC4-4EBD-AC3C-5E349C620766.jpeg
F9CE3AE7-4077-481E-B006-F87FDF528680.jpeg
CBE67CBA-AFD0-42F2-936B-A86FAE08B4B6.jpeg

So I reverted back to the easier cut slots and weld them up method... not as pretty, but once cleaned up and blended in it will look good. At least the radii fit can be massaged a little easier.

started repairing the lower tailgate as well. A number of the internally welded nuts have broken off and were rattling around inside. Repairing the box sections themselves won’t be too hard, but I am stumped by two things:

033E53EF-F0D1-4FA9-AFEC-51DF7C5BF7E6.jpeg

firstly: what is the best method to straighten the floor panel of the lower gate? It has been pushed in from people sitting on it. Do I drill holes and get a slide hammer or do I cut the section out and try to straighten it - then weld it back in? Or do I cut open the opposite side so I can hammer it flat that way... neither option looks overly promising. Suggestions welcome!

140889BE-E44E-4906-8A2B-CDE77C336AFC.jpeg

secondly: it has about 20 holes drilled into it where the number plates go... some look genuine but I have no idea why they are there, some belong to the number plate lights, and many are from number plate screws. On the photo I have crossed out the ones I know I need to weld up, but there are still about 6 or 8 holes (8mm) that I am not sure whether I should weld them up or whether they have a purpose. Any suggestions?

FE95C612-58CD-4863-8A43-B43AE7FCA052.jpeg

also finished off the fuel tank. To my surprise I found one small pinhole! Glad I found it now, that’s would have been ugly later on. Must admit: welding a fuel tank got me nervous... it had been empty for a fair while, but how many fumes are sufficient to ignite/explode? Contemplated filling it up with water, but decided not to. Well, glad to say I didn’t have to find out... phew.

D3A5E691-EA87-4697-8233-7A1988AD4CF1.jpeg

And also cleaned up the fan shroud and gave it a coat of clear - looks great now!

6C15D19F-7EEC-4F31-B3EA-97F6F9B3ABDC.jpeg

Sven
 
firstly: what is the best method to straighten the floor panel of the lower gate? It has been pushed in from people sitting on it. Do I drill holes and get a slide hammer or do I cut the section out and try to straighten it - then weld it back in? Or do I cut open the opposite side so I can hammer it flat that way... neither option looks overly promising. Suggestions welcome!

Hello, mine was the same. I believe now I should have left it alone, part of the patina.
I welded some dent puller rings (https://www.ebay.co.uk/itm/Dent-Pul...d-Steel-New-/401918892445?hash=item5d943b999d) and pulled out the main dents with a slide hammer. The puller rings can be snapped off once their job is done (and re used).
I made a right mess.
I then tried to strengthen the panel by cutting long slots, inserting some flat steel into the slots and then welding shut.
Even more of a mess.
As it was becoming a disaster, I cut the entire panel out. I then welded in a lattice of 12mm square steel tube so that a new flat plate could be welded on top. It didn't get much better, the plug welds to the steel tube caused a bit of distortion.
So now I have a wavy flat panel which will need some filler, but it can take a lot of weight.

Leave it alone! Even if you get it flat, the first time you sit on it, it will distort.

When I did my tailgate screen corners I made an L shape and bent that by hand to the correct curve, with a little help from a hammer and dolly. I then made the screen lip and silver soldered that into place. A good fillet of silver solder is very strong and mimics the original profile. Silver soldering can be done with a propane blow lamp unlike bronze brazing.
I fully intended buying a shrinker/stretcher to make the profiles, but then I went all cheapskate and used a hammer instead!

With the number plate, three of the holes had captive spire nuts, the others were random. I intend welding them all up and using double sided tape to affix the number plates.

Babadec,
funny you are finding the same things challenging. Hadn’t thought of soldering or brazing...

not sure yet I can leave the rear lid as is... yes, it’s history/patina, but it just wouldn’t look right. Will keep thinking... interesting you tried the strengthening as well. Had the same thought!
 
Hello, in retrospect I could have cut the panel out at the beginning and straightened it on the bench. I would still weld a lattice of square section tube for the repaired panel to lay on.
I am not using the strapontins that came with the car, instead I am fitting the large panel that covers the entire floor. This panel I have clamped to a thick sheet of ply and then I welded on strengthening square section tube. It has stayed mostly flat!
I also strengthened the panel which sits over the anti-roll bar (the flat one, not the curved one)
I'm using the strapontins space to house the air-con condenser in a metal box which extends through the floor about 5cm. It sucks and blows air from under the car and is sealed from the interior.
 
I'm using the strapontins space to house the air-con condenser in a metal box which extends through the floor about 5cm. It sucks and blows air from under the car and is sealed from the interior.

Ingenious. That ambulance is just crying out for a turbo.......
 
Feels like weeks that I have been able to make some progress on the Safari. Have ordered the first pile of parts from Darrin in the UK, the only part I can’t come at yet is the floor pan. I only need the front section, and there must be a cheaper way then getting one from Europe.

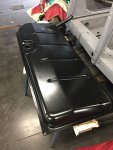
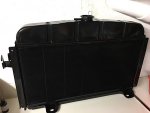
so I did a bit of painting: fuel tank and radiator all done now and safely stashed away until I need them.

55EC61F9-9E24-4623-B874-15897FEE3B66.jpeg
9D2187FB-A10A-4F55-B7D6-C38DCACFAE1B.jpeg

i finished the rear lid corner. With a skim of filler it will be pretty good.

A0A7EF4E-2A77-4270-9ED3-F4EB997D9329.jpeg

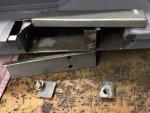
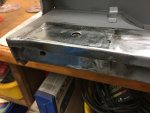
then I spent a fair bit of time repairing the rear lower lid. Haven’t made up my mind yet on whether I cut the whole bent floor panel out or not... one for later. But the hinge attachment internal nuts were mostly broken or poorly repaired. So I cut out both ends, made up the repair sections and welded both sides back in. it came up pretty well once the welds were all cleaned up. Now the rear bumper and the hinges will be securely attached again.

EA66B59E-F202-43C2-9685-39B05AFDC6F7.jpeg
3D32D0C1-A837-4996-B237-DB33F7AC9EB8.jpeg
3F2973FE-5D39-45E2-A361-D4E6816ABD61.jpeg
2C0E8707-0E4B-490F-B806-C7CF1A0C53A8.jpeg
BD383BB6-D32B-4745-B102-A72CFAF184B8.jpeg

Sven
 
Feels like weeks that I have been able to make some progress on the Safari. Have ordered the first pile of parts from Darrin in the UK, the only part I can’t come at yet is the floor pan. I only need the front section, and there must be a cheaper way then getting one from Europe.

so I did a bit of painting: fuel tank and radiator all done now and safely stashed away until I need them.

View attachment 117009
View attachment 117010

i finished the rear lid corner. With a skim of filler it will be pretty good.

View attachment 117011

then I spent a fair bit of time repairing the rear lower lid. Haven’t made up my mind yet on whether I cut the whole bent floor panel out or not... one for later. But the hinge attachment internal nuts were mostly broken or poorly repaired. So I cut out both ends, made up the repair sections and welded both sides back in. it came up pretty well once the welds were all cleaned up. Now the rear bumper and the hinges will be securely attached again.

View attachment 117012
View attachment 117013
View attachment 117014
View attachment 117015
View attachment 117016

Sven

Nicely done tank, Sven. What black are you using for the black parts - silk mat, half blank og blank? Looks blank but also silky to me. I am about the repaint tank, lid and floorboards on my car.

As many others have said: Great to follow your well-illustrated and excitingly narrated process!

Christian
 
Feels like weeks that I have been able to make some progress on the Safari. Have ordered the first pile of parts from Darrin in the UK, the only part I can’t come at yet is the floor pan. I only need the front section, and there must be a cheaper way then getting one from Europe.

so I did a bit of painting: fuel tank and radiator all done now and safely stashed away until I need them.

View attachment 117009
View attachment 117010

i finished the rear lid corner. With a skim of filler it will be pretty good.

View attachment 117011

then I spent a fair bit of time repairing the rear lower lid. Haven’t made up my mind yet on whether I cut the whole bent floor panel out or not... one for later. But the hinge attachment internal nuts were mostly broken or poorly repaired. So I cut out both ends, made up the repair sections and welded both sides back in. it came up pretty well once the welds were all cleaned up. Now the rear bumper and the hinges will be securely attached again.

View attachment 117012
View attachment 117013
View attachment 117014
View attachment 117015
View attachment 117016

Sven
We must get you into the club to talk on fabricating and welding. The work you are doing looks fantastic!
 
Nicely done tank, Sven. What black are you using for the black parts - silk mat, half blank og blank? Looks blank but also silky to me. I am about the repaint tank, lid and floorboards on my car. As many others have said: Great to follow your well-illustrated and excitingly narrated process! Christian
I painted the tank in Satin Black and the radiator in Gloss Black. Just felt that matched the original and looked right. I will probably regret the gloss as it shows every little spec of dirt and prints...
 
Top