it's clear you're over the hump on this car Sven, great work.

You are using an out of date browser. It may not display this or other websites correctly.
You should upgrade or use an alternative browser.
You should upgrade or use an alternative browser.
My new challenge - 1964 ID19F Safari
- Thread starter bleudanube
- Start date
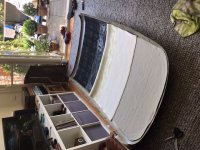
This roof liner is driving me bonkers... glued on the liner, loosely put the roof on and... crap, the glue didn’t stick and partly fell down.
pulling the liner off of course pulled the noise foam off as well, so i had to replace some of the foam, buy more headliner fabric and more glue.

To be 100% sure I ordered two cans of 3M 90 adhesive - apparently “the best”.... laid on well and seemed very sticky... but dried too fast on fabric, so I had to redo it again, this time in sections and work faster.

Result? Don’t know, still concerned it won’t hold. So, roof back up and I will see whether it still sticks after a week or whether it falls down again. If it does I might run the car without roof

 . Annoying. Shouldn’t be that hard.

Anything vertical or horizontal is of course a lot easier. But I am glad I was sent spare vinyl as I had to recut a couple of panels and ‘optimise’ the fit, like the panel in the driver footwell.


To take a rest from gluing, time to have a go at the dashboard. Much more fun. Added a couple of holes for the fan and the auxiliary lights and it went together quite well.


Getting the alignment of the glovebox lid and the cover panel took a bit of mucking around, but it now looks great. I know gloss isn’t original for the 64 dash, but getting the wrinkle paint finish was getting too hard.
i quite like the look of the brass with the polished aluminium and the dune paint.

The vents and speedo went in ok, as did the seat support vinyl. Made up a small wiring loom for the fan and auxiliary lights that can tuck away under the fan and in the passenger side fender. All Very fiddly, slow work. Never feels like a lot of progress after a weekend.

Let’s hope the roof liner stays up there...
pulling the liner off of course pulled the noise foam off as well, so i had to replace some of the foam, buy more headliner fabric and more glue.
To be 100% sure I ordered two cans of 3M 90 adhesive - apparently “the best”.... laid on well and seemed very sticky... but dried too fast on fabric, so I had to redo it again, this time in sections and work faster.
Result? Don’t know, still concerned it won’t hold. So, roof back up and I will see whether it still sticks after a week or whether it falls down again. If it does I might run the car without roof
. Annoying. Shouldn’t be that hard.Anything vertical or horizontal is of course a lot easier. But I am glad I was sent spare vinyl as I had to recut a couple of panels and ‘optimise’ the fit, like the panel in the driver footwell.
To take a rest from gluing, time to have a go at the dashboard. Much more fun. Added a couple of holes for the fan and the auxiliary lights and it went together quite well.
Getting the alignment of the glovebox lid and the cover panel took a bit of mucking around, but it now looks great. I know gloss isn’t original for the 64 dash, but getting the wrinkle paint finish was getting too hard.
i quite like the look of the brass with the polished aluminium and the dune paint.
The vents and speedo went in ok, as did the seat support vinyl. Made up a small wiring loom for the fan and auxiliary lights that can tuck away under the fan and in the passenger side fender. All Very fiddly, slow work. Never feels like a lot of progress after a weekend.
Let’s hope the roof liner stays up there...
Last edited:
The real test for a roof lining is when it sits in hot sunshine for a while.....
I really like the dash. I personally don't like the wrinkle finish. Would go for gloss any time. Much easier to keep clean, looks fantastic.
I really like the dash. I personally don't like the wrinkle finish. Would go for gloss any time. Much easier to keep clean, looks fantastic.
... I know... might only drive it at nightThe real test for a roof lining is when it sits in hot sunshine for a while.....
 ... am dreading the thought of a drooping liner replacement with the roof bolted and glued in place. I will think positively ... it will stay up!!!
Don't glue it! Just bolt it, with a smear of coolroom mastic.... I know... might only drive it at night
I said it before, roof removal for seal replacement and rail inspection should be a regular maintenance item.
Therefore it should be made as easy as possible.
Where are you getting the fabric from Sven?
The guys at Vyfab sell a contact adhesive specifically designed for roof linings. I found it's best to apply it with a foam roller, the solvents do eventually dissolve the foam but they're cheap. It avoids applying to much glue and having it come through the top face of the fabric.
The guys at Vyfab sell a contact adhesive specifically designed for roof linings. I found it's best to apply it with a foam roller, the solvents do eventually dissolve the foam but they're cheap. It avoids applying to much glue and having it come through the top face of the fabric.
Got the fabric from Daley’s in Falkner. Had two types by now, two types of glue, both sprays - open time seems to be the trick, the fabric (and the foam) suck the glue in very quickly.
Haven’t look at it yet... too nervous what I might find after letting it hang for a week.
Haven’t look at it yet... too nervous what I might find after letting it hang for a week.
I’m also a Vyfab fan, I brushed mine on slowly rolling it back onto itself (fabric onto roof) so it wasn’t out too long. It certainly was thirsty.Where are you getting the fabric from Sven?
The guys at Vyfab sell a contact adhesive specifically designed for roof linings. I found it's best to apply it with a foam roller, the solvents do eventually dissolve the foam but they're cheap. It avoids applying to much glue and having it come through the top face of the fabric.
Not a bad outcome for a first timer.
Good luck!
Attachments
Now that I have the dash assembled, it was time to install it, trying to align all the wiring to each switch.
especially the indicator switch was a tad tricky, but I hope I got most (all?) wiring in the right spot... but I am sure there will be a few malfunctions when I power it up

The dash itself looks really nice, the brass switch bezels stand out well. Am a bit suspicious of the wash water pump... cannot see that this little sucker will push any water onto the windscreen - but, maybe I am wrong. Having water and electrics side by side is also a bit suspect.

Bill, the wiring went together as well as hoped. Still have to work out the indicator and high beam dash feeds. Shouldn’t be too hard.

As the head liner stayed up, I finally had a go at installing the roof. Bob, have taken your advice and have used cool room mastic. Let’s see...

I put a 5-10mm bead into the roof rail , put some soapy water onto the seal to make it slide a little easier and lowered the roof, with the seal glued in place, into the rail. Two helpers made it manageable.
It took a lot of pushing, tugging and use of a small podgy bar to seat the roof and get the bolts in. In a couple of spots the seal rolled in a little, so I may need to add some ‘gap filler’ to close off any gaps.

The end result is pretty good. Let’s hope it’s water proof as well

Adding the polished aluminium trim was one of the more satisfying jobs. They clipped in with this nicely solid ‘crunch’. And finally some bling on the car, after 50 shades of grey.

To try and finish off the chassis and make some space in the garage, the rear lid was next. The trim pieces, chevrons and lock went together without a hitch.
The small pice of trim was one of the easier job after all the rooting around with the main headliner. Does anyone know what the large holes are there for? They are awkward to upholster as they will show through the fabric. But they don’t seem to have any real purpose... air flow? Weight saving???

Fitting the lid was actually quite tricky. I am still not 100% happy with the alignment. I had to shim out the hinges a fair distance to try and even it out and not have them foul on the roof... will reassess it next weekend. One side has about a 5mm gap to the roof, the driver side 2mm...

It also doesn’t shut / lock yet. Maybe the seals are still too stiff. It is missing out by about 5mm or so... can’t be too hard to fix. Next week.
It was nice though to bolt some more significant parts together rather than fiddly little items... feels like progress.
Sven
especially the indicator switch was a tad tricky, but I hope I got most (all?) wiring in the right spot... but I am sure there will be a few malfunctions when I power it up
The dash itself looks really nice, the brass switch bezels stand out well. Am a bit suspicious of the wash water pump... cannot see that this little sucker will push any water onto the windscreen - but, maybe I am wrong. Having water and electrics side by side is also a bit suspect.
Bill, the wiring went together as well as hoped. Still have to work out the indicator and high beam dash feeds. Shouldn’t be too hard.
As the head liner stayed up, I finally had a go at installing the roof. Bob, have taken your advice and have used cool room mastic. Let’s see...
I put a 5-10mm bead into the roof rail , put some soapy water onto the seal to make it slide a little easier and lowered the roof, with the seal glued in place, into the rail. Two helpers made it manageable.
It took a lot of pushing, tugging and use of a small podgy bar to seat the roof and get the bolts in. In a couple of spots the seal rolled in a little, so I may need to add some ‘gap filler’ to close off any gaps.
The end result is pretty good. Let’s hope it’s water proof as well
Adding the polished aluminium trim was one of the more satisfying jobs. They clipped in with this nicely solid ‘crunch’. And finally some bling on the car, after 50 shades of grey.
To try and finish off the chassis and make some space in the garage, the rear lid was next. The trim pieces, chevrons and lock went together without a hitch.
The small pice of trim was one of the easier job after all the rooting around with the main headliner. Does anyone know what the large holes are there for? They are awkward to upholster as they will show through the fabric. But they don’t seem to have any real purpose... air flow? Weight saving
???Fitting the lid was actually quite tricky. I am still not 100% happy with the alignment. I had to shim out the hinges a fair distance to try and even it out and not have them foul on the roof... will reassess it next weekend. One side has about a 5mm gap to the roof, the driver side 2mm...
It also doesn’t shut / lock yet. Maybe the seals are still too stiff. It is missing out by about 5mm or so... can’t be too hard to fix. Next week.
It was nice though to bolt some more significant parts together rather than fiddly little items... feels like progress.
Sven
That definitely is progress Sven.
Excellent work.
Excellent work.
Sven, a minor quibble: I see you're using an older diagram for your guide . The one I followed was here:
http://bk23.free.fr/MR/DR472_64_ID19PLANCHES.pdf plates 124 G and H, pages 171 and 172 (according to the Acrobat reader). The original French wire schedule was here: http://bk23.free.fr/MR/DR472_64_ID19TEXTE.pdf pages 413-420 (again, according to the Acrobat reader). The English translation I supplied you should be reasonably accurate- darn well better be, as many times as I had to do it!! That's another story.......
http://bk23.free.fr/MR/DR472_64_ID19PLANCHES.pdf plates 124 G and H, pages 171 and 172 (according to the Acrobat reader). The original French wire schedule was here: http://bk23.free.fr/MR/DR472_64_ID19TEXTE.pdf pages 413-420 (again, according to the Acrobat reader). The English translation I supplied you should be reasonably accurate- darn well better be, as many times as I had to do it!!
That's another story.......Well spotted Eagle eye!Sven, a minor quibble: I see you're using an older diagram for your guide . The one I followed was here:
http://bk23.free.fr/MR/DR472_64_ID19PLANCHES.pdf plates 124 G and H, pages 171 and 172 (according to the Acrobat reader). The original French wire schedule was here: http://bk23.free.fr/MR/DR472_64_ID19TEXTE.pdf pages 413-420 (again, according to the Acrobat reader). The English translation I supplied you should be reasonably accurate- darn well better be, as many times as I had to do it!!
i an using 124G and H, but to work out which wires had to go to which one of the four indicator terminals +, -, gauche, droit, plus earth) I used the other one... hope I got it right.
Quick question: where does this bracket get attached to behind the dash? I can’t see an obvious spot, but the drawings shows it somewhere near the binnacle.
Appreciate the help.

Appreciate the help.
Sorry Sven, no joy here. The description (upper dashboard mounting bracket (central part)) is as vague as the picture. Is there a screw hole in the upper pad?
I'll have to check on a car, but I think it's near the centre of the car, not behind the binnacle.
Well, after a number of adjustments and fiddles the rear lid is finally shutting... but without the bottom seal... it was just too tight. Have to rethink how I get it back in. Maybe a smaller diameter infill sausage? There’ll be a way...
Also spent the last couple of weekends breathing in glue fumes... fun times!
the sill vinyl needed a reasonable amount of trimming, but in general they did fit really well and it looks pretty good compared to the original pattern and colour.

Recovered the seat stops and shoved a new cardboard hose into the sill and connected both ends... and it now works! With the stronger new fan motor the airflow is actually quite good into the rear foot well.


I have been using Kwikgrip gel this time. It is actually a lot better than both spray cans and the normal stringy liquid canned glue - can recommend it : reduced open time and good adhesion and easier to apply.

A couple of new rubber straps finished off the little lids.

i was worried the rear wheel arch covers might be difficult to fit over the multiple radii of the arch, but they fit really well, including the grey vinyl that covers the arch section behind the folding rear seat.
The footwell for the rear strapotins is covered in the same black vinyl the boot of the sedans is covered in. With a bit of trimming the sections also fit well and the whole boot now looks really nice.


finishing off the roof rail with the usual grey sausage and the two little end covers completed the roof.

i will have a go at upholstering the strapotins myself, looks like a pretty easy job. I will buy some 50 and 25mm foam at Clarke Rubber.

I thought those seats only had a foam block, but it actually has a small steel frame that it all attaches to... good design, even if the frames need a bit of love... the foam of the old seats is all crumbled and even smelled burnt... weird.
I am sure, a decent wire brushing and paint will bring the frames back to life...

Bought a couple of sheets of 3.2mm Masonite to recut the door cards next week. The old ones are all buckled, so four new cards are needed to ensure the cards sit flat and flush the doors.
The door card upholstery work and front seats will be given to the professionals... that’s a bit beyond my skills, but I might give the rear bench a go - am intending to replace the spring bench with foam blocks as well. The springs are too far gone.
Now, I still am after a couple of parts:
- My fuel sender in the tank seems to have some intermittent wiring issue. The finest wiggle moves the gauge from full to empty, but I cannot work out how to make it reliable. Does anyone have a good used one?
- does anyone have a decent used drivers door pocket? From a DSuper or ID, one of those beige plastic ones. I have the passenger one, but not a drivers door one.
thanks in advance.
next on the to do list will be the engine. Got all the parts now, so that will be a few weeks of fun!
Sven
Also spent the last couple of weekends breathing in glue fumes
... fun times!the sill vinyl needed a reasonable amount of trimming, but in general they did fit really well and it looks pretty good compared to the original pattern and colour.
Recovered the seat stops and shoved a new cardboard hose into the sill and connected both ends... and it now works! With the stronger new fan motor the airflow is actually quite good into the rear foot well.
I have been using Kwikgrip gel this time. It is actually a lot better than both spray cans and the normal stringy liquid canned glue - can recommend it : reduced open time and good adhesion and easier to apply.
A couple of new rubber straps finished off the little lids.
i was worried the rear wheel arch covers might be difficult to fit over the multiple radii of the arch, but they fit really well, including the grey vinyl that covers the arch section behind the folding rear seat.
The footwell for the rear strapotins is covered in the same black vinyl the boot of the sedans is covered in. With a bit of trimming the sections also fit well and the whole boot now looks really nice.
finishing off the roof rail with the usual grey sausage and the two little end covers completed the roof.
i will have a go at upholstering the strapotins myself, looks like a pretty easy job. I will buy some 50 and 25mm foam at Clarke Rubber.
I thought those seats only had a foam block, but it actually has a small steel frame that it all attaches to... good design, even if the frames need a bit of love... the foam of the old seats is all crumbled and even smelled burnt... weird.
I am sure, a decent wire brushing and paint will bring the frames back to life...
Bought a couple of sheets of 3.2mm Masonite to recut the door cards next week. The old ones are all buckled, so four new cards are needed to ensure the cards sit flat and flush the doors.
The door card upholstery work and front seats will be given to the professionals... that’s a bit beyond my skills, but I might give the rear bench a go - am intending to replace the spring bench with foam blocks as well. The springs are too far gone.
Now, I still am after a couple of parts:
- My fuel sender in the tank seems to have some intermittent wiring issue. The finest wiggle moves the gauge from full to empty, but I cannot work out how to make it reliable. Does anyone have a good used one?
- does anyone have a decent used drivers door pocket? From a DSuper or ID, one of those beige plastic ones. I have the passenger one, but not a drivers door one.
thanks in advance.
next on the to do list will be the engine. Got all the parts now, so that will be a few weeks of fun!
Sven
Last edited:
Looking fab Sven,
It must be very exciting seeing this ''new'' DS materialising in front of you.
cheers Tony
It must be very exciting seeing this ''new'' DS materialising in front of you.
cheers Tony
Hello, if you fold the rear seat forward, do the D shaped handles hit the rubber bump stops on the sill? And does the entire floor become flat?
On mine, when I do that, seat base handles do touch the bump stops, but the floor is not level.
On mine, when I do that, seat base handles do touch the bump stops, but the floor is not level.
I remember that discussion... yes, mine make the floor flat and the handles sit on both bump stops. Not sure how yours doesn’t... would have thought they are all the same. Can take a photo if that helps.Hello, if you fold the rear seat forward, do the D shaped handles hit the rubber bump stops on the sill? And does the entire floor become flat?
On mine, when I do that, seat base handles do touch the bump stops, but the floor is not level.
Yes please. No doubt I am doing something wrong.