My 68 404 restoration

Cally404

Member
VIP Paid Subscriber
Tadpole
Joined
May 21, 2020
Messages
76
Location
Woodcroft, South Australia
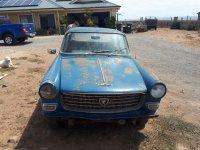
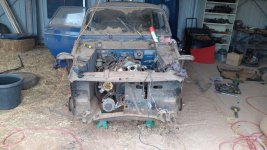
Hi all. I have been a member for a little while now and have decided I should catalogue the trip I am currently on with my 404. I have had a bit of a bumpy start with first stripping most of it down and then deciding to move house so packing it all up, reconstructing it a bit and then unpacking again at the other end...

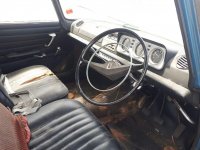
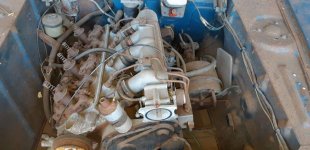
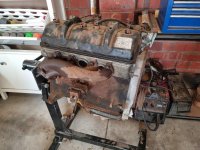
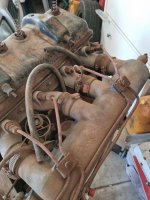
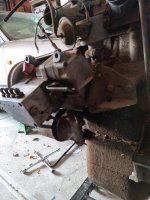
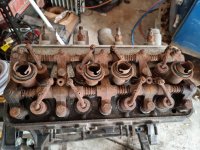
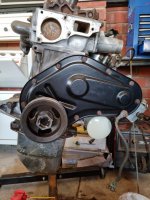
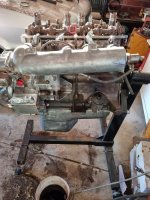
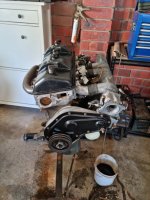
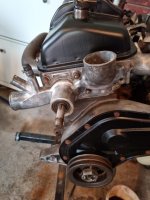
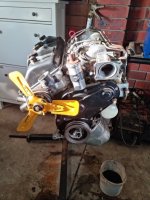
Thanks to everyone on here I discovered I have a 1968 with a 1969 504 KF6 injection engine, which seems to have never run in this car. I also had a sticky gearbox, which after lots of advice I managed to remove with some anchoring and lots of hammering!

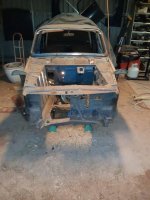
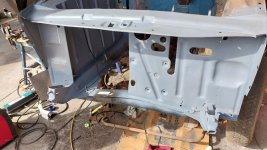
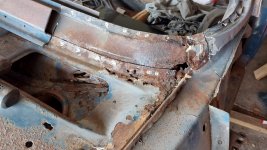
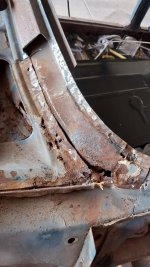
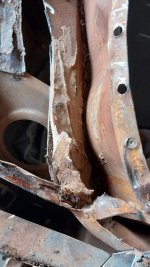
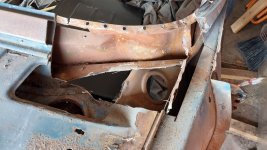
Anyway I am just starting out so I expect my progress to be slow as it is purely 'when I get time'. I will see how it goes..... The pics below show how far I got before moving and restarting. The rest continues from today.
 

Attachments

  • 20190209_145212.jpg
    20190209_145212.jpg
    160.9 KB · Views: 209
  • 20190209_145151.jpg
    20190209_145151.jpg
    154.5 KB · Views: 212
  • 20190209_145203.jpg
    20190209_145203.jpg
    114.7 KB · Views: 212
  • 20200530_100845.jpg
    20200530_100845.jpg
    96.6 KB · Views: 209
  • 20200531_151120.jpg
    20200531_151120.jpg
    123.5 KB · Views: 211
  • 20200830_175534.jpg
    20200830_175534.jpg
    75.4 KB · Views: 216
Nice project. Purist tip: If you're redoing the body, which it seems you are, switch sides for the "Injection" badge. The 404 Injection sedans had that badge on the left side of the license plate, and a bit lower than it is right now on the right side.
 
Last edited:
Nice project. Purist tip: If you're redoing the body, which it seems you are, switch sides for the "Injection" badge. The 404 Injection sedans had that badge on the left side of the license plate, and a bit lower than it is right now on the left side.
Thanks Mike. I think that was mentioned before, maybe by you, I will definitely do that. I am not a hardcore purist but some attention to detail is good!
 
Great to have an update from you. Although the 504 Ti is my favourite Peugeot, an Injected 404 comes a very close second.

This is a very good project and you are starting with a good base. Having to move with a car in bits is not something most of us would look forward to so you have my sympathy.
 
Last edited:
Things are progressing well. I have opted to rebuild the engine first and then do the body work. As this is a simple restore I am just cleaning as I go and repainting anything that was previously done. All rusty parts have been through electrolysis before being re assembled. New gaskets throughout. As I have worked on it, it has become obvious that this engine has never run in this car and some work as done on it before it was put in the shed in 1994.

The fuel pump is in good condition and was straightforward to reassemble. The head gasket was like new when removed but I replaced with a new one just to be on the safe side. There was an over excess of instant gasket in various areas but that was all removed before reassembling with new gaskets.

I am just having a few issues testing the disengageable fan pulley but just need to suss that out and most engine parts are back on.
 

Attachments

  • 20210502_144543 (1).jpg
    20210502_144543 (1).jpg
    155.8 KB · Views: 185
  • 20210509_145532 (1).jpg
    20210509_145532 (1).jpg
    86.8 KB · Views: 180
  • 20210511_100542 (1).jpg
    20210511_100542 (1).jpg
    79.3 KB · Views: 178
  • 20210511_102849 (1).jpg
    20210511_102849 (1).jpg
    105.8 KB · Views: 178
  • 20210515_140132 (1).jpg
    20210515_140132 (1).jpg
    115 KB · Views: 168
  • 20210522_142151 (1).jpg
    20210522_142151 (1).jpg
    89.7 KB · Views: 178
  • 20210522_142148 (1).jpg
    20210522_142148 (1).jpg
    98.4 KB · Views: 181
  • 20210515_143621 (1).jpg
    20210515_143621 (1).jpg
    163.2 KB · Views: 175
more pics of the engine rebuild
 

Attachments

  • 20210522_150629 (1).jpg
    20210522_150629 (1).jpg
    109.5 KB · Views: 169
  • 20210522_150636 (1).jpg
    20210522_150636 (1).jpg
    131.6 KB · Views: 170
  • 20210606_134350 (1).jpg
    20210606_134350 (1).jpg
    94.6 KB · Views: 172
  • 20210606_160310 (1).jpg
    20210606_160310 (1).jpg
    110.7 KB · Views: 169
  • 20210609_143914 (1).jpg
    20210609_143914 (1).jpg
    84.5 KB · Views: 180
  • 20210614_152938 (1).jpg
    20210614_152938 (1).jpg
    66.3 KB · Views: 165
Nice work Cally.

Sorry I am unable to provide any alternatives for testing the magnetic fan hub other then what you have already tried.
 
Well it's been a while! Just got back to it today.... SA summers and West facing garages are not good for car restoration.

Things have moved on a bit since my last post. I have been working on the welding that needs doing since finishing the engine. The front cross member has been replaced plus repairs to the left hand and right hand jacking points. I have also cut out the frame behind the jacking points and replaced those, where needed. Lots of lanolin for the rest.

As always hidden rust is a challenge and I have unearthed various amounts in the usual spot under the windscreen, on the left corner so ended today cutting it all out through various layers. The next project will be to make these bits and replace that section.

Also done is a small hole in the rood and two holes around the bonnet mounts. Once this rework around the windscreen is done onto the boot/ rear bumper area, which could be fun!

I will add some pics when I get them small enough 😏
 
Plenty of 30 year old filler found too!
 

Attachments

  • 20230313_163214_resized.jpg
    20230313_163214_resized.jpg
    242.8 KB · Views: 104
  • 20230313_153924_resized.jpg
    20230313_153924_resized.jpg
    283.7 KB · Views: 108
  • 20230313_155504_resized.jpg
    20230313_155504_resized.jpg
    251.5 KB · Views: 115
  • 20230313_162044_resized.jpg
    20230313_162044_resized.jpg
    238.3 KB · Views: 117
  • 20230313_163141_resized.jpg
    20230313_163141_resized.jpg
    259.8 KB · Views: 109
Plenty of 30 year old filler found too!
Cally,
It is so good to see you're still at it.
It gets a little scary as you pull back the layers.
Just in case you haven't done it yet, pull out the bog in the bottom of the inverted trangular section in the corner at the base of the drain area. The bog gets had and pulls away a little and allows water to seep out onto the passengers and drivers feet.
1678694569526.png
Most impressed with what you have done.
Cally
 
Cally,
It is so good to see you're still at it.
It gets a little scary as you pull back the layers.
Just in case you haven't done it yet, pull out the bog in the bottom of the inverted trangular section in the corner at the base of the drain area. The bog gets had and pulls away a little and allows water to seep out onto the passengers and drivers feet.
View attachment 218260 Most impressed with what you have done.
Cally
Thanks Dan, I will have a look, once I work out your photo 🤣
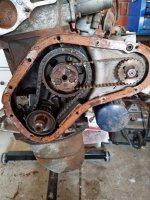
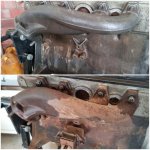
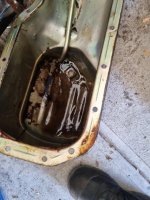
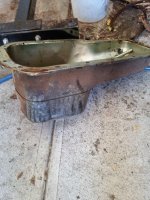
. It's been a while since I have been on it but hope to achieve a bit more moving forward
 
Top