Graeme's R8 Gordini Rebuild !!!

geckoeng

Well-known member
VIP Paid Subscriber
1000+ Posts
Fellow Frogger
Joined
Oct 31, 2010
Messages
2,441
Location
Perth, WA
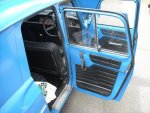
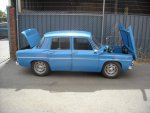
I would like to point out that this car is now on the road and running well. I was not into running a Project Thread at the time, but have been asked by a number of people to to do a coverage of the Gordini known as "Gordi"

It all started with news in Western Australia that there was a R8 Gordini to be auctioned in Melbourne. There were a few interested parties, who had money, that may put in a bid.

Well it was out of my league, so it meant nothing to me, and I got on with preparing cars for French Car Day,2013. I had just finished Tom Riley’s Alpine A110, getting it through road worthy and registration, and then building a R5 Alpine motor and connecting it to a “big 5 speed” and doing the modifications to make it fit in the chassis. That was done and Tom’s South African R8 Gordini needed some work to get it through roadworthy and registration. And these 2 were to be on the FCD show.

At the show there was a lot of interest in the older Renaults, in particular the performance orientated car. Again there was chatter about the Gordini that was sold in Melbourne, and was coming to WA. But nobody new who it was who now owned it. My friend John came to talk to me, and said he had just spoken to the new owner of the Gordini, and he had asked who could do some work on it for him. John had pointed him in my direction.

Well Graeme came and introduced himself, explained he had bought the Gordini from Melbourne, and would I be willing to access what would be needed to get it through Road worthy for registration. I gave Graeme my card, and we said we would speak soon.

And that is the introduction to the Gordini rebuild.
 
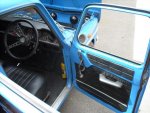
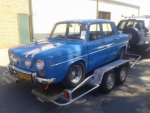
Graeme phoned me during the week, and the next day he came to the workshop with the Gordini. He had told me the price he had paid for the car, and I will admit I was expecting a really nice car. Not this rather rough specimen, with a well worn home paint job. I had a quick once over and under, and we agreed to continue with our plan to take it up to Kalamunda for a run, so we could get an idea of what there was.

The car definitely didn’t feel like a 1300 Gordini, and I recon a good R8 1108 would have given it a very good go., all that sounded good were the DCOEs chugging away in the back. We had to come down to third gear to get over the top of Greenmont Hill. And when we were over the top and Graeme went up to fourth and then fith, I told him to ease it off and pull into the service station, as the temp gauge was now very close to the red. I let it stem for a few minutes, then poured cold water over the radiator, twice, and then started the motor again. It di fire up but coughed and sputtered for a while, as I poured another can of water over the rad. Eventually the temp came down and I switched off. Fortunately I had put my travelling box of spanners in, so I could take off the radiator cap. Started it up again and slowly poured in some fresh water. It needed about a litre, but what came up was dark brown liquid. But no bubbles. Thank God.

The rest of the drive was done at a sedate pace, the temp was abnormally high, but did not nudge the red again. The only thing that got me was a distinct rumble and bumping from the RH rear. We actually stopped at on stage so I could check the rear wheel wasn’t falling off.

The car was left with me so I could make my report as to what was needed to go over the pits for registration.

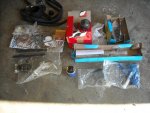
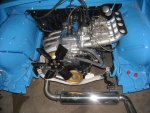
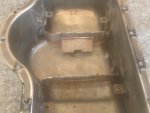
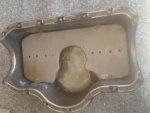
R8G Origin 5.jpgR8G Origin 1.jpgR8G Origin 2.jpgR8G Origin 3.jpgR8G Origin 4.jpg
 
Well Graeme had had somebody else take his car to the pits for inspection, and it shows that people are not even willing to do some research on a vehicle if they know nothing about it.

Two glaring points that that came up on the inspection list that the previous people had not picked up on was :
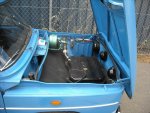
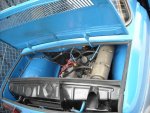
1 Extra fuel tank fitted to front, engineering document required.
2 Excessive carburetors fitted, engineering document required.

So out came the books and parts books.
The rest of the items were rather easy to correct. And what surprised me was no mention of the rumble in the LH rear axle, and a few prominent oil leaks. I made an appointment with the guys I always use, as they know a bit more about classic cars, and took it for test the next day. Just before driving in the oil leaks at the back were spayed with brake cleaner and wiped dry. The Gordini went through first time and the guys were all very happy with the book presentation to show original equipment fitted to the Gordini.

When I had the documentation in hand, I texted Graeme and told him it was done. He was very pleased, and said he would see me at the workshop on my return. Sure enough as I drove onto my forecourt there the Red Boxter was sitting. He greeted me with a smile and took all the papers, and said he would see me soon. This was all before lunch. So I went off to get lunch and came back to sit and take in a rebuild on a project like this. My pencil and pad next to me.

About 15:30, Graeme arrives back, with registration papers and number plates “GR 68 R8G”. So I got to work fitting his plates. And we went for a ride around the block to celebrate. One very pleased customer. The next day he came to collect the car to have a bit of driving in it, and confirmed we would put a program together for a complete rebuild.
 
The Stripping Process

Graeme came and visited and we discussed the rebuild. I set one thing straight and we both agreed on it. This would not be a restoration, it would be a budget feel rebuild, but doing everything properly. The main reason was he wanted to play in club competition with the Gordini. I would not build a racing motor, as some critical parts are no longer available or very expensive, and that defeats the object of a play car. It must go well and be strong.

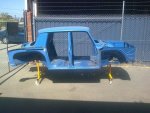
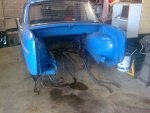
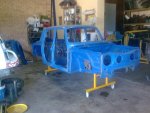
Close to Christmas 2013 he came and dropped the car off as he would be away on leave, and I would start the rebuild the first working day of 2014. Well 5 days later and the car was a part number on the roller stands. And the following Mon it was at the media blast site for its work to start.

I also got started on stripping the engine and gearbox and axle tubes, these needed lists made of all the parts and work needed to make them work like new. I also found the rumbling noise in the LH axle. It had a bent halfshaft and a broken bearing with only 4 balls in it.

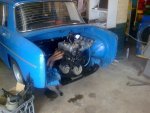
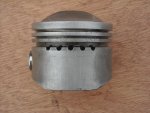
The motor was just sad inside, just put together very badly. Old worn out pistons with spacer rings fitted in the top groove, and all 4 pistons had valve marks on them. And 3 bent exhaust valves and one inlet.

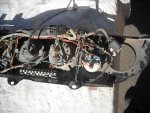
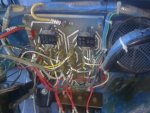
The electrics were another thing that had been played with by many a dab electrician, and behind the dash was just a snakes nest of old wires and disconnections..


The list got bigger !!!!

Back Dash 1.jpgR8G Stripped.jpgImage0281.jpgImage0282.jpgImage0290.jpgR8G Stripped 2.jpg


Last edited:
This is great reading. Thank you for posting this.
 
A funny little story related to the Gordini rebuild.
Taking the Gordini body to Naval Base industrial site to have the car media blasted, I am driving down Rockingham Rd in the Rodeo, and I notice this Land Cruiser about 5 cars back desperately trying to get through the 2 lanes of traffic in our direction. And I say to myself “that guy is acting funny”, why not just ride with the traffic till it thins. Well I get to my turning and go left, and a few seconds later the Cruiser turns in behind me. I have another left turn, and a few seconds the Cruiser turns in behind me, much closer this time. What the Hell, no coincidence!!

I get to the place I want to be and pull over and park on the pavement and the Cruiser parks just behind me. I get out and (I am told ) that I was quite abrupt and aggressive. But this young man introduced himself as Julian (julians) and said he had a Gordini in Zimbabwe, which he was in the process of bringing to WA. And with an introduction like that who can be aggressive ???

Julian’s Gordini has arrived and we have done some work on it to get it running properly and so we can register it as a club car for the moment. Julian's G outside my workshop, notice the ominous Cruiser in the background !!!!

Julian G.jpg
 
Last edited:
Do I get a mention in any of the chapters? I'll even start it off for you....

"There's this tall east European background Melbournian FIFO worker electrician who pops in every now and then during his down time in Perth. I've got these R8G's sitting in my work shop and all he wants to talk about is Florides, now c'mon, really, rusty crappy Florides, look at the R8G's, no, Floride this, Floride that, please! "
 
Hi Guys,
Thanks for the comments. As much as it is "old hat" to me it is still a major in my building life. I get very involved with the cars and their owners. It is a great challenge to produce good cars, and I try very hard to do them as the customer requires. I am not a stickler for original, but dislike a car being messed up through queer ideas. I am very privileged to be building these cars, as I would not be able to afford them at their market values, and then to invest the funds. So I am able to build icons for other people who become my friends.

And as for John the FIFO he is a nice guy, but does carry on about Florides and Caravelles !!!!

Ray
 
A funny little story related to the Gordini rebuild.
Taking the Gordini body to Naval Base industrial site to have the car media blasted, I am driving down Rockingham Rd in the Rodeo, and I notice this Land Cruiser about 5 cars back desperately trying to get through the 2 lanes of traffic in our direction. And I say to myself “that guy is acting funny”, why not just ride with the traffic till it thins. Well I get to my turning and go left, and a few seconds later the Cruiser turns in behind me. I have another left turn, and a few seconds the Cruiser turns in behind me, much closer this time. What the Hell, no coincidence!!

I get to the place I want to be and pull over and park on the pavement and the Cruiser parks just behind me. I get out and (I am told ) that I was quite abrupt and aggressive. But this young man introduced himself as Julian (julians) and said he had a Gordini in Zimbabwe, which he was in the process of bringing to WA. And with an introduction like that who can be aggressive ???

Julian’s Gordini has arrived and we have done some work on it to get it running properly and so we can register it as a club car for the moment. Julian's g outside my workshop, notice the ominous Cruiser in the background !!!!

View attachment 81430


Ray,
Do your new friend Julian a favour. Remove the Zim [?] plates before it goes in for inspection. The Rego wallahs will insist they be removed and handed over. I reckon they then sell them on.
I'm thinking Julian may like to souvenir his old plates.:wink2:

Wildebeest.
 
Ray,
Do your new friend Julian a favour. Remove the Zim [?] plates before it goes in for inspection. The Rego wallahs will insist they be removed and handed over. I reckon they then sell them on.
I'm thinking Julian may like to souvenir his old plates.:wink2:

Wildebeest.

Good thinking.
 
Building the Motor (Engine)

I normally just strip a motor, everything apart, nuts bolts washers bearings sprockets valves cotters, and large parts all in on tub. Block head and flywheel all on my work table. The work table is on wheels and so moves easy to the wash area. All parts go through a prelim was with turpentine (used, but not too dirty). As I am laying the parts out on news paper they are checked, even nuts and bolts.

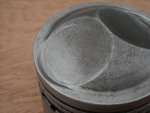
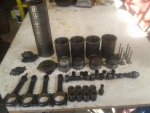
The pistons were very marked with valve patterns, and so checked the valves in the drill machine and 2 inlets bent and 1 exhaust. Told a lot. The pistons also had spacer rings on the top groove. (I do not like).

With all the parts cleaned, I then do a dummy assembly with all the old parts, no rings. First is to get cam pattern graph, and check cc of piston tops for compressions. Cam was very radical for street use. Put good valves in head and did a combustion chamber cc. When the motor was in good condition it would have 12.9:1 CR. Impossible to use for street. Then I measured the head height and it had been milled 2.25mm. So in theory it was throw away.

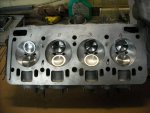
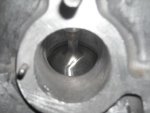
So I made a parts list to build a strong street motor, and sent out for proformos. Colombo were the only place showing heads, but my email came back, we have not had for 2 years, and we have no intensions of making at the moment. So I went looking for a used head. What I did find were not for sale. Eventually an old friend in New Zealand gave some hope. He makes head gaskets for a living. He told me to get some 2mm (compressed) gasket material, and he would make me a gasket. As soon as I went down this road the world opened up. One of my contacts in Belgium could get the material, and he knew a person who could get it and make the gasket. So I had solved one problem, but the combustion chamber was still too small, so I got to work on the head. First, I had bought bigger vales, so they needed seats, then it was on to the grinding work. Opened the inlet ports 2mm on diam., 3mm on exhausts. Matched ports to inlet manifolds. And then the difficult stuff removing 3.8cc from each combustion chamber. Eventually came to 10.49:1 CR.

I had at this time been convinced by a friend that an annealed copper head gasket would work in this situation, so I went and had one laser cut.

Valve pocket-sml.jpg20151008_100408.jpgThrust face-sml.JPGG Crank Assy.jpgG Head Assy.jpgG Inlet Port.JPG
 
Motor/Engine cont.

One thing that fell in our favour was, in all the bits that came with the car were a brand new set of conn rods. I would never have believed they would still be available, but here they were in my hands.

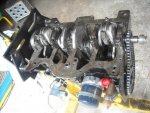
The crank was ground smooth on all the casting faces and polished with 320 grit on a rotary bar in my drilling machine. All the rods and pistons were balanced and made equal weights., and then the rotating parts were sent for dynamic balance.

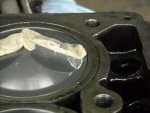
Time to clean and do a full dummy assembly. The main reason for this is to find out if the valves and cam and pistons all work together. I made 2mm aluminium spacers to take the place of the special gasket. The exhaust valves were too close to the edge of the valve pockets. So my special valve tool came out and 1mm extra radius was put in the pockets, reassembled and checked. The plasticine was perfect, 1mm clear of the pocket edge and 1mm clear of the piston top. Cam was set straight up on the marks, and was probably about 1.5 degrees advanced. Nothing to worry about in my book for what we would do with the motor.

All the parts were stripped and completely cleaned, first with fresh turpentine, and then with soap (dish wash) and water, and bottle brushes and pipe cleaners. And then finished with strong hose sprayer. Blow off and oil every surface with a liberal coating of engine oil, and pack into clean garbage bags. So no dust gets in. All the parts were ready for assembly, and the next morning it started.

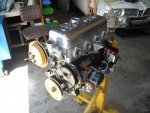
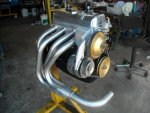
I used the copper head gasket to start with. All torqued up and valves set and ready to run. It was great to have it all assembled.

Engine Parts 2 - like Christmas.jpgRear Eng Assy 2.jpg20150223_084029.jpg20150223_084643.jpgG Valve Clear Mock.JPGFuel pump.jpgG Engine Rocker cover.jpgG Motor Assy 2.jpg
 
The Gearbox

Well the gearbox was quite a task. When I opened it I was full of amazement as to what people had done inside to make it “more competitive”. Fortunately it had had a rebuild with some good new parts, but settings were all over the place. I found the pinion a bit too deep and this resulted in the crownwheel spaced too much on one side. Adjusters had been put on the selector detent balls, and were still the small detent balls. So the casing was modified for the larger balls and I had the slightly heavier springs, still from ZA. The adjusters were backed off slightly to give the right spring tension. One problem I didn’t have solution for was a broken tag on one of the pawls for 5th gear. After a lot of searching on the internet and friends, Steven Swan came up with the goods. Assembly was easy once all the parts were together, especially once the pinion depth and crownwheel were set up properly.

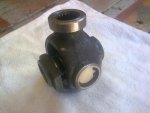
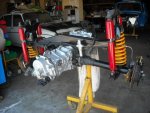
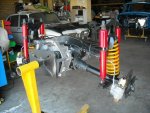
As I didn’t know the use of the drive shafts, one being bent seriously. I took a set of my known ZA R10 1300 shafts that were marked RH, LH, and they were drilled for the rubber plugs. I also made a rebuilt set of CV joints. And the final assembly was very smooth and comfortable.

I didn’t take too many pictures of the box build.

8-10 UJ.JPGRear Susp Assy 3.jpgRear Sup Assy 2.jpg
 
Last edited:
Top