GiSelle the GS Mechanical Refresh Mark 2

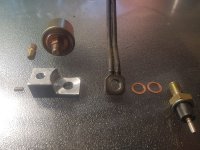
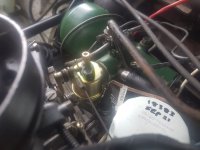
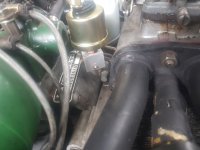
Haven't looked that closely yet Bob. I think it's just rubbed through from rattling around undamped, but when I removed the p clip it was worse, so I suspect a crack.

Time will tell.

Ian, not sure about Cowra yet. So many plans have gone out the window, the garden is full of them! We shall see.

Cheers, Pottsy
 
Hi Pottsy,

Yes one of my acquaintances in Brisbane had the same problem last year. They all must be getting to an age. Also, when we were checking the oil flow to the heads on the engine in the green bean, it seemed to be quite pulsitile, like it was only flowing for part of the camshaft revolution and blocked for some of the time. I guess that would cause some pulse waves in the tube leading to extra stress that could progress to cracking of a weakened section after much use.

Cheers, Ken
I don't think so..... the pressure or pulsing involved cannot cause fatigue here, because the blocking effect is very soft and the max pressure is so low.

A pipe leak here never spurts, it just dribbles.
The cause of the leak, is a degradation of the pipe by wear or corrosion. And it's amazing how thin it can get before it is weak enough to fail.
 
Yeah, it was dribbling, but consistently. Sort of a mid Winter cold type nasal drip! (Maybe I should get her checked for Covid?)

Given the distance from the oil pump via several galleries to the oil pressure switch and thence to the nether regions of the pipes, I don't reckon pulsing would survive, but it's a good theory, and I'm always up for a good theory, no matter how many facts discount it! :)

I can feel a rebuild coming on, with new pipe and maybe an additional bit at the pressure switch end to attach a proper oil pressure gauge as well. Something else to keep me in the shed and away from the Plague!

I'd better get some silver solder flux and rods. A good excuse for Jaycar click & collect online shopping expedition.

Cheers Chaps. Pottsy
 
Once more we triumph over the Powers of Darkness.....until the next time.

GiSelle is now, at least for the moment, holding her fluids in like a proper Lady.

I had a spare oil pipe assembly so after cleaning it up and replacing all the supporting rubber bits, it's fitted.

I decided to create a separate fitting to add on so that I can monitor the oil pressure. I designed it to use either the electric sender or a more normal type of oil pressure gauge fitting. Both are 1/8" BSP thread.

After experimenting with a bit of brass rod, unsuccessfully, I scored a bit of aluminium square from No 1 Son. Once I'd marked and drilled the holes I set it up in the lathe and milled the step down to 7mm or so. Yes, I could have used a proper mill but the one to which I have access lives at No 3 Son's house and I figured I had nothing to lose by having a crack. I've learned a lot about lathing lately!

Originally I intended to sandwich the "step" part between the block and the pipe assembly but this put a bit much of an angle on the assembly, so I've gone the other way and sat the block on top of the assembly. I machined the oil pressure switch thread down a bit and drilled a second hole so the Banjo Fitting still has enough clearance for the oil pipe assembly despite being positioned further down the oil pressure switch.

A small hole between the threaded sensor hole and the step part is plugged at the outer end with a grub screw.

All sealed up with anaerobic sealant. The proper copper washer top and bottom and a paper gasket between the bottom of the block and the pipe assembly.

It works, it doesn't leak and there's room for the electric sender and to spare.

The fitting of the gauge is part of the next phase of GiSelle's renaissance. Since the dash has to come off completely to replace the wiper spindles, the opportunity for a re-work will be too good to miss.

In the meantime, she's sitting over a bit of clean cardboard and we'll see if her continence issue is at least partly resolved.

A Shed cleanup then it's back to the Monster Mini Motor.

Cheers, Pottsy
 

Attachments

  • Adaptor assembly.jpg
    Adaptor assembly.jpg
    129.3 KB · Views: 125
  • Adaptor in situ.jpg
    Adaptor in situ.jpg
    74.7 KB · Views: 132
  • Adaptor in situ 2.jpg
    Adaptor in situ 2.jpg
    68.9 KB · Views: 139
thats exactly where my pipe went crack too Ray. I did a patch on it, flared some copper pipe and brazed on, or should I say silver soldered, a plumber I know gave the heads up on what rod to use, new rubber clamp liner on it and tightened up just so. Theres quite a bit of stress on those. pipes when fixed. Anyway hoping it'll hold when I finally get it all back together, have copied your return hose to three way plastic but yet to install. Can only get down in there for short periods fearing a disc will bulge! mine not a brake...
 
Last edited:
Just want to re-iterate what a great thread this has been - I've been working on my 4 speed, and there have been some great tips.
Once the car is back on the road, I'll write up the whole lot, but I've just had some success removing the sealing rings and bearings from my output shafts using a slightly different procedure, so I figured I'd put up my procedure for those playing at home.

I had a "sacrificial" output shaft to work on, so I figured I'd try and get that one apart, and make any mistakes there.

I started out much the same as Pottsy, in trying to use a standard 3 jaw puller on the ring nut, but it quickly ran out of steam without anything moving.

Next try was to try and use some 5mm angle steel ground to slip in under the ring nut, and supporting that in my 20 ton press.
No joy there too, even with heat and penetrating fluid applied; the ring nut started to distort, and the angle steel started to bend.

After some cursing, i decided to try using my set of bearing splitters to get under the angled bottom of the sealing bush, and to support the splitter in the vice.
P3drWpf.jpg

Initially, I had the same result, just watching the splitter starting to bend, but after a heat cycle and some more penetrating oil applied while hot, there was a *crack* and the sealing ring started to move.
MBgD3yg.jpg


Now that the seal bush was out of the way, I went back to the 3 jaw puller in the vice.
Using the same technique, (heat and penetrating oil), the bearing started to move, and came off with
no damage to the ring nut.

To protect the top of the output shaft, I removed the pointed end from the puller, and put a thin piece of sacrificial steel between the top of the puller's threaded rod and the shaft.
m6ZNk6H.jpg


Net result:
W9RxwgO.jpg


The fun part will be getting the new bearings and sealing rings on. I don't have a 26mm bore tube to use to press them on, so I'll have to come up with something. What did you use Pottsy?
 
Ken

From memory (tenuous at best) I sat the threaded collar/bearing/seal ring on the "table" of my press with the shaft poking out the bottom, like one's face on a massage couch. Press then squidged onto the centre of the drive flange face and Bob's yer Mother's Brother.

Cheers, Pottsy.
 
Top