Bentleigh East's most practical 307 wagon

Where did the low beam lights come from, this vendor or another?

Now looking for a 406HDi wrecking to do the intercooler on mine as well, always wanted to do this.

Excellent work.

Matt
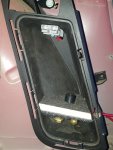
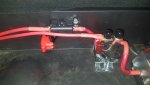
Low beam lights came from the same vendor "CN360". Again I went with a T5 as it doesn't put through a low reference voltage to test for blown bulbs. The high beams I have to go for a different design as the positioning of the LED on the light base retracts at the wrong angle - I think my parklights actually have a brighter spread haha. But realistically it doesn't matter because as soon as I flicked the light bar on it turns night into day :)

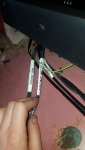
To fit these LED lights to a T6 you would need the canbus resistors.

Sent from my SM-N950F using Tapatalk
 
I thought I had put the pictures of the seats up. But obviously didn't. Apart from narrowing the rail width and length to make them fit into a 307, a lot of work was required modifying the electric forward back motor. This single piece of engineering is brilliant. Every other electric seat manufacturer take note. As you can see in picture 1 the flexible shaft between the motor and the rail movement device (?) Is flexible. Narrowing the width put a significant kink in the shaft. Complication no2 is the C5 rails sit more proud of the floor than the 307. The 307 has a large front crewmember that the rail movement device input bracket fouls on when moving the seat forwards. Luckily they have multiple Holt holes so you can change the angle. And as I needed them to be at the same or higher level to the rails to clear the crossmemebr, I was able to remove and swap from LH to RH rail. This in turn put the input higher than the rail. Coupled with the various mounting holes I was able to "lift" them higher to clear the crossmember WITHOUT having to put strength reducing rail spacers and longer bolts. These bases took the majority of the time to figure out and make work.

But totally worth it.

Have I mentioned how comfortable this is to drive.....
8f5cac2a51d239eef1f34a931effb83d.jpg
1074ca5ad2d379cb702ed7b6c8604a40.jpg
4958ef95b30c9091a69765128f1b4059.jpg
6f4bd522a030f3befe414a678e1b8e7f.jpg
5c71145df58e02f2c9d0c60698b53ccb.jpg


Sent from my SM-N950F using Tapatalk
 
A few pre COVID photos from the last time I had a weekend free to get out. Swag has now been updated to a smaller higher quality easier to roll up single handed darche unit. The kings did exactly what I needed it to do when I was going out to bendigo every weekend for flight training, however I can do the exact same thing now with this newer setup and the knowledge that the darche will last. Plus i don't need to go to bendigo anymore.
a39006a77340c942050f0fe00bf88457.jpg
f5615220e122b211728c03955b25933b.jpg
ccb92c733da0ad4a6a0fb1705b166d59.jpg


Sent from my SM-N950F using Tapatalk
 
Just once before, I think.

But it looks to me like you'd be just as comfortable sleeping in it!

Have you converted the back seat(s)?
Yes. Drivers seat is great for power naps.

I also have a foldable false floor that i made after learning that setting up a swag at 1am in 2 degree wet weather and howling wind is less than ideal. Slide fridge to the RH side and remove LHR seat base (2 seconds), fold down LHR seat back and false floor slots into place. I then fold out the 3 piece wanderer mattress and fit very comfortably. But the condensation is a nightmare....

I am currently designing a new false floor system that locks into place for extended periods. I can't remove the rear seats as then I have to register it as a 2 seater (crazy frustrating vicroad laws). On a side note if you have a complied 7 seater 308 and you take it in for a RWC it will fail if you leave the 2 rear seats at home. Illogical right? So the seat base for the RH side will fit in front of the folded LHR seat and the LHR seat base will slot over the inverter under the LH side false floor. On the RH side under the hinged false floor I'm am mounting my EPSOM XP 970 wireless printer, which was selected due to its size, and print A5 paper in an onboard enclosed paper tray. I use the A5 printouts when i'm flying (paper printouts don't run out of battery charge....)


Sent from my SM-N950F using Tapatalk
 
I love this build. Reminds me of my Berlingo camper that took me and my wife from Brisbane to Melbourne and back over a few weeks. Only this build has craftsmanship and my build challenge was to not buy any parts and get them all for free (the convertible couch/bed worked pretty well for scrap wood actually). Maybe when I get the wife's C5 up to full reliability I'll build a lightweight camper trailer on a Berlingo axle (towing independent suspension would be much nicer than a leaf spring axle).

If you want to lift the 307 I've got some 405 stock struts and springs here in Brisbane. Not sure if you need the spot to mount the antiroll bar to the strut though (they're on the hub on the 405). I swapped to GTi 180 struts and it's about a 60mm drop, so it would probably be quite a lift on a 307...
 
They just fly out the window. :crazy:

You keep mentioning Bendigo. Is that where you’re flying from?
I used to fly a lot out of bendigo as unlike moorabbin the weather was more predictable, and I could always get a plane and an instructor when required.

Now I fly predominantly out of moorabbin. Although not currently due to the covids...

Sent from my SM-N950F using Tapatalk
 
I used to fly a lot out of bendigo as unlike moorabbin the weather was more predictable, and I could always get a plane and an instructor when required.

Now I fly predominantly out of moorabbin. Although not currently due to the covids...
The reason I asked is because my brother recently learnt to fly. I don't remember what particular licence he has. And he was learning at Bendigo, which is where he lives. He is still getting a plane when he wants to go flying for practice, especially for what ever test is coming up next.
 
The reason I asked is because my brother recently learnt to fly. I don't remember what particular licence he has. And he was learning at Bendigo, which is where he lives. He is still getting a plane when he wants to go flying for practice, especially for what ever test is coming up next.
I was with a flight school that copped a lot of unjustified bad press late last year. I am now a private student working towards CPL (have an RPL with many many design feature endos).

Such a brilliant time to change industry and go into aviation....

Sent from my SM-N950F using Tapatalk
 
After all of that work?

What are you going to do with the car?

A lot of the stuff is going into my prado.

The 307 is going up on car sales hopefully Sunday. I'm reworking the setup currently to allow fitment of a battery box in the rear (drawers have been removed to go into a mates 307) via an Anderson plug (if the theoretical new owner wishes to use it). The multitude of usb points still remain. The mismatch interior has been removed (C5 seats going into my mates 307...) and is being replaced with a complete leather interior. Audio is staying (after upgrading the prado over the last few months again with bits that didn't come in that spec) as well as steering wheel, self dimming rear vision mirror, 17" 307 CC sport rims, T6 taillights, all front headlight LED (not the light bar). Engine remaining untouched. Car comes with RWC and 2 months rego.
 
Personally, I think the modifications you did will be too heavy for the 1.6i TU5JP4 engine on a 307 wagon to pull, considering that 307 wagon with that engine is already underpowered from factory. Probably a 2.0I EW10J4 or 1.6 - 2.0 diesel would have been better, I think.

Ikenna351, Lion King - Monk.


Edited.

Just read that its DW10 engine. Please, ignore the above comment then.
 
So i ended up making a shelf inside the boot area on the RH side. On the upper edge i have mounted the Anderson connector, and on the lower shelf that i made i have installed an isolator switch (to the main battery). The Anderson passes through a maxi fuse and then into the Aux fuse box. The shelf sits a little lower than the face plate so the base is hidden away.
 

Attachments

  • 20200802_113233.jpg
    20200802_113233.jpg
    125.2 KB · Views: 113
  • IMG-20200802-WA0015.jpeg
    IMG-20200802-WA0015.jpeg
    113.5 KB · Views: 104
For ease of use for the next owner, i re-made all harnesses and labelled on both ends to avoid confusion. Power cables have also been replaced to be neater and all cables/harnesses have been cut to size and are tidy.
 

Attachments

  • IMG-20200802-WA0011.jpeg
    IMG-20200802-WA0011.jpeg
    74.2 KB · Views: 113
Today I incorporated an overide switch. This will allow a battery box (house battery) in the rear to jump start the main starter battery if required. It is fitted with an illuminated missile switch to make it very obvious that it is on. If it is accidentally left on, it overides the dual battery isolator and will drain both house and starter battery if a power hungry device (read fridge) is left connected.
 

Attachments

  • 20200806_115205.jpg
    20200806_115205.jpg
    232.8 KB · Views: 116
  • 20200806_115212.jpg
    20200806_115212.jpg
    202.6 KB · Views: 113
  • 20200806_115222.jpg
    20200806_115222.jpg
    35.8 KB · Views: 112
Top