Another Dauphine Gordini Ressurection

Dauphinegordini

Member
Tadpole
Joined
Jul 6, 2020
Messages
57
Location
Perth
I have recently taken delivery of a 1091 1961 Renault Dauphine Gordini. Its an ex SA car which has been through a couple of hands in WA before coming to me. Its basically complete but has been sitting unused for a few years. My aim is to first up getting it mechanically A1 and then getting it registered on club registration before tackling a full body restoration.

A big thank you to Ray (Geckoeng) who helped pick it up and bring it to its new home where it is now living with its younger Renault brother.

20200621_152408_copy_1008x490.jpg
20200621_152432_copy_1008x490.jpg
20200630_122159_copy_1008x2073.jpg
20200630_125334_copy_1008x490.jpg
 
First job to get the brakes working!! As you can see from the photos they were a bit sad with all wheel cylinders and the master cylinder seized and rusted. So removed these and sent them out for refurbishment and stainless sleeves to be added and new flexible lines to be made. While these were away getting refurbed I removed the brake backing plates de-rusted the clips and springs, checked wheel bearings, king pins which required an additional shim to take up the vertical movement in the left hand side. Ordered some replacement front brake shoes from Ebay and sent the rears out for re lining. Unfortunately the items from Ebay are from an earlier model of the Dauphine and are narrower and have a slightly different shaped core so cleaned up the originals which dont seem too bad. The rear shoes came back and were not the ones I have sent for relining. They have the same pattern core as the ebay items. The supplier are now trying to find my original shoes.
 

Attachments

  • 20200703_161951_copy_1008x2073.jpg
    20200703_161951_copy_1008x2073.jpg
    529.7 KB · Views: 175
  • 20200703_162006_copy_1008x2073.jpg
    20200703_162006_copy_1008x2073.jpg
    548.2 KB · Views: 178
  • 20200707_105104_copy_490x1008.jpg
    20200707_105104_copy_490x1008.jpg
    221.3 KB · Views: 178
  • 20200707_112144_copy_490x1008.jpg
    20200707_112144_copy_490x1008.jpg
    178.4 KB · Views: 182
  • 20200708_095859_copy_490x238.jpg
    20200708_095859_copy_490x238.jpg
    70.5 KB · Views: 177
  • 20200707_145447_copy_490x1008.jpg
    20200707_145447_copy_490x1008.jpg
    214.6 KB · Views: 179
  • 20200710_120222_copy_1008x2073.jpg
    20200710_120222_copy_1008x2073.jpg
    480.6 KB · Views: 178
  • 20200724_115734_copy_490x1008.jpg
    20200724_115734_copy_490x1008.jpg
    158.8 KB · Views: 181
  • 20200724_115802_copy_490x1008.jpg
    20200724_115802_copy_490x1008.jpg
    136.2 KB · Views: 177
I had a feeling we'd hear the "still trying to find the right ones" line..... :(

Good you are posting this thread!
 
Well the original shoes have not been located so thanks Geckoeng Ray we were able to modify the incorrect ones. These are all now fitted to the car just need to bleed them and then its time to get the engine running.
 

Attachments

  • 20200728_160022_copy_490x1008.jpg
    20200728_160022_copy_490x1008.jpg
    233.5 KB · Views: 170
Well the original shoes have not been located so thanks Geckoeng Ray we were able to modify the incorrect ones. These are all now fitted to the car just need to bleed them and then its time to get the engine running.
That's the final nail in the coffin for my giving Perth Brakes any more work. I imagine they were thrown out immediately they found the old stock.

Sometime we'll find a set of the correct shoes I imagine, not that it won't make a substantial difference to the braking for WA use. We're not in the Alps.
 
Can these be changed to ball joint front suspension? Maybe swap the whole front setup with R8/R10? That would give you a nicer front suspension/steering and disc brakes to boot! Come to think of it, why not do the rear as well?
 
Can these be changed to ball joint front suspension? Maybe swap the whole front setup with R8/R10? That would give you a nicer front suspension/steering and disc brakes to boot! Come to think of it, why not do the rear as well?
Yes, quite a few have had the R8/10 cross member fitted over the years. Ditto bolting in the rear cross member and making attachment points for the trailing arms.

The disc brake calliper brackets bolt onto all RERs and fit easily to all the 1957+ cars with disc wheels. See photo, showing R10 steering rack too.
4CV disc brakes sml.jpg
 
  • Like
Reactions: COL
I was just going to say that the disc brakes are able to be bolted to the 4CV and Dauph spindles (which they are) but then I saw the tie rod end and the upper control arm and realised the 4CV photo was of a R8/10 front crossmember and complete suspension. I have done 2 Dauphine and one 4CV updated crossmembers with"all the fruit' and they are awesome on the brakes and handling with the new suspension. Although with a good king pin front end they still steer very well.

Ray
 
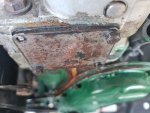
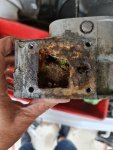
Well this week was 1 step forward and 2 steps backwards. I received my rebushed starter from Geckoeng on Monday fitted this and my new battery and tried to get her started. After a bit of messing around I realised the distributor was not sitting correctly in the block. Pulled it out repaired the locking clamping bracket which was causing the problem. And had her running very nicely. Then I noticed a coolant leak from the inspection plate at the rear of the head. So I thought I would simply make up a new gasket. Sprayed some wd40 penetrant on the bolts holding this in place and left it overnight. Today I turned the first bolt and snap the head broke off. Not to worry once I remove the plate there would still be enough of the bolt to get some vice grips on the shaft to remove it. 2nd bolt came out easily third one snapped but this one has snapped off flush with the head. It is going to be a bit difficult to remove. It appears to me I am going to have to remove the head now to get tools in to be able to remove this unless anyone has any other brilliant ideas.
 

Attachments

  • 20200925_090355_copy_1000x750.jpg
    20200925_090355_copy_1000x750.jpg
    154.5 KB · Views: 170
Drill in the centre and use an easy out? ( something I bought from suoercheap - removes broken bolts)
 
That's not an uncommon problem I'm afraid. You can buy right angle drive attachments for drills, probably at Toolmart. Very useful accessory!

You need to try and check inside the head for the condition (and open-ness) of the long steel tube that controls the coolant flow. You'd be able to look in there with a mirror. Better access with a 4CV of course.... :)

Chat tomorrow perhaps.
 
Be careful with easy outs with rusted stud - they can break off in the stump leaving you with a very tough irregular steel core to a dead stud and you further in the shit.

A way which involves a bit less risk and commitment, if you have access to a lathe, is to make an insert for the offending hole in the plate, with a central hole for a pilot drill ( 3mm or so ). Centre pop very accurately, then use the guide in the plate ( bolted by surviving set screws to get alignment ) to drill pilot hole

Then drill successively in 0.5 mm steps until you are at the tapping drill size for 6 mm metric ( 5 mm drill ). Then use tap to remove Remains of set screw and cut new thread

A variant is also to make a second insert with the 5 mm hole for the tapping drill, which allows you to make it a two step process

Access for this is easy in 4CV, not sure about Dauphine

A variant of this trick got me out of a similar situation recently with Lurch ( Haflinger )

Good luck

Andrew
 
I never managed to get easy-out type thingos to work.

Most of the time those bolts/studs are so hardened by the repeated heat/cool cycles they are like glass and you can't even drill them without the drill wandering all over the place and destroying other stuff.

In my view you have two options now (short of removing the head and doing it properly).

1. Weld something on the snapped heads and use that as a lever to turn the screw. The screw might snap again somewhere lower than the surface and now you have to drill it.

Alternatively, after you weld something on it go through process #2 below and use the welded extension just to wiggle it around and gently test if it turns. Welding might put enough heat in it that it may release.

No welding possibilities? Keep reading.

2. Use Loctite (or any other brand you fancy) freeze and release. Give it a good squirt. Wait a bit, check if it is really cool before the next step. The casting should get cold too. Get a small propane torch and put some heat in it. Let it cool a bit and repeat the Loctite treatment. Go through a few of these cycles and see if you get it to release. You can also use some WD40 in there and let it sit overnight to soak in. If you're lucky, it will come out eventually. This has the advantage that it doesn't rely on brute force so the screw won't snap again. It is slow and expensive though. That Loctite stuff ain't cheap, but in my experience works. It may take a few days but the upshot is you are guaranteed not to destroy anything else. This is now my preferred method after many similar very difficult incidents.

EDIT. Andrew beat me to it, his suggestion works well, but I assumed you don't have the room you need to stick a drill in. A right angle adaptor for the drill is golden but you need the steadiest hand in the game and you need to aim it dead nuts square and centred otherwise you'll end up in the alloy casting.

If the bolt is as I suspect glass hard, I would suggest forget all drilling options. Even with a carbide drill bit (very exxy) you might screw it up, this time for good, because if you snap that in, nothing will drill through it.

If you want to use a drill guide, you can use brass tubes from model shops. Those come in convenient sizes both metric and imperial that slide inside each other so you can up the diameter in small steps. Not cheap, but very good when bolts snap below the surface because you can insert a large dia tube fest with the hole and then more tubes inside that until you get the diameter down to whatever drill you want to use first. Keep them long enough the drill has good lateral support.

And lastly, if you have to drill, don't use a corded drill. Use a small battery powered drill, or even better one of those nut drivers you can adjust the speed right down to a rather slow action. Remember, you need torque, not speed to go through tough metals.
 
Last edited:
My Eazy Out experience is mostly bad but not always - I had more or less the same conversation yesterday with Mr DG. Another trouble is access to the end of the Dauphine cylinder head. Easy, just pull off the head but what worms will be exposed when the lid comes off that tin! It's encouraging that one of the bolts unscrewed....
 
2. Use Loctite (or any other brand you fancy) freeze and release. Give it a good squirt. Wait a bit, check if it is really cool before the next step. The casting should get cold too. Get a small propane torch and put some heat in it. Let it cool a bit and repeat the Loctite treatment. Go through a few of these cycles and see if you get it to release. You can also use some WD40 in there and let it sit overnight to soak in. If you're lucky, it will come out eventually. This has the advantage that it doesn't rely on brute force so the screw won't snap again. It is slow and expensive though. That Loctite stuff ain't cheap, but in my experience works. It may take a few days but the upshot is you are guaranteed not to destroy anything else. This is now my preferred method after many similar very difficult incidents.

Love "Freeze and Release" works, and doesn't destroy everything around it! Must remember to use it before snapping the bolt!
 
Removed the head yesterday and today drilled out the bolts and then tapped and cleaned up the threads. The valves all look good bores are fine only worms I can see are the steel pipe running through the head has a lot of gunk in it and some corrosion it was actually blocked so the head had to come off anyway. Now I have to clean it up to better inspect the steel tube probably replace it. wait for my gasket set then put it back together.
 

Attachments

  • head.jpg
    head.jpg
    190.9 KB · Views: 175
Yuck. That looks pretty grotty. Now you've got to clean the head inside and I would have a look inside the block as much as possible around the liners because that crap isn't only in the head.

Maybe resurface that face too.
 
I haven't done many easy outs, but mine have come out ok, including this broken exhaust manifold stud came out ok

IMG_6185.JPG
 
I haven't done many easy outs, but mine have come out ok, including this broken exhaust manifold stud came out ok

View attachment 125929
They are designed for broken over-torqued studs and work well enough for them - yours looks pretty clean

Studs which have broken through having taken up residence for 60 years and becoming thoroughly rusted in and heat treated, as Schlitz noted, are a different matter, which prompted my comment above.

Depends upon why the stud/set screw broke

Best Wishes

Andrew

Andrew
 
Top