A few upgrades to the 504.

Pug72

Active member
Fellow Frogger
Joined
Feb 11, 2013
Messages
538
Location
Brisbane
HI all

Given that my 504 is still used as a daily driver, sometimes modernisation is a necessary evil (I've already added central locking, tinted windows and air conditioning) So all you purists may wish to turn a blind eye for what is going on below.

Firstly, i have been chasing rattles for a long time. Bottom line is I hate rattles! I have been chasing an under bonnet rattle for a while now and narrowed it down to the bonnet support. So after some head scratching it was removed and replaced with gas struts. Makes working on the motor mush easier now.

Secondly, the boot lid hinge springs break occasionally, so the boot lid was treated to the same gas strut arrangement. While I was in there, retractable seat belts were finally added to the rear seats (had them sitting on a shelf for 3 + years). I am not overly excited about the size of the mounts, but this is want the engineer wanted to see. It didn't help that the previous owner and cut huge holes in the rear parcel shelf for 6 x 9 speakers.

Thirdly added the tow bar that was also sitting under my house for a long time. This took some head scratching as well, given that I have a 195 sized tyre stuffed in the spare tyre space and the tow mounts needed some re-fabricating.

Also added a large led boot light and another led light for the rear passengers.

Happy days....
Rear seat belts.jpg
LH seat belt mount.jpg
RH Seat belt mount.jpg
Boot gas struts.jpg
Tow bar.jpg
bonnet gas struts 1.jpg
bonnet gas struts.jpg
 
To me, they all sound like pretty good mods! You have that car looking very nice.
 
Good one Pug72

Totally get the mods, especially in a daily drive. Nothing garish or outlandish, just sensible refinements.

Nice looking car by the way.

Cheers

Dano
 
504s are wonderful old things.

Mine got one long strut on the bonnet (LHS) but I have a stock of boot hinges to feed it springs. Central locking yes, air, yes, rear inertia reels - it's June '80 so already had them. Added a vacuum cruise control. Has 604 power steering and trapezoidal headlights with the auxiliary reflectors, fog lights and an 80 amp alternator. It also has a noisy 5 speed in it, but I'm not convinced about that and I think I'll put a 4 speed back in. Currently held up with 15" alloys (cheaper tyres) but I don't like the look. At the moment it's off the road sulking and waiting for a respray and its old 14" wheels back while I drive a 306 XT...

I like the gas struts on the boot!
 
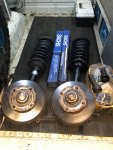
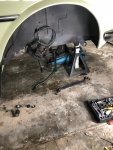
Time for a front suspension overhaul. I had noticed that the front left strut was leaking fluid so after collecting all the parts needed to rebuild the struts, it was time to remove them from the car.

Next step is borrowing a mates spring compressor and pull the struts apart, clean them up, replace the bottom ball joints and rebuild the struts.
 

Attachments

  • packed and ready.jpg
    packed and ready.jpg
    489.6 KB · Views: 151
  • removed.jpg
    removed.jpg
    429.5 KB · Views: 161
  • top view.jpg
    top view.jpg
    329.3 KB · Views: 154
its a good idea to clean and loop the roller bearings that the strut rotates on ,made the world of difference to the steering on my 404 .when i replaced the shocks recently ,pugs
 
PS ,THE SPRING COMPRESSERS WITH THE DOUBLE CLASPS ON THE SPRING ARE A BIT MORE PREDICTABLE AS THE SINGLE CLASP ONES CAN LET GO BECAUSE OF THE ANGLE OF THE SPIRAL ,CHECK OUT ALTERNATE METHODS ON HERE USING LUMPS OF HARDWOOD AND THREADED ROD ,THERES A HELL OF A LOT OF FORCE TIED UP IN THE COMPRESED SPRING, THAT CAN COUSE EXCITEMENT AND OR DAMAGE IF IT LETS GO ,,
 
All good gents, borrowed a close to factory style spring compressor. Being such a long spring, I doubt those small style clasp spring compressors would work effectively (and safely).

Struts are now dismantled and springs are on their way to the sandblasters/powercoaters for a repaint.

The only casualty was one of the large nuts holding the shock absorber into the strut. Will try to get a replacement. Hoping that the threads on the strut will clean up ok with the wire wheel. Took a lot of heat to get this nut off. I only had stilsens to work with which made a mess of the outside. The threads are all flat on the inside.


Now to work out how to get the lower ball joint apart at the bottom of the strut. Looks like I need to make a three pronged socket.

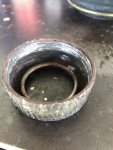
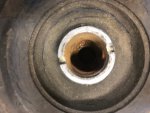
Needle roller bearing has been cleaned and ready for install.

Cheers
 

Attachments

  • End cap.jpg
    End cap.jpg
    639.4 KB · Views: 126
  • inside.jpg
    inside.jpg
    516.7 KB · Views: 132
The top needle bearings in the 404 were notorious for seizing in icy climates (Sweden). I always used a small spring compressor on strut springs and took several bites with the assistance of No8 fencing wire to tie off as I went. There's a lot of force locked down there.
 
Yep, Stilsons are the way to go for the amateur. I use a fairly large old pair that belonged to my now departed father - a retired plumber. Last time (many yonks ago) I bought new strut inserts they came with new top nuts but that could be a thing of the past. The bottom ball joints are usually very firmly attached. I bought one of those cheap tuning fork ball joint separators which worked well, although it ruins the ball joint rubber.
 
Reminds me of a funny story a mechanic told me many years ago - he was dismantling a 404 strut and the spring compressor let go. The flying parts caught him fair in the wedding tackle resulting in heavy bruising. His wife was convinced he was having an affair...
 
Now to work out how to get the lower ball joint apart at the bottom of the strut. Looks like I need to make a three pronged socket.

I made one of them once. If you measure carefully, it can be done without too much difficulty using an old socket. The trick whilst using it later is to keep everything at 90 degrees, if you know what I mean. You don't want it to become the wrong angle or one of the little arms will break off very easily.
 
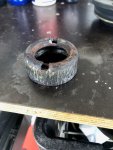
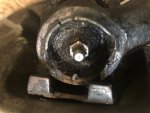
I haven't touched the struts since I pulled them out on Wednesday. Mainly because one of the lower ball joint closing nuts is severely butchered. Going to take some persuasion to undo. It looks like the edge has been hammered in one spot to prevent the nut from undoing.

Is this the correct method of installation (see pic)? No mention of it in the Workshop Manual

Strut tops need to be cleaned up and painted mainly where the bump stop sits. Plus i'll need to carefully clean up the fine threads at the top of the struts.
 

Attachments

  • Struts.jpg
    Struts.jpg
    717.8 KB · Views: 143
  • Butchered cap.jpg
    Butchered cap.jpg
    714.9 KB · Views: 143
I haven't touched the struts since I pulled them out on Wednesday. Mainly because one of the lower ball joint closing nuts is severely butchered. Going to take some persuasion to undo. It looks like the edge has been hammered in one spot to prevent the nut from undoing.

Is this the correct method of installation (see pic)? No mention of it in the Workshop Manual

Strut tops need to be cleaned up and painted mainly where the bump stop sits. Plus i'll need to carefully clean up the fine threads at the top of the struts.

Pretty standard fitment. You grind a small punch to hit down behind the notched in bit and push the material (which is quite soft) in enough to clear the thread. The nut on the strut bottom is similarly notched in and will require the same treatment and a knock with a punch to start it undoing. Tools do exist but are rare.
 
Ah yes...the outer one. I thought you were referring to the inner one.
Many people use a blunt chisel and small hammer to tap anti-clockwise on the outer one (as you pictured) to undo it. Then after doing it up the same way they peen it against the housing. If you want to be careful, I guess you could always cover the pointy end of the chisel (even though it is blunt) with a bit of copper you could cut off a pipe...

You can't employ this technique on the inner one.....a small tool has to be made, and it needs to be done up to a specified torque.
 
make sure you use a new inner nut, punch the sleeve part to lock it into the recession on the shaft and use loctite for good measure.
 
Secondly, the boot lid hinge springs break occasionally, so the boot lid was treated to the same gas strut arrangement.

Hi. Great work.

May I suggest that you flip all of you gas struts end for end. I recall years ago that I was told by a Mech Eng that worked at stabilus struts that the rod should be lower or face downward relative to the body. This way the internal oil constantly lubricates the gland bearing and rod seal. The main advantage being that the nitrogen gas leakage rate is much reduced and your struts maintain their thrust for much longer.
 
Good tip Whippet, makes sense

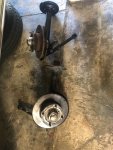
Ok...had an hour spare tonight so thought I'd get stuck into removing the old lower ball joint.

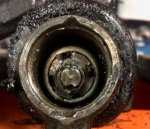
Whipped the disc off, removed the backing plate, then was able to remove the outer nut quite easily. The inner nut however is not moving. I suspect I need to focus more on removing the squashed part siting against the pin. I also suspect that the proper tool would make life a lot easier....so I'll do some more head scratching on that one...unless someone on here has one I can borrow???

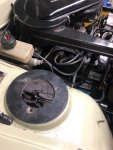
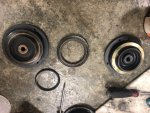
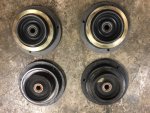
I did manage to clean up the needle bearing that sits under the top pad mount. The old grease was very sticky. Lots of cleaning and fresh light weight grease and it turns freely now.

I was surprised at the amount of rust inside the collar of the top pad (passenger side) given that this car hardly gets wet!
 

Attachments

  • Old top pads.jpg
    Old top pads.jpg
    352.3 KB · Views: 106
  • Old V New.jpg
    Old V New.jpg
    321.1 KB · Views: 109
  • Rust.jpg
    Rust.jpg
    308.6 KB · Views: 107
  • Inner nut (2).jpg
    Inner nut (2).jpg
    63.6 KB · Views: 106
Top