505 GTI brake master cylinder - How to take a Bendix unit apart?

Hugo

Member
Fellow Frogger
Joined
Aug 4, 2013
Messages
133
Location
Melbourne
Hi all,

The work to get my 505 1993 GTI wagon back on the road continues... :) And another newbie question, this time about the brake master cylinder.

I just removed the brake master cylinder. It it a Bendix unit. Can anyone tell me how to take it apart? Nothing relevant in the Haynes manual.

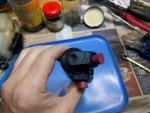
It isn't held together with a circlip and washer at the front like the ATE unit. It does however have some spring pins (beneath where the reservoir joins the cylinder) which also come with the repair kit – do they have something to do with taking it apart? Here is a photo of one:
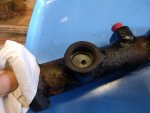
IMG_20180819_134841.jpg

I'm guessing the spring pins act as stops,but there is no exit for them on the other side so hammering them further in is not an option I guess. Also, I can't see how to pull them up and out.

Any info much appreciated.

Cheers,
Hugo
 
Hi all,

The work to get my 505 1993 GTI wagon back on the road continues... :) And another newbie question, this time about the brake master cylinder.

I just removed the brake master cylinder. It it a Bendix unit. Can anyone tell me how to take it apart? Nothing relevant in the Haynes manual.

It isn't held together with a circlip and washer at the front like the ATE unit. It does however have some spring pins (beneath where the reservoir joins the cylinder) which also come with the repair kit – do they have something to do with taking it apart? Here is a photo of one:
View attachment 108497

I'm guessing the spring pins act as stops,but there is no exit for them on the other side so hammering them further in is not an option I guess. Also, I can't see how to pull them up and out.

Any info much appreciated.

Cheers,
Hugo

Normally by removing a circlip inside the bore at the end with the mounting ears.

However, be prepared for the possibility of a multitude of pistons, seals, washers and springs to eject forcibly when you remove the circlip.

I have to say, I've not had a positive experience fitting kits to dual circuit masters.This could just be my lack of skills.

I'd certainly make sure you a have rebuild kit on the bench and an accurate exploded diagram before any disassembly.

Alternatively, you could trawl ebay for a new cylinder (my preferred option) Or look on one of the overseas suppliers websites.
 
Last edited:
Hi robmac,

Thanks for the tips. :) I'm certainly keeping a new cylinder in mind.

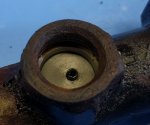
Oddly the Bendix unit I have has no circlip:
IMG_20180819_153608 No circlip.jpg

From sites like the following one, I get the impression there are two variants - ATE (uses a circlip) and Bendix (does not use a circlip):
https://www.onlinecarparts.co.uk/ca...4/15088/repair-kit-brake-master-cylinder.html

I'm wondering if it is possible to pull out the spring pins. :confused:
IMG_20180819_134841 spring clip.jpg IMG_20180819_134841 spring clip closeup.jpg

Still trying to work out how to take it apart to check the condition of the bore. :crazy:

Cheers,
Hugo
 
Oddly the Bendix unit I have has no circlip:

Dig a bit deeper.

The circlip may have no "ears". Ie a round section piece of wire formed into a circle.

Clean it up with a brakleen or carby cleaner and go looking for the gap in circlip groove. Then use a couple of rt angle scribers to spring out the clip.

If there is no circlip it's not able to rebuilt.
 
There is probably a small bolt near the middle on one side withdraw it carefully while pushing the piston in slightly.
 
Robmac, I cleaned up the front of the bore and definitely no circlip unfortunately.

Ianrobbo, thanks for the tip. Unfortunately there is no small stop bolt (as there is on the ATE model).

I haven't given up hope yet since there IS a repair kit for the Bendix unit. :)

If worst comes to worst I'll drill out the 2 spring pins and see if they are what is holding the pistons in the cylinder (which is my current theory).

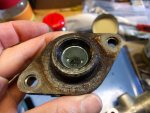
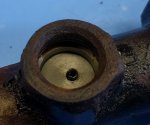
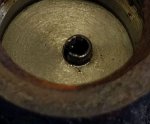
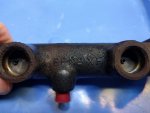
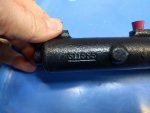
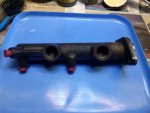
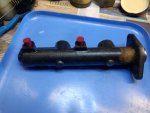
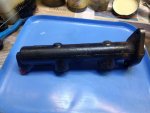
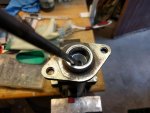
For those forensically minded who like to solve mysteries, here is the master cylinder from all angles (including the piston slightly pressed in by a screwdriver):
1 IMG_20180819_164141.jpg 2 IMG_20180819_164131.jpg 3 IMG_20180819_164100.jpg 4 IMG_20180819_164105.jpg 5 IMG_20180819_164126.jpg
6 IMG_20180819_164148.jpg 7 IMG_20180819_134841 spring clip.jpg 8 IMG_20180819_164235.jpg 9 IMG_20180819_164241 closeup.jpg

Cheers,
Hugo
 
I'm guessing there is a bush interference fitted into the top of the master bore to retain the workings. I can't see it being screwed in place.

Does the top section of the master have any hole in the bush,for a removal tool ? Can you see any fixings for the bush ?

Is there an apparent line between the top of the master and bore ?

Someone on AF must know and how to rebuild these masters.

Robmac, the cylinder itself is 20.6 mm diameter and when the piston in pushed in, the bore is also 20.6 mm, i.e. there is nothing at the open end of the cylinder to stop the piston coming out (in contrast to a typical circlip and washer design). Also, no holes for a bush removal. :(

That is why I suspect some other mechanism is stopping the piston from coming out; something further inside the cylinder I suspect.

The mystery continues. If I can't work it out (it may possibly be not repairable by design) then I'll take it apart destructively to satisfy my curiosity. But I haven't give up yet! :)

Cheers,
Hugh
 
Take a close look for a fixing inside one of the hydraulic ports ?

Yes, had a close look and found nothing. Either I'm missing something (very possible) or it was made to be not repaired (which would be a pity).
 
Those roll pins should be the piston stoppers so try pulling them out with some pressure against the piston outer one first and see what you get
 
I have done this job before. They are indeed called roll pins. And you do pull them out. Use a pair of long nose pliers. Or tiny vise grips with which you can squeeze the pins slightly closed.. I can see in your photo that there is enough protrusion to grab onto. It may help to push in slightly on the pistons. You certainly want to put a rag over the front in case they pop out.
I think once I had to use a small Ezi-Out ( with a tapered reverse thread ).

If the cylinder bore is a bit pitted you may like to make a buffing pad with a piece of coathanger wire, with an "L" shape at one end. Put the straight end in a hand drill and use the "L" to catch onto a piece of rag which you then wind around the shaft. Put some Extra Cut car polish onto the rag / in the bore, and away you go.

Just clean it all VERY well later with a brush and methylated spirits. Do NOT use turps.....it leaves a residue which will affect the rubbers.
 
Last edited:
Excellent advice ianrobbo and Beano! Out they came!! :tongue:

IMG_20180819_202741.jpg

Great to get them out! Thanks everyone for your advice. I needed to grind some long nose pliers to get the rear pin out.

The condition of the cylinder looks pretty good so I'll probably get a repair kit to get it working again. Happy days! :)

Cheers,
Hugo
 
I highly recommend a polish internally....can't hurt at all. And pitting will decrease the seal life.

You've done this kind of job before ? Don't forget the rubber grease ! It is an absolute necessity.
 
I highly recommend a polish internally....can't hurt at all. And pitting will decrease the seal life.

HYou've done this kind of job before ? Don't forget the rubber grease ! It is an absolute necessity.

Hi Beano,

I did a master cylinder before, but probably 15 years ago. :)

I've used a cylinder hone up to 400 grit for the polishing.

What function does the rubber grease have? Is it just to assist assembly or more than that?

Cheers,
Hugo
 
Rubber grease will aid slipping the seals over the pistons and help to prevent tearing. A "little dab will do ya".

The only time I don't use rubber grease during hydraulic system assembly is on dust seals and boots.

It makes them easy to fit but also easier to slip off !
 
Rubber grease will aid slipping the seals over the pistons and help to prevent tearing. A "little dab will do ya".

The only time I don't use rubber grease during hydraulic system assembly is on dust seals and boots.

It makes them easy to fit but also easier to slip off !

Thanks, that makes sense.
I've just ordered the repair kit. Finding the kit was not easy, so if all works out I'll post the details of the kit I bought.

Cheers,
Hugo :)
 
Hi all,

For posterity, I'm adding a short note here to aid in the removal of the roll pins.

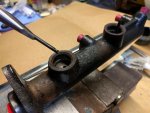
Note that the roll pins have a hole at each end, approximately 1.8 mm diameter:

Here the pin's hole is illustrated in situ with an engineer's scribe. (A scribe is not a good extraction tool however.)
IMG_20231015_231904 sml.jpg


And here, once it is removed, showing the hole at the end of the pin:
IMG_20231017_001220 sml.jpg


The holes make removal of the pins easier in comparison to just using needle nose pliers on the outside of the pins.

Cheers,
Hugo
 
European auto imports have them new for about $80. Saves a lot of mucking around. If you don’t stainless steel sleeve them I think it’s a waste of time. You might have to do again in 5years but a new one you’ll get double or triple.

Never had luck re sleeving them.

I know oddfire v6 (rob) on here has had good luck I’m lead to believe.

Maybe 504 ones are different to 505 in terms of rebuilding.
 
Top