306 Cabriolet - where to get a replacement rear window?

BlackC2

Member
Fellow Frogger
Joined
Sep 17, 2005
Messages
228
Location
Hobart, Tasmania
Hi All,

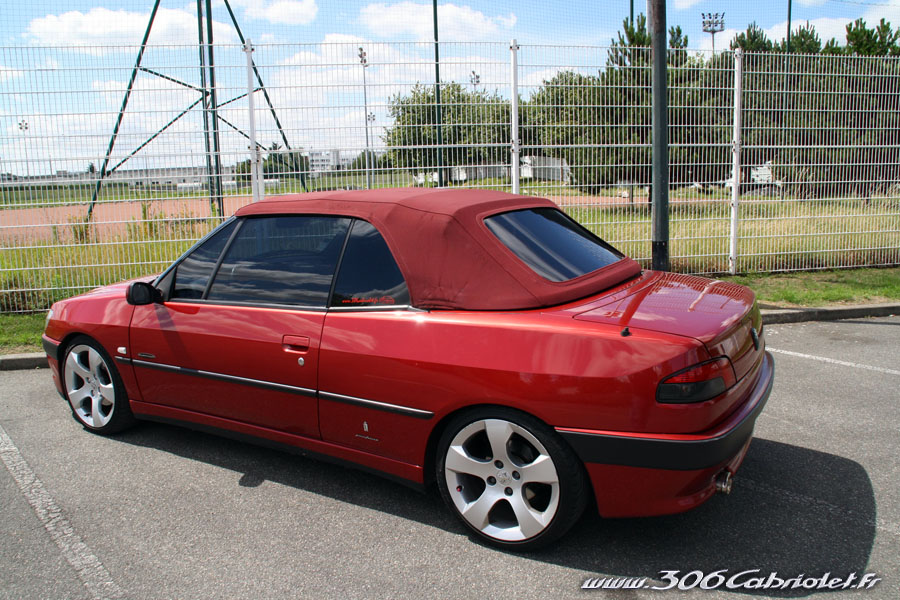
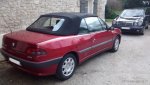
I've just bought myself a gracefully ageing 1999 306 Cabriolet.:approve:

There are a few jobs to do, but that's the idea!

The first one is relatively simple, though - the rear window is quite possibly LESS translucent than the roof material itself!

Any ideas about the best place to get a replacement?

For a baseline, I rang the local stealer and, of course, they don't sell just the window. You have to buy the whole roof - for approximately $5000... (For the sake of sharing, the quote for a driver's seat belt was $699).

Cheers,

Tony.
 
Hi Tony. Good to hear that another one is being used. If you have a look back through the listings, you will find that some one has sourced a supplier from the states for a zip in window. Has not been back to tell us how well it fits yet!! There is a company in either melbourne or sydney that will do you a new roof for about 1200 from memory, 600 to fit. Chase it on google. Cheers, Geoff.:joker:
 
Hi Tony. Good to hear that another one is being used. If you have a look back through the listings, you will find that some one has sourced a supplier from the states for a zip in window. Has not been back to tell us how well it fits yet!! There is a company in either melbourne or sydney that will do you a new roof for about 1200 from memory, 600 to fit. Chase it on google. Cheers, Geoff.:joker:

Thanks for the tips, Geoff. (I did a search before I posted, but didn't find anything :doh:. Will have another look.)

Cheers,

T.
 
Any trimmer should be able to replace the Perspex but would have to remove the roof from the car to sew it . I got a new top for 504 cab from European Trimming Co in England for 545 pounds ,about $900 delivered here.
 
Any trimmer should be able to replace the Perspex but would have to remove the roof from the car to sew it . I got a new top for 504 cab from European Trimming Co in England for 545 pounds ,about $900 delivered here.

That sounds like brilliant value! You really need to know where to go for this stuff, don't you. Out of curiosity, did you have to send them measurements, or did they have a whole set of numbers for various cars already?
 
Thanks for help folks. I've gone ahead and bought from here...

convertiblewindscreen.co.uk

Will share final cost and whether it's any good once I know myself....
 
That sounds like brilliant value! You really need to know where to go for this stuff, don't you. Out of curiosity, did you have to send them measurements, or did they have a whole set of numbers for various cars already?
They have the patterns for all the roofs they make so they don't need measurements .They do 504 cabs because the boss has one .They had black ones ready to send straight away but I wanted cream colour so I had to wait a couple of weeks for it to be made.
 
I'm replacing the rear screen on my recently acquired 306 Cabriolet, too. I'll be following these links!

No trimmer that I've spoken to yet wants to replace just the screen. Something about the zips on mine being damaged and unserviceable. Two of them have told me about a place in Melbourne which makes replacement roofs for the 306 at about $2000 fitted. That's with plastic welds. If I want stitched, it is about $200 cheaper. Plastic welds sounds better for being leakproof.

Thanks for all the tips.

Andrew
 
Update: Window bought and (sort of) installed...

Hi All,

For the sake of continuity, I thought I'd share how the window replacement is going. (It's a bit long winded, so only go further if you're genuinely interested...:rolleyes:).

I ended up buying a replacement insert from the US for $AU142 delivered. It consists of the window itself with a zipper edge attached, two zip tabs to help install and a tube of contact cement (plus instructions - in American:clown:).

DSC_0556.jpg

The original window - or least the one that had to come out: I'm not convinced it was the original - was held in by the zip and a row of stitching through the hood material through the plastic window itself. By contrast, this new window doesn't use stitching - just the contact cement.

(After popping open the roof to relieve all the tension in the structure) The stitching came apart instantly with a craft knife with the blade well extended. Was able to cut it all out with just one lap of the perimeter - literally 5-10 seconds for the lot! The zipper wasn't much harder. As per the instructions, a screwdriver was used to gently part the end of the zip (remember, no zipper tab) then it just peels apart. I found the easiest way was to just run my index finger between the two zips and they just separated easily.

DSC_0559.jpg

This was where it started to get tricky/fiddly. After pondering the instructions and photos - which appeared at first to be contradictory but made sense in the end - the idea is to slide one of the supplied tabs onto the window. The zipper starts and ends at the base of the window - where a high mount stop light would go if it went there - so from inside the car you start there and go right. It's quite fiddly to get it started and I really had to swallow pride and get my partner to help.

The problem here is that you need to have the window centred. If you start the zip a few teeth either side of 'ideal' you'll end up with a big diagonal kink in the window once you're done. We put some white nail polish (thankyou darling!) across one point after our first attempt which gave us a reference. The first attempt was rejected anyway because the zipper started undoing at the start and end points. You're supposed to sew them together when you're done but we hadn't even got that far. The second attempt was obviously out a bit as there was a the aforementioned kink going across part of the screen (bottom left up to the right):

DSC_0562.jpg

So after realigning we tried again and got a better result (though better doesn't mean satisfactory...). Our sewing was getting better all the time (incidentally, this is where you most need a second person, otherwise it's "push the needle through, get inside the car, push the needle back through, get outside the car, push the needle in....").

Unfortunately, this is where we've stopped because I'm still not happy with the results so far:

DSC_0563.jpgDSC_0564.jpg

Though we don't have a diagonal kink across the screen, we do have two diagonal (though mirrored) kinks across the screen. (They are much more even than the photos may suggest.) Also, the vertical tension is such that the hem of the roof material at the bottom of the screen is bent back and away from the screen by the tension underneath. In theory, the idea now is to go around the hem with the supplied contact cement to glue it all down. As it currently is, though, there's no way that's possible. I could probably open the roof to such an extent as to remove almost all the tension before applying the cement, but a) once the roof was fully extended and locked down again, the load on that join would be considerable and b) the ripples in the screen indicate to me that the total length of the screen surface (to be glued) would be different to the length of roof canvas to be glued - so there would have to be a 'hump' somewhere in proceedings (if that makes any sense...).

So mixed results. At least so far. I decided to lock the roof down and leave it all overnight to settle. Maybe the tensions will sort themselves at least a little. How much is me making a mistake somewhere, I don't know. I'm fairly confident that the even nature of the kinks means it's as aligned as it can be. How much is the window being a 'poor fit' is debatable. As my partner pointed out - it's one thing to cut a new one to original dimensions and quite another to make one to fit an old, stretched roof. Having said that, the hope that contact cement can double for actual stitching may be a bit ambitious...

Anyway, will see how it looks tomorrow. May even give it a week to see if that helps. Want to do this as 'properly' as possible but we'll just have to see how that goes.

Cheers,

Tony.
:cheers:
 
Park the Cabrio in the sun...OK it's Canberra in winter and the stress relief due to the temperature rise is going to be minimal. Ask a motor trimmer is this will help(?) and if so find a spray painter that will allow you to 'warm' the vehicle in the booth. Not really required to go to a baked finish but a toasty 40C should do. Or wave a heat gun over the assembly.:confused: :cheers: Brendan
 
I'm replacing the rear screen on my recently acquired 306 Cabriolet, too. I'll be following these links!

No trimmer that I've spoken to yet wants to replace just the screen. Something about the zips on mine being damaged and unserviceable. Two of them have told me about a place in Melbourne which makes replacement roofs for the 306 at about $2000 fitted. That's with plastic welds. If I want stitched, it is about $200 cheaper. Plastic welds sounds better for being leakproof.

Thanks for all the tips.

Andrew

How did you go, Andrew?
 
How did you go, Andrew?

Nothing yet, Tony.

I've had a few second and maybe third thoughts after reading about your misadventures. I was going to go down the path of the replacement screen from the U.S. but I don't think so now.

I've seen some UK ads and I might go down one of those paths.


Via the aussiefrogs App
 
Just thought I'd wrap up with the final result of the rear window replacement project.

In short, not overly happy. The plus is that I can now see out the back window (big plus!) and from a distance it looks ok.

On the minus, the tension was too much for the glue to hold the edges down properly. It seems the new window was simply a little too small for the opening. Wish I'd compared them before putting in the new one and throwing out the old. There wasn't quite enough contact glue to go around. Don't think I spread it on particularly thickly. Used a urethane glue to finish it off. Despite allowing double the curing time on both products before closing the roof properly, the edges still drew away. And, to add insult to injury, in one place where the glued edge has held properly - the poor old roof fabric has ripped!

So one day when I'm feeling rich (snort!) I'll have to look into getting the whole roof done...

:cheers:

Tony.
 

Attachments

  • medium-11492-fjmdoc-4r81.jpg
    medium-11492-fjmdoc-4r81.jpg
    61.3 KB · Views: 159
Top