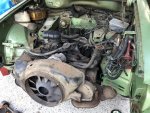
1977 GS 1220 Pallas

KenW Jnr

Active member
Fellow Frogger
Joined
Apr 29, 2001
Messages
416
Location
Brisbane
For last year or so, I've really been wanting to do up and enjoy an older car. For those who know me, it was pretty obvious that it was going to be a Citroen of some sort, the only real question was which one?

After a brief dalliance with a Renault 10S, my Dad (KenW) has always had Citroens, and his first Citroens were his GSes.
I don't have any photos of his first GS, (it went before I was born), but the two I remember was his 1977 Green GS 1220 Pallas, and his Brown GS 1220 Club
This was his Green Pallas on the Indian Pacific, when they were moving back to Brisbane from Perth - around 1981

GreenGS-IndianPacific.jpg

This is his Brown Club underneath the family home soon after we'd moved in and had the place lifted - this would be 88-89.

BrownGS-PearySt.jpg

After a bunch of thinking, Dad let me know that BruceH had a menagerie of GSes at his place, so we had a chat, and I went to look at this.
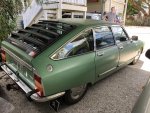
GreenPallas-Back.jpgGreenPallas-Front.jpg

Looking at the chassis numbers, it was the next car off the production line after Dad's, so I guess that means it was meant to be.

A deal was done (for the car, and a half cut with an engine that turns over), and a date was organised to get the car and the half cut to KenW's place as I'm still in the process of getting a double garage organised at mine.
 
Last edited:
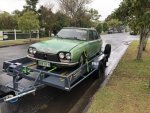
So, a few weekends after, I buttered up a mate with a ute, hired a trailer, and went and picked the car and a half up.

Managing to mostly dodge the rain, we got the car delivered, then the half cut
GS On Trailer.jpgHalfcut on Trailer.jpg

Here it is, sitting in its temporary accomodation
Right Side at M&D.jpg

Now, the parts ordering begins.
 
I've had a bunch of parts arrive lately, so I've been itching to do some work on the car.
Previously, we'd determined that the motor in the Pallas was seized, but we'd started the motor in the wreck (with the distributor from the Pallas, and a jury rigged fuel system).

I booked today off on leave, and tee'd up Dad to spend a day on the car. My aim was to pull the busted motor out of the car, pull the running motor out of the wreck,
and then get the running motor into the car.

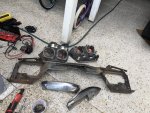
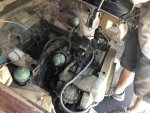
Started off by taking the front end off the car - it all comes off with a collection of 11mm bolts and nuts. Milwaukee M12 cordless wrench came in super handy for this.
IMG_6428.jpg

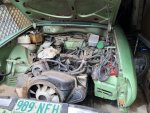
The picture shows the front upper frame, headlights, and the two side bumpers. The bottom section comes off with a few 13 mm bolts, and then you've got great access to the engine.

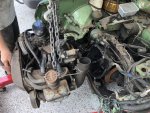
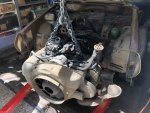
We got the gearbox supported, brought in the crane, fought with the gearbox nuts (universal joint needed to access the bottom two), and voila
IMG_6431.jpg
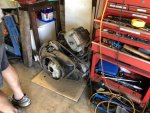
Ran the engine down to the shed in the trailer, retrieved the HP hydraulic line from the pump, and the fuel pump, and put it in the corner; we'll pull the ancillaries off it at some stage and see what else is salvageable.
IMG_6439.jpgIMG_6433.jpg

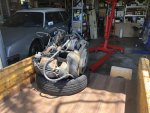
After an early lunch, we attacked the motor in the wreck.
IMG_6440.jpg
This was more of a pain to remove than the one in the car, as we hadn't got the front cut high enough, and it was fairly unstable.
It also had its exhaust manifolds and front pipes - one of the joints was easy enough to remove, it had had LHM (hydraulic oil) sitting on it.
The other needed an angle grinder.
Once past that, with a bunch of swearing, we got the gearbox nuts and engine mount bolts out, and swung it out.
IMG_6441.jpg
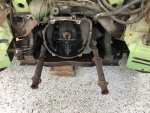
Before it could go into the other car, we needed to get the front exhaust sections connected. There is a Y piece which sits under the gearbox, and access was pretty awful.
Still, much easier to do with the engine out. I also changed the throwout bearing to the one from the wreck, it was much better.
I've got a clutch kit for it, but I'll save that for another engine in/out.
IMG_6443.jpg
Then, it was a matter of trying to get the engine attitude matched to the gearbox,
IMG_6444.jpg
Having the exhaust manifolds and pipes in added another dimension of fun :blackeye:, but finally, got it home.
IMG_6445.jpg
Next job is to put new timing belts and tensioners on this engine, get the fuel pump on it, hook up the hydraulics, and see if we can get it to start and pump up!
 
Last edited:
Then the fun really begins - I am a bit worried about my grass my the backyard. Hopefully this engine only runs on two cylinders.

Ken W
 
Last edited:
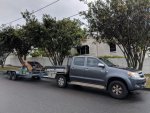
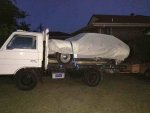
Looking like good progress. Here’s mine packed on the truck ready to head to dads for a bit of TLC, Ken will know where [emoji6]IMG_1542873882.821899.jpg


Sent from my iPhone using aussiefrogs
 
Glad you got further than I did:)
My latest project (the big blue one) has left me stranded in Sydney today :(
 
So that's where you are Bruce,

I hope you are stranded in a nice part of Sydney and that it gets sorted easily and quickly.

Cheers, Ken
 
Looking good AxGT - the rear shot of the GS suggests it already looks great

Used a trolley jack to remove my GS engine and ended up putting it back in with 2 people carrying it into position and me pseudo guiding it. The engines are really not that heavy. With the flywheel removed I was able to lift mine onto the workbench unaided.

Look forward to more progress. Had a great day up in Brissie recently with Bruce/Graham & your dad's collection
 
Bit more progress today
The aim of today was to get the timing belt and tensioners changed on the car.

First job was to undo the starter dog on the front of the engine, which needs a 42mm socket. They're pretty elusive, so luckily a 1 3/4 imperial socket works out to 44.something mm - which is close enough.

To do this, you need someone to jam a screwdriver into some of the starter teeth, while someone else uses a breaker bar with a big pipe on it.
Once that is undone, you can remove the starter dog, the fan, and the alternator drive belt.
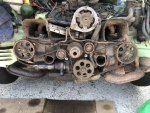
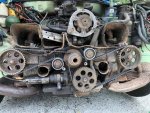
Then, removing the fan shroud gives you this:
IMG_6453.jpg

Once we could see all the timing marks, we marked them with chalk (couldn't find the paint pen), and rotated the engine until they were all in the position shown in the manual. At that stage, we removed the tensioners, and pulled the belts off.
The tensioner bearings were absolutely stuffed. I'm glad we didn't run the engine long when we tested it!. One of them barely rotated. We pressed the tensioners out of the old bearings, and inserted them into the new ones, the popped on the new belts.

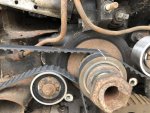
IMG_6457.jpg
This image shows the starter dog, the two drive sprockets from the crank, and the left hand tensioner.

Then, we were all done:
IMG_6459.jpg

Last step was to put the fan shroud back on, but in the meantime KenW managed to drop a socket down under the inlet manifold :joker:, so we'll wait till we fish that out with a magnet before putting the front back on.
 
Got a bit more work done on this.
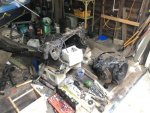
KenW spent some time stripping the wreck in the shed, and we've got it down to bits we want to keep
IMG_6479-small.jpg
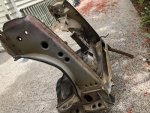
We'll keep the sub-frame, gearbox, exhaust, and the suspension arms and cylinders. The fluid blocks in the bottom arms are much better than the ones in the car, so
we'll move the arms across completely.

The rest of the body got dumped in a trailer, and disposed for free at the transfer station
IMG_6480-small.jpg

Next job was seeing if we could start the engine.
The car has a mechanical fuel pump driven off the drivers side camshaft, but we were a bit dubious about how well it pumps, so I grabbed a Goss electric pump,
both to clear out any residual fuel from the tank, and to start it up in the mean time.
I connected the pump up, and fired it up - it was pumping, but the tank was empty.

Poured some fuel into the tanks, and heard splashing noises under the car...

IMG_6483-small.jpg
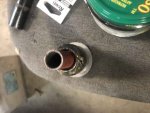
You can see the pipe from the filler into the fuel tank is missing quite a bit of rubber. :roflmao:

Still, the car was starting today. I rigged up a fuel feed from the Jerry can, and after
some issues getting 12V on the "Run" position of the ignition switch (worked around with an alligator clip from the positive terminal to the coil) this happened!


You can see the jury rigged fuel pump on the left hand side, and the slow drip of hydraulic fluid where we forgot to tighten up some of the at the bottom next to the left hand exhaust.
 
That sounds a lot like mine did when the ,bottom blew out of the hot box under the inlet manifold ,fixed with a couple of welch plugs in the tubes, coming up from the exhausts ,ok for wormer climes ,maybe not for colder pugs
 
that sounds pretty damn good, I'd have MORE cardboard below though : )

out of curiosity how easy would it be to plonk th emotor in minus the exhaust and add the exhaust after?
 
hindsight is always 20/20 regarding more cardboard :)

w.r.t the exhausts, getting to the exhaust clamps at the back near the gearbox would be a real pain with the engine in.
Bruce undid them with the engine in, maybe he can comment :D
 
Slow progress over the last month or so, due to waiting for parts, and trips to the US.

Anyway,
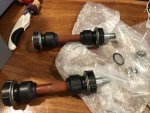
Fuel filler pipe and other bits (drive shaft boots, and a few seals) turned up, as did some new fluid blocs for the front suspension arms.
Box of Bits.JPG
These go in the lower arms, and provide noise and vibration insulation.
Fluid Blocks.jpg
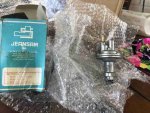
Also got a parcel from Greece, with a new mechanical fuel pump. (Old one was sus).
New Mechanical Pump.jpg


Got the new fuel filler pipe on the car, and poured ~15L of fuel into the tank.
Went to prime the electric pump, and the electric pump didn't really get quieter. Pulled the fuel line off the carburettor and tried to primed the pump again, and just got a few drips
of very varnishy old smelling petrol.

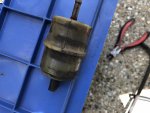
Went back and consulted the manual, then hopped under the car to find this
Old Fuel Filter #2.jpg
Old Fuel Filter.jpg

The filter itself was ancient, and the pipes were cracked and broken when i went to remove the filter. No wonder it couldn't get any fuel from the tank. :rolleyes:
Hit up Repco, and grabbed a suitable filter, and some new 6mm line.
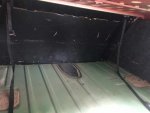
Emptied the boot, and got to the tank access panel
Tank Access through Boot.jpg
Old Flexible Line.jpg


Got a new length of line onto the fuel feed pipe, then hooked up the electric pump to pull some crap out of the tank.
Pumping out Crap fuel.JPG

Pulled out about 5 litres - the first bit was pretty yuck, but after that it cleared up pretty well, so attached the new filter and then plumbed up a new bit of line from the filter
to the under-car line (nylon).
New Line & Filter #2.jpg[

After that, the pump primed easily, and the car started right up!

While I was doing this, the old man was working on his Citroen Xantia, fixing a rear suspension leak.
I think I had the easier job...
Dad Rear Xantia Suspension.jpg
 
Last edited:
So, this happened today:
The clicking you can hear every second or so is the pressure accumulator. Its busted in that video, but we've put a non-blown sphere on it, so at least that is fixed.

Felt great to see it moving under its own steam. I've really been working to get it to this point, as I wanted it mobile before I moved it down to my place.
I'm building a double garage with a hoist so I've got somewhere to work on it, but that won't be ready for a few more months.

Back to the beginning of the day.


The first bit of work involved pulling off the front covers, as we'd heard a slight scrape, while the engine was running, and we also had leaking hydraulic fluid from the HP pump
After removing the front cover, it was clear that the oil pump was scraping a bit. I'd messed up putting the washers back on the spacers, and had them in the wrong order,
meaning the oil pump pulley was occasionally touching. Easy to fix. In the following photo, the oil pump is the large toothed wheel at the bottom of the engine
IMG_6453.jpg

For HP pump, luckily we just needed to replace a seal. I took the solid line out, put a new seal in, and re-inserted the line. All good. In the photo above, the high pressure pump is the horizontal block at the bottom of the left picture with the metal line coming out of it.

After that, we put some more fluid in the hydraulic tank, pushed some wooden blocks under the wheels, started it, and set the suspension to high. The car lifted itself off the stands and blocks we had it sitting on, so we pulled them out of the way, and drove it off. Easy!

After it warmed up, I dropped the oil and changed the oil and filter. Ended up changing the passenger side intake cam cover too, as it contains the oil filler; the one on the car was full of rust, and it had dumped a bunch of crud into the top of the cylinder head. I cleaned it out as best I could, but it really confirms that this engine is coming out and apart sometime soon.
IMG_6704.jpg
All in all, a great day. Photo below is the GS, and my other flat 4.
GS + Subaru.jpg
Few more parts to order after today, but the car is mostly working :headbang:
 
After the last bit of work, it was pretty clear that the car needed a bunch of new suspension spheres for the hydraulic system. I ordered a new set
from France, and they arrived last week. The front spheres and accumulator spheres are ok for now, but the rear spheres were blown, meaning there was
no suspension travel in the back.

First job is to get the rear wheels in the air.


Once the car is up, pull off the wheel (who needs more than 3 wheel nuts?), and you expose the rear hub and disc, mounted at the end of the trailing arm
Rear Hub and Disc.jpg

Looking behind, you can see the rear suspension strut, with its high pressure line, return line, and breather. The end of the strut keys into the end of the trailing arm with a spring clip
Rear suspension strut.jpg

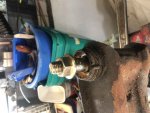
After swearing and moving the trailing arm around, you can undo the lines, and pull the unit out. To change the sphere, you put the strut in a vice, undo the old sphere with a chain wrench, and then put the new seal and sphere on:

Old:
Changing the rear sphere.jpg
New:
New Sphere.jpg
Put it all back together, and repeat on the other-side.

Now the suspension feels much nicer at the back.
Next mechanical job is replacing the fluid blocs (fluid filled bushings) on the lower front suspension arms.
 
Look forward to seeing how to change the fluid blocs as that’s i my list of things to do as well. Did you get yours from Fransos ?


Sent from my iPhone using aussiefrogs
 
Had a busy few weeks at work, and prepping for some renovations at home. We've moved out of home while the renovations happen, up to the folks, which coincidentally is where the car is being stored for now :yup:
Now that the car access is a bit easier, I've started to get on with some more of the mechanical jobs that are required for a roadworthy.
The first of these is putting some new fluid blocs (complicated bushings) in the lower arms of the front suspension as the current ones are a little worn

First, the front suspension of the car:
ATTACH]

It has a double wishbone arrangement of upper and lower arms, with the suspension strut acting on the upper arm, and the steering and anti roll bars attaching near the bottom.
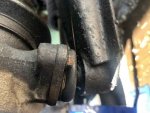
First job is to disconnect the bottom ball joint, which is retained by a few bolts.
Bearing retention bolts.JPG
Once those are removed, the long lower arm nut can be undone.
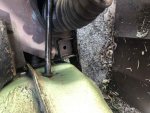
When these cars were put together, the lower arms were attached before the subframe was mounted in the body. Consequently, the wheel well needs a dint added
to remove the lower arm bolts while the engine/subframe are in the car. This car has had the lower arms out before, as the dint was already there.
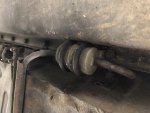
As you can see, it's a pretty tight fit.
Dint with bolt.JPG
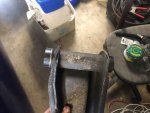
Once I pulled the lower arm out, the existing fluid blocks just fell apart.
Old Fluid Block internals.JPG
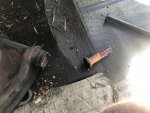
Removing the outer portions of these from the suspension arm is a little tricky, as there isn't an internal lip to press from.
Instead, a 20mm dynabolt is inserted into the outer and tightened.
Dynabolt in old Fluid Block.JPG
And then a hydraulic press can be used to push a bolt from the other side to remove the old outer.
Old Fluid Block Out.JPG
This is a new fluid bloc. Internally there is a greased bearing that rolls on an internal race, with the outer coated in rubber to isolate noise and vibration
Fluid Block - new.JPG
After lots of grease, the fluid bloc can be pressed into the arm, then the arm flipped, and the other side bloc installed
Fluid Block greased.JPG
New fluid Block in.JPG
Reinstall the arm, and things are much less wobbly!
 
Last edited:
Top