1959 4cv Restoration in North Carolina USA

I think one can just use some sort of rubber lubricant or even silicone grease under the seals. You only need the tiniest film to make sure there's no water ingress. Modern silicone grease is miles ahead what was (not) available to the average person back in the sixties and even in the nineties. Still not cheap but for our use one tube should last a lifetime. Back then, finding silicone grease was not even imagined, let alone the price (today) for a tube equaled my monthly wage.

Problem with silicone fluid in cold climates is that any water that gets in is not absorbed (does not mix) in the fluid and you can have water drops freeze inside the system, who knows where.
Hi :)
Back in the '60s when I was working on Renaults we had some interaction with Renault Australia in Sydney. They were helpful and offered advice if asked and some access to the workshop.
As for the disk brakes which were new technology then there were specific instructions, probably factory sheets, for them and hints and tips. They did have special 'rubber grease' available and recommended it for assembling the calipers and o rings etc. We had never heard of it up to then but did use it as necessary.

The factory instructions on the brakes had the statement, "only remove and fit the O rings with a long soft flexible tool", what was that ? A finger was the answer !! And use the special rubber grease everywhere. I believe the original formulation used caster oil.

I have used rubber grease ever since then for all brake cylinders and cups and o rings, disc and drum, and pack it under the boots and on bleed nipples, as it keeps the parts free from corrosion and helps the smooth operation. A container lasts for many years.
Jaahn

Wonderful stuff I agree. I still use it on odd things but with silicone fluid in both Renault braking systems, not there..... My 4CV had the same silicone fluid for about 25 years, and when I pulled the brakes down (to fit Dauphine drums) everything as as new. Wonderful stuff providing you don't shake it (aeration) or get water in (how??).
 
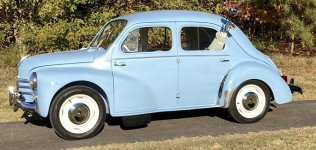
I took the 4cv to a local car show today - lots and lots of interest. People really loved the color. I told the kids that it was the car that the Easter bunny drives. I let them honk the horn - they thought that was really fun. It's a kid sized car.
IMG_3863Copys.JPG


I sent several letters out to try to get detailed information from relatives of owners prior to 1971. I did get a call from the daughter of the dealer who sold the car! She was very interested, but does not have any pictures of the dealership. She drove a 4cv as her first car in the late 1970s. Her mother finally said that she needed a bigger newer car, so she got a used Mustang. The 4cv was parked outside by the barn (early 1980s) and was still there when they sold the property two and a half years ago after her father passed. I am going to try to find out if it still sitting there. If it is, there won't be much left, but it might have some good parts.
 
I seem to recall vw using a gaiter that had a slit down one side ,don't know how the tube diameter would match or how you would attach to the gearbox ,they seem to manage ok with the felt seals and I don't imagine you will be doing the BAJA in it
 
I seem to recall vw using a gaiter that had a slit down one side ,don't know how the tube diameter would match or how you would attach to the gearbox ,they seem to manage ok with the felt seals and I don't imagine you will be doing the BAJA in it
The swing axle gaiters available new for the RERs are split (and last for decades). Mine were genuine NOS Renault items and came with a set of rivets to hold the join together, the pressed steel fittings to hold them in place and thin nuts to fit over the crownwheel carrier studs. The great advantage of using them is keeping road dirt out of the felt strips and the rubbing area. That said, I ran mine without them (ignorance and short in funds....) for years (but not decades).
 
Hehehehe! It is a kid size car and with that soft colour and the smiley front end it looks very friendly. How does it drive?
It drives very well! It has a lot more torque and power than my first 4cv. I rebuilt the engine in my first 4cv with new cylinders, but the extra power from the Dauphine cylinders and higher compression in my current car makes a big difference. Almost nothing rattles, which is a big accomplishment with a 4cv. The automatic choke works great. I will be making new front seat upholstery and cushions next. After that, I will be installing the four speed gearbox. The idea was to have a "new" 4cv with a few improvements that were hidden.
 
It drives very well! It has a lot more torque and power than my first 4cv. I rebuilt the engine in my first 4cv with new cylinders, but the extra power from the Dauphine cylinders and higher compression in my current car makes a big difference. Almost nothing rattles, which is a big accomplishment with a 4cv. The automatic choke works great. I will be making new front seat upholstery and cushions next. After that, I will be installing the four speed gearbox. The idea was to have a "new" 4cv with a few improvements that were hidden.
My current "rattle" irritation is the rear window slide catches "zzzz-ing" at times. Happily not when cruising.
 
Here are links to the improvements being made to my 4cv:
Seat rebuild
Four speed gearbox installation
Kingpin replacement

I took the 4cv to the local monthly cruise-in. Lots and lots of interest in the car. I was surprised that quite a few people knew what it was. There are a lot of "gearheads" (petrolheads?) in the county where I live. One gentleman even seemed interested in finding a 4cv for himself. I flat towed the car, and this time the rear did not wander at speeds above 50mph. The solution to the towing problem was to put a 60lb bag of cement in the front where the spare tire normally sits. I will find some smaller weights that ad up to 60lbs. It's a bad idea to be lifting that much weight straight up out of the boot.
 
some kind of water containers ,filled ? possibly ,in the corners !
 
Tough small sand bags not fully filled won't leak. They are at builders' supply places for water diversion, sometimes complete with a tape sewn on.
 
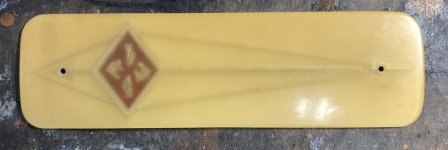
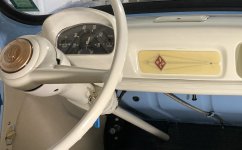
The 4cv has been running regularly, 720 miles so far. I completed a few more details that include a real radio delete plate, front mud flaps and the splash pan that covers the area between the boot floor and front suspension. If you drive your 4cv through any mud, the need for front mud flaps becomes obvious.

The lowest part of the splash pan was very thin, so I doubled it using thin sheet metal. I wasn't sure the original metal was thick enough to weld, so I riveted the doubler and sealed all around the new metal.

The radio delete plate was cloudy. I wet sanded it a good bit to get the cloudy layer off, then applied clear coat. The results were very good.

The only significant thing left to do is installation of new king pins.

IMG_4247Copys.JPGIMG_4263Copys.JPGIMG_4290Copys.JPG
IMG_4275Copys.JPGIMG_4250Copys.JPGImg_4248Copys.jpgImg_4256Copys.jpgImg_4261Copys.jpg
 
You drive that jewel through mud?! Sacrilege!

Man, I said it before, that interior is such a nice place to be. I would just drive it around the golf course without getting out.
 
You drive that jewel through mud?! Sacrilege!

Man, I said it before, that interior is such a nice place to be. I would just drive it around the golf course without getting out.
I've done that also! I don't drive through mud on purpose, but there are a few spots on the cart path that are muddy after a rain. I rinse off the wheel wells anytime I run through wet dirt.
 
The 4cv has been running regularly, 720 miles so far. I completed a few more details that include a real radio delete plate, front mud flaps and the splash pan that covers the area between the boot floor and front suspension. If you drive your 4cv through any mud, the need for front mud flaps becomes obvious.

The lowest part of the splash pan was very thin, so I doubled it using thin sheet metal. I wasn't sure the original metal was thick enough to weld, so I riveted the doubler and sealed all around the new metal.

The radio delete plate was cloudy. I wet sanded it a good bit to get the cloudy layer off, then applied clear coat. The results were very good.

The only significant thing left to do is installation of new king pins.

View attachment 212854View attachment 212855View attachment 212856
View attachment 212857View attachment 212859View attachment 212858View attachment 212860View attachment 212861
Nice work. Those front splash pans are quite some shape, aren't they?

The radio delete plate looks just perfect. Makes a huge difference!

I've done one thing on mine in parallel that might interest you. After a fair bit of thinking, a large amount of measuring and remeasuring, I've fitted the air vents available as an accessory to improve hot weather cooling. Naturally we are having a prolonged cool spring so I can't test it yet. By hot I mean 35-40+
Vents fitted home photo 30 Sept 2022 1 sml.jpg
degrees, just to be clear.
 
I talked with the shop that did my trunnion bushings - they know exactly how do the king pins properly. Now I just have to take the spindles off.

John, the air vents look good. Do they work as well as an engine lip prop? I guess the sloped back of the 4cv doesn't lend itself to cooling as well as the Dauphine. Anyone know the aerodynamics behind 4cv cooling problems? Does your car have the "air scoop" piece by the clutch? 40 degrees is HOT!
 
Excellent re king pins - I had bushes machined up for mine 30-odd years ago and they are still fine. It was a real "Old School" machine shop and the main issue they discussed was exactly which grade of bronze they thought most appropriate! Wish I'd written it down.

Re the vents, we've not had much warm weather since I fitted the grills. Naturally..... I think it is running a bit cooler (about three times the thickness of the needle on the gauge) as a non-hilly temperature when warmed up (which takes a good 10-15 km). On Sunday I did 100 km including a steady 250 m climb up the main road into the Darling Range behind Perth and the gauge moved up to the top end of 'normal'. It's a steady, hard climb and mine does it in top gear, full throttle at 65-70 kph on the steeper parts, 80 when flatter. It's a good test.

I couldn't detect any difference with the prop and reckon that it only is useful at higher speeds (think Kamm tail aerodynamics). You see photos with the prop on enthusiasts' cars but the 1063 competition photos you see the extra vents but not the prop. Maybe they didn't think of it or maybe they did and it made no difference?

What I think is the real story is the height of the top of that rear panel above the engine trays. When we did the trip from the Barossa Valley to Perth last Easter, Mr Harrisonati drove his nicely original Dauphine across and it didn't overheat even when we had 42 degrees one day across the Nullarbor. The air exits the Daupine nicely and without that rear panel if you think about the grill geometry. Nice parallel airlfow. I reckon that the rear panel in the 4CV causes some turbulence in the engine bay, as it is 250 mm or so higher than the engine trays. The extra grills, I suspect, take out that turbulence and lower the air pressure at the elevation of the engine trays, and therefore allow much closer to parallel airflow through the engine bay. In turn, that ought to mean more airflow through the standard louvres as well as a bit more again through the extra grills. I could be over-thinking this but don't think I am.

When the car is idling, the right hand grill airflow can be felt by hand but not the left! I'll try and test it systematically if summer ever arrives.

My early car doesn't have that scoop. I haven't worked out how to fit it because of the clutch actuation shaft. I reckon that most airflow issues are mostly to do with getting a good exit for the airflow, thinking of WW2 aircraft radiator entry slots and the aerodynamic design of the Vanwall.

I'll finish by observing that I don't really have an overheating problem anyway. But faster drivers report that running at 85-90 kph in hilly terrain on hot days they do overheat, not dropping the temperature enough on the downslopes to make up for the next hill. Not quite enough cooling capacity for that condition. I remember mine used to run in the right place on the gauge (same gauge as now) back in the 1960s. This photo was cruising across the Hay Plains in NSW, a long flat road and probably 25-30 degrees in early summer. I had fitted a later instrument panel then to get the temperature gauge that my 1951 "Luxe" model lacked. Now I have nice French km instruments.
Hay Plains speedo 1967 e.jpg
 
If you want to see what air does around the car just use the time tested method of pieces of thread taped to relevant points on the car, take a drive and watch the footage. This guy did it that way:

 
Top