Resurrecting a Goddess.......Twice

faulksy

Well-known member
Fellow Frogger
Joined
Jan 6, 2012
Messages
1,069
Location
melbourne
So, I've been meaning to start a thread here since I bought my DS21 waaayyy back in 2016. Between changing cities, jobs and sorting life out it just never seemed to happen. However now that the project is almost done it seems like the time to actually share some of the work that has been done on the off chance that it helps someone else to tackle their own project. Much of what follows occurred some time ago however i shall try and keep things chronological.

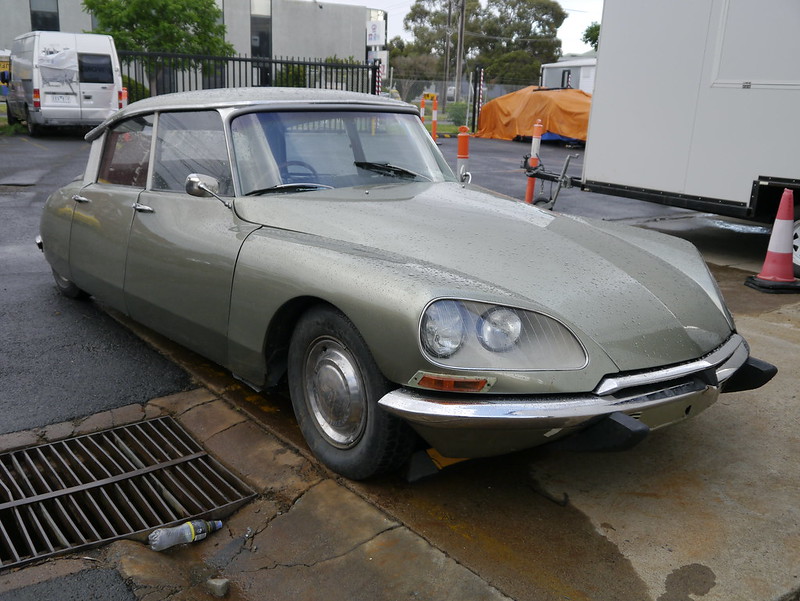
With that out of the way it's time to introduce the car. What we have here is a very rare beast indeed. A 1970 DS21 IE BHV confort, seen here as I found it on a hillside down on the Mornington Peninsula.

46145549574_f23c7a5b7d_n.jpg
45956201755_16417d0a74_n.jpg


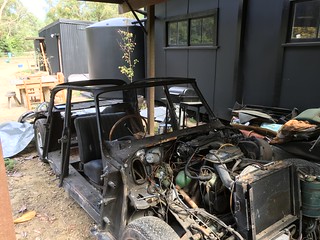
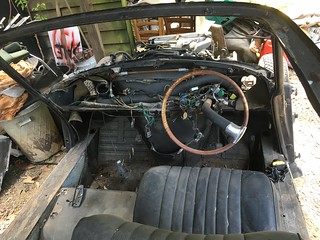
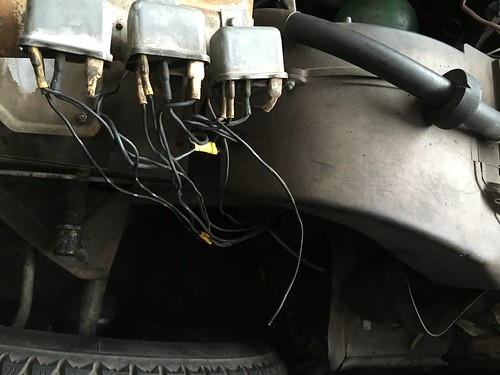
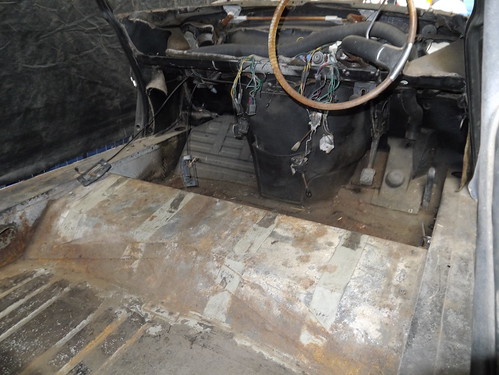
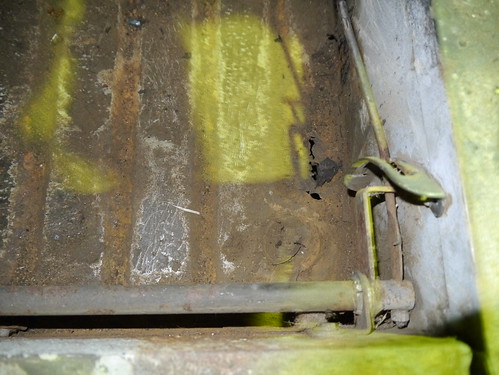
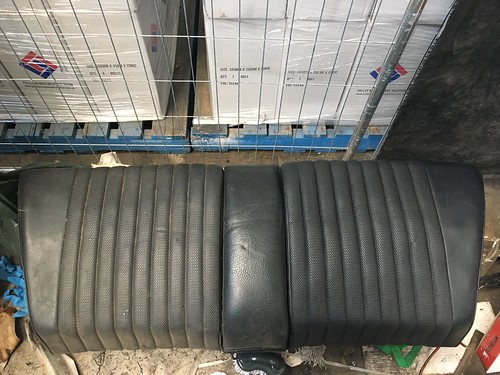
I spent a delightful afternoon with the owner chatting and climbing all over the car hunting for rust and casting my eye over the tubs of parts. Happily the only rust that could be found was confined to the sides and floor of the boot and the outer section of the passenger side sill. My thinking is that because the car had been in pieces and in shed for so long the boot linings had gotten wet and slowly rusted out the boot. As I discovered later there appears to be more to this storey. A deal was struck and suddenly I had just taken on the largest Meccano set i'd ever come across. My housemate was roped in to help move the chassis and all the parts to a workshop at which point we could actually see what we had.

46145795914_67c94f5a9f_n.jpg


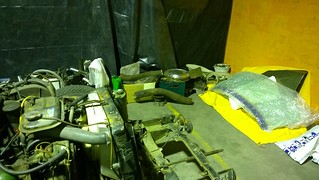
None of the parts were labelled and there was an entire box filled with unlabelled jars of bolts, brackets and fixings. All told the only missing parts were:
Headlight reflectors
1 piece of trim for the roof
3 of the stainless steel rubber seal holders for the sills
interior light lenses
and a few other assorted pieces of trim


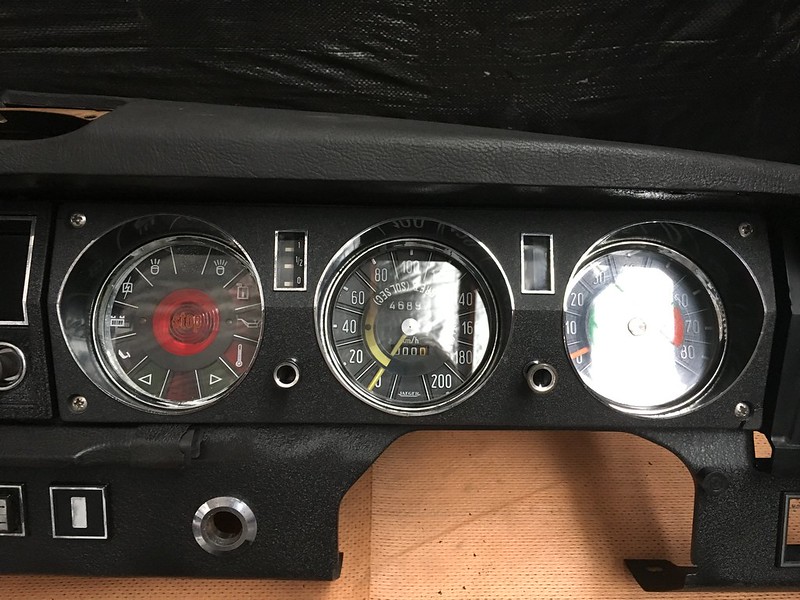
Not bad for a car that had been taken apart and moved between 3 different owners in 5 years. With a stocktake completed and armed with a pile of workshop manuals the project could then begin in earnest.
 
Last edited:
Well done Faulksy . My '70 EFI, BVH Pallas, was a fun car, meant to be driven. Bought second hand & my first experience with BVH & EFI, it was a steep & sometimes frustrating experience, but ultimately a great car.
BVH function is hyper critical of engine tune & functional set up. All settings are in the manuals, but I think several things help, such as electronic replacement of ignition points & setting the timing accurately. Best quality HT leads, coil, & guide tubes on plugs. Most helpful, & you won't find it highlighted in any manual, is the absolute necessity for there to be no exhaust leaks at the flexipipe. Any exhaust leak there results in crankiness on the overrun as you you slow to a stop, & as you know with the BVH, you can't dip the clutch early to ease it. Get it all right & that gear change is magic.
Have fun.

Richard
 
Completely agree, there's nothing like a well sorted BVH. Happily I didn't have to adjust anything it all just worked but I'll come to that in a bit.

Having got the car home the first order of business was to try and get it running. Talking with the previous owner it had spent some time at a mechanic who was unable to get it running and several people from the local citroen club had also had a go to no avail. What lay ahead was a seriously steep learning curve in 1970s Bosch fuel injection......

Putting in a new battery meant that the car now cranked quite readily but flatly refused to do anything more interesting. After years of sitting it didn't seem to be in any hurry to run. A cursory look showed everything to be connected so this wasn't going to be an easy fix. Turning the key caused the fuel pump to run so that seemed ok but highlighted a more serious issue. After a while of running the fuel pump and cranking the engine there was a strong smell of petrol about the engine bay. Running the pump and inspecting the fuel rail revealed very old and cracked rubber hoses. Before going any further that needed to be dealt with as the chance of a fire is very real.

The EFI fuel rail is a somewhat odd mix of rilsan tubing, steel pipe and a few different sizes of rubber fuel line. 3/8" EFI hose is just about the right size for most of it and is easy to get, that was the easy part. Getting to the fuel rail is a whole other story involving removal of the inlet manifold. For those not familiar with the EFI layout, the fuel rail lives in the gap between the inlet pipes (on the right with green tape over them) and the rocker cover.
46251511974_01dd90844e.jpg

Not wanting to undo the hydraulic lines to the CRC I elected to undo the bolts joining the plenum to the throttle body. With the manifold out of the way, the rail was removed and hoses replaced. The old style EFI hose with braiding (on the left) on the outside is a fire waiting to happen. The rubber can degrade and you have no idea till fuel pours through the braiding. All those small section were removed from just the fuel rail. There are many more sections of rubber fuel line in the system which are somewhat inaccessible with the engine in.
46251511734_ea70f92e75.jpg

Confident that we were now safely getting fuel my attention now turned to the ignition system. Aplolgies for the length of the posts, there's 2 years of work to cover. I'll come back and add some photos to this post later as i'm waiting for them to finish uploading. Until the next instalment...
 
Last edited:
this method of divulgence is as brilliant as any plot instalment conjured by Sir Arthur Conan Doyle! Or George Simenon for that matter.
 
Faulksy

i think you you should give them the full story. Maybe people will have some bits to help
 
Episode 3: The Woes of Bosch D-Jetronic Fuel Injection

The Bosch D-jet system at it's core is very simple, It uses a vacuum and temperature sensors to determine engine conditions and uses a set of dual points to fire the injectors in banks of 2 (1+3 & 2+4).

It's biggest problem these days is availability of parts and the generally non repairable nature of the units. Bosch never intended for them to be opened and repaired regarding them as throw away items. Nice idea in 1970 when you could get parts but very unhelpful 50 years on. The whole troubleshooting checklist is really a set of pass fail checks. When a unit fails you replace it, simple haha. As a general, there isn't a lot of info out there in english let alone specific to the DS.

The first port of call was to check the computer was getting power. The easiest way to do this is turn the key in the ignition. 2 things should happen, the main power relay should trip, and the fuel pump should run for approx. 2 seconds. The relays live on the side of the battery frame and are jammed against the wing. Its far easier to remove the wing so you can see what youre doing. As a general early EFI cars have 3 relays and late ones have 2. The cold start relay is deleted on later cars. With that said, from left to right we have main power, fuel pump and cold start/impulse relay.
33104565968_6e7accc847.jpg

Turning the key revealed we had power so next was to go through the wiring sensor by sensor to see what was what. Whilst you can just take the connector off each sensor the better option is to unplug the ECU and measure everything from the multi-pin connector. This kills two birds at once, it checks the sensor and all of the wiring to it. On this model the ECU lives in the passenger footwell under a false floor. I believe later cars have it counted under the dashboard. Each wire shoudl have a cloth tag with a number on it but on mine they had all been lost to the ages. Pin 1 is the furthest from where the wires enter the case.

Rather that spell out the testing procedure, the best place to go is the technical notes otherwise known as Citroen Manual 586/5 and the Citron fuel injection manual. Let me know if anyone wants a blow by blow of how to test the EFI system or a link to the documents.

Going through the system wire by wire a grand total of 4 times, revealed that all the wiring was fine and the sensors were within spec. GOing through the checklist resulted in a car that would start but stall after a few seconds. The main injectors just weren't firing. The first time it fired, it shot forward causing me to stamp on the breaks. This did two things, stalled the engine and seized the breaks on. I ended up testing everything 4 times because twice just didn't seem enough haha. Also, with the system refusing to run I figured something had to be wrong with a sensor as everyone told me repeatedly that the ECUs never, ever break.............
46251512354_9f6f237e8b.jpg

Throwing caution to the wind and against all advice I had a closer look at the ECU. Punching the part number into the Bosch parts database revealed that this part was intended for a 1973ish DS23. That was the first red flag. The next was the words DS safari handwritten on the casing. Out of curiosity i took the cover off and discovered a solid inch of mud inside it and the wires to the resistor bank totally rusted through. Without the test bench to tune the ECU it really isn't worth trying to repair them. Bosch used military grade components with less than 1% tolerance and each unit was hand tuned at the factory. The hunt was now on for a new ECU. They can be had out of Europe for anything upwards of 500 EUR with no guarantee they work. The ECU and the MAP sensor are matched insofar as a 0280150011 MAP goes with a 0280000011 ECU. Mixing and matching will work but your results may vary. Asking around the car clubs turned up exactly the right ECU that had been removed from a car some 30years ago and had been on a shelf since. After a trip to pick up the new ECU it was swiftly installed. Not really expecting much the key was turned and the starter given a prod. To mine and my Dad's amazement this happened.


Suddenly the car had gone from a from a conceptual art installation to viable transport!
 
Last edited:
Episode 4: The DS Fights Back

As mentioned in the previous post, the car's first party trick was to bunnyhop forward over my Dad's foot. This prompted the first use of the main brakes in about 5 years which they totally objected to. All 4 pistons, having been called into service, jammed locking the front brakes on. I'm not sure how many of you have tried to moved a DS with locked main brakes but it is just about impossible without a powerful winch. To get the car back into its pen the front wheels had to come off. This was made somewhat harder by the suspension having just enough pressure in it to start working. The front ended up being jacked about 50cm in the air to get both front wheels off the ground so they could be removed. Eventually we got the car put away allowing us to go home a plot the next move. By this point in the project my Dad has gone from curious observer to coming down to the workshop every weekend to help.

The usual way to remove the brake calipers is to undo the pipework and then undo the two 21mm bolts that hold them to the gearbox. Because the pistons had jammed, the whole assembly on both sides was under considerable pressure making undoing the bolts impossible. The only solution was to reach in with a spanner and undo the 2 bolts that hold the caliper halves together. As is usual for a DS, a frightening number of parts need to come off to even see the calipers let along remove them. TO be able to see the bolts the air duct, radiator, both front wings, gearbox support crosmember, radiator support brackets and very nearly the steering rack need to go. With all that out of hte way this is what's left

46258805595_549233d0ca_c.jpg


For those considering doing this, there is very little space and you will lose all the skin from your knuckles. Access to the drivers side is slightly tighter owing to the engine being offset in the engine bay. There is just enough room on either side to undo the bolts but not remove them from the caliper. Splitting the calipers released the pressure on the main bolts and gave a fighting chance of undoing them. Looking at posts here, I took others advice and soaked them in WD40 giving them several doses over the course of a week. The next weekend, 2 of the bolts came out with little fuss. The other 2 though proved to be a challenge. We ended up putting a 2m long pipe on the end of the breaker bar to get more leverage. Just at the point where the pipe started bending, the last bolt let go with a loud crack. The problem with these bolts is that they are steel screwed into an aluminium casting and done up to 110ft/lb. Even without the galvanic corrosion welding them in place they are hard to undo. Happy to have claimed a victory we retired for the night with the spoils.

47120984892_6dd36a4ea1.jpg


To get the stuck pistons out, I put a line seal into one port with an m7 bolt and connected the other port directly to the output from the brake accumulator. This is effectively a direct connection to the pump. Slackening the belts and winding the pump by hand with a ratchet made getting the pistons out a breeze. Compressed air would work just as well but you need to go carefully to avoid building pressure and firing the piston across the room. They have some reasonable weight to them and will cause damage to whatever it hits. Inside the bore you'll find a single o-ring and a felt seal. replacement is easy enough but getting the pistons back in can require some force.
 
Last edited:
Episode 5: Back to Black

Having brought the beastie back to life and dealt with the errant brakes it was now time to turn my attention to the all important chassis. Citroen took a unique approach to constructing the frame of the DS, almost the entire frame is made from a single gauge of steel. Where extra strength was required they simply added more layers of steel or stiffening plates. As such there are numerous sections that are double walled with nothing more than hope used to prevent rust. I can't imagine anyone at the Paris factory imagining the cars would still be on the road 50 years later.

Removing what remained of the carpet and sound deadening revealed a lot of surface rust and only a few nasties. A small hole in the drivers floor, heavy pitting under the drivers seat, the back edge of the boot floor and the passenger side sill closing panel needed attention.

46841060502_02b2766382.jpg

39928103193_5e06dca265.jpg

47172827301_2a2f435c59.jpg


All in all its in remarkably good shape for a car thats sat dismantled in sheds and fields for a number of years. A new boot floor and sills were ordered from Europe and while waiting for them to arrive the entire frame was wirebrushed and stripped of any loose paint and caked on mud. Fortunately everywhere we looked we just found solid metal.

33350989968_a63f551897.jpg
47174619452_310e5664bd.jpg

33350990428_77b3358227.jpg

46312252845_15dbfcaa9c.jpg


In the last image you can see I've started painting the frame with KBS Rustseal. Its basically POR15 but has the added benefits of being cheaper, is made in Australia and can be brushed on. From the bulkhead back, the entire frame was given 2 coats followed by a final coat of KBS Blacktop which is a UV stable topcoat that won't discolour like the rustseal. Once cured, this stuff is damn hard to remove by anything other that seriously corse sandpaper. With the frame painted it was time to think about some insulation. Taking advice from others here I ordered a roll of ezycool from the USA. The floor, bulkhead and behind the dash received 2 layers and the roof got one under the velour head lining.

46503275964_7b2d5e3dbd_c.jpg


This stuff made a massive difference to the heat transfer through the firewall. Prior to installing i managed to burn my hand on the driver's footwell. After you can happily place your hand on the firewall and it's barely warm.
 
Episode 7:

The time had come where we could no longer put off installing the headlining and roof. Fabric for the headlining came from Vyfab in Moorabbin, the friendly people there were happy to cut samples and supply the glue. Workshop space was running a bit tight so a blanked was laid over the cant rail and the roof was placed on the car upside down. Before putting on the headlining, the steel edge band of the roof was wire brushed and treated to the same paint regime as the rest of the frame.

47226706991_d290d92ed0_c.jpg


As it happened this made laying the fabric very simple. Because of the foam backing the fabric has a habit of sticking to itself causing pinches in the top surface. They can be gently teased out however there was one that refused to play nicely. One of the boxes of parts contained a NOS bolted roof seal and a remanufactured one. The NOS one, despite being 50 years old, was perfect whereas the remanufactured one was hard and seemed to be made of a stiff vinyl not rubber. The seal was installed on the roof and a bead of sikeflex 227 was laid onto the cant rail. At this point you have to work fast as the sikaflex only has a working time of 30min. Although I had all the original bolts for the roof I decided that they were too far gone to reuse and substituted them for stainless steel ones. This made life a lot easier rather than dealing with rusted 50year old fixings.

After all that it came up really well. Leak testing would have to wait for a bit though.

46251513844_4a70cf4719_c.jpg
 
Episode 8: Dashboard antics

It's been a while since the last post but figured it was time to get back to it. Having largely sorted the chassis and engine it was time to start thinking about the interior. The vinyl seats and doorcards were in pretty good nick with no tears or damage to speak of and after a good clean they came up alright. The right side has been cleaned and the left is as they came to me.

46258926315_1c5250814b.jpg


With the seats in hand, I turned my attention to the dashboard which was in a very sad state looking as if it had been left outside for some time

46892840811_b13b82ace4_c.jpg


First order of business was to dismantle it and strip off all the old paint. There is a surprising number of pieces that make up the dasboard and all of them are bolted through the main steel pressing. These are just some of the fixing for the glove box insert and padded band that runs across the dashboard.

46062203125_cc438ded14_c.jpg
 
looks like you're right in the thick of it. Go you good thing! Why did I write that?

I'm curious to know what coleur you will be painting the body? Original or?.....

I guess one of the metallic silvers originally used would be good with the black leather.
 
This project certainly turned into a bit of a rabbit hole haha. Each time I finished a job the piece next to it immediately looked shabby and required attention.


I was fortunate in that a previous owner had done the hard work on the panels so there wasnt much need to touch them other than to reassemble. They had recently been resprayed in a holden colour somewhat weirdly named martini grey despite the colour being a metallic olive green. Originally the car was AC632 Bleu Platine however i rather think the green suits it so decided not to change it back.

So to finish off the dashboard saga. Dismantling the dashboard is pretty straight forward, undo all the bolts, nuts and screws and it falls apart into the 10 or so pieces that make it up. This image should give an idea of what state the paint was in.

33100468558_6a3ea21686_c.jpg


I have no idea what happened to it but as you can see the wrinkle effect is totally gone, having been replaced with a layer of oily grime. Incidentally, does anyone know what that plastic plug is for? it seems to be unique to BVH equipped DS. After many hours of wire brushing all the paint was gone and rust converter was applied to deal with the remaining surface rust. By the time that was done it was the middle summer and temperatures in the workshop were reaching 35 which as it happens is perfect for getting the VHT wrinkle paint to do its thing. 3 light coats were applied in opposite directions as per the can instructions. When first applied the paint is almost piano like in its level of gloss but as it dries the wrinkles slowly appear. Combined with a silver foil kit from Greg, the final result made for quite the transformation

33297787338_c2637e0560_c.jpg


32231250247_34a49f2298_c.jpg


The photos make the wrinkles look quite large and globby but in reality they were a nice fine pattern similar to a fingerprint. Jet black may not be correct the factory finish but it certainly unifies the whole dashboard.
 
Nice work.

Those old dash boards are a pain. Sometimes they really feel like they had been cobbled together rather than designed and fabricated. So many fixings of all kinds imaginable, odd eyelets, anchor points and so on. Blah. Modern cars are a dream to work on in this area by comparison.
 
So it's been over a month since the last post, time for another instalment I think. Without further ado i give you Episode 9: Let there be light.

Not sure if they are origina to my car or not ut in the boxes of parts was a rather sorry looking pair of Marchal Ampliluxs. My first thought was to hunt up a set of replacements given the state they were in but after doing some reading I decided it was at least worth investigating resilvering them. For those not familiar with the amplilux, it was Marchal's answer to putting a high and low beam into one housing as dual filament bulbs hadn't been released to the world yet. Removing the glass lens was a pain involving lots of heat courtesy of a BBQ and gentle prying. With the glass removed you can see the full horror of what was left after 10 years in a box.

33100362758_3b1fd2a45e_c.jpg


Now for the fun part, every square milimeter of the reflector needs to be cleaned and polished before plating otherwise there is a good chance the plating will fail pretty quickly or the light will be scattered by all the craters. So, out with the sandpaper and metal polish to bring them up to a smooth surface, each one took about a week to do. The few people I found who will refurbish these lights charge at least double because even the back of the high beam reflector needs to be polished before plating. With that done, the next big decision was to have them silver plated as original or vacuum metalised using aluminium as per modern headligh reflectors. Both motals have a similar reflectivity but the aluminium has the advantage of not turning black like silver.

46251510874_d06c355bd7_c.jpg


Freshly silvered they look pretty amazing, hard to believe that its the same reflectors. The smaller ones in from are the inner turning headlamps followed by the high beam reflector and low beam reflector. The guy who helped out reckoned they were the worst set of reflectors he'd seen and were almost at the point of being scrap. In the end he was happy we persevered.

The end result fitted to the wing
46251518014_04346354a4_c.jpg


Fitting some relays is a job for the future but for now they seem to work just fine.
 
how good is that? well done! Just don't park it in parking lots where dummies can hit it!
 
Sadly i didnt get much of a chance to drive it around expect to get its roadorthy before it suffered somewhat of a tragedy in the form of a fire which gutted the interior and ruined the roof! More on that later. It did make it to the club sandwich display at motor classica last year

48011916673_b2ccab24f9_c.jpg


48011904296_24618a99f6_c.jpg


Driving it up punt road with no plates on was certainly an experience!

After 4 roadworthy attempts, 3 of which were utter wastes of time due to the inexperience of some mechanics, it was finally registered on christmas eve last year. I swear this car is cursed, it was nearly written off in the Vicroads carpark 5 min after putting the plates on.

46518294734_56a6a77633_c.jpg


4 days later after this happened after a drive of no more than 5Km

33366174008_2e58187a7d_c.jpg


46518297554_cc856f0eec_c.jpg


As I said, this car is cursed haha. This put me back basically at square 1 and with that I have begun to rebuilt this car a second time.
 
You are nothing but persistent Michael. We are all here to help when you need it. It will be worth it when it is done. They are such nice cars to drive. I have no doubt that you will on so much about these cars when you are done that you will be the go to guy!
 
Top