Citroen C5 X7 door wing mirror

GreenBlood

Administrator
Staff member
Administrator
VIP Paid Subscriber
Fellow Frogger
Joined
Mar 17, 2001
Messages
8,570
Location
Brisbane
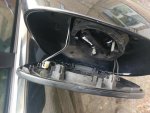
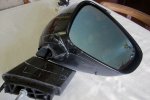
My drivers side door mirror had an argument with a steel post on Christmas Eve :cry:

Mirror 0
Steel post 1

The top section separated from the lower arm, only held together by the wiring loom, I was able to gaffer tape the two parts together until a replacement was found. . .

attachment.php


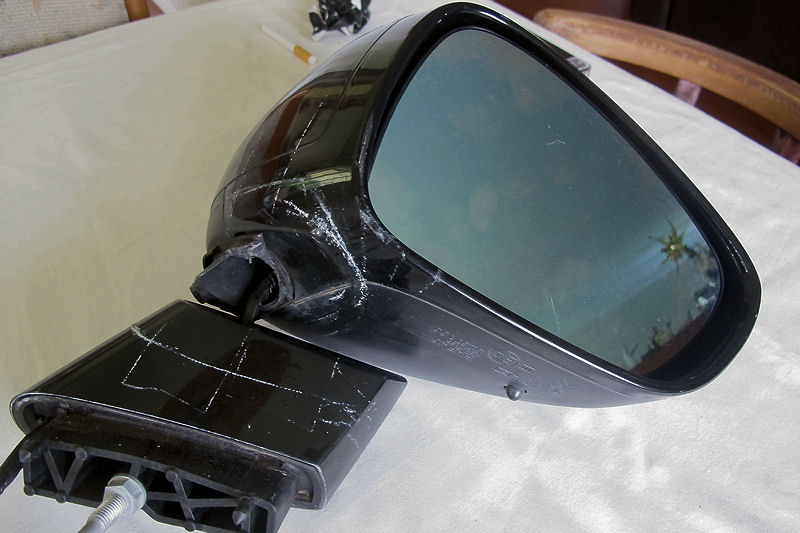
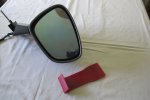
After some extensive searching I found a replacement in of all places Lithuania, in my search I found that even with the early X7 there was 7 possible part numbers depending on your car's specification/equipment. A good few Australian ebay possibilities but none with the matching part number and quite expensive. I could get the correct part from the UK but again expensive especially with post added. I understand the part form Citroen is around $900.00 (some assembly required and unpainted).

The mirror from Lithuania was just over $100.00 delivered, very prompt around 10 days with a public holiday and two weekends thrown in.

Of course it was the wrong colour so I needed to pull it down and rescue the part I needed. Then do the same with my mirror and make one good from of two. . . My plan of attack was to pull the replacement mirror apart and rescue the part I needed, if I damaged any of the plastic clips etc. it would give me a good idea of the pitfalls for when I pulled my mirror apart.

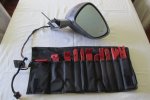
So with some encouragement from David S, I set up a clean workspace. . .

attachment.php


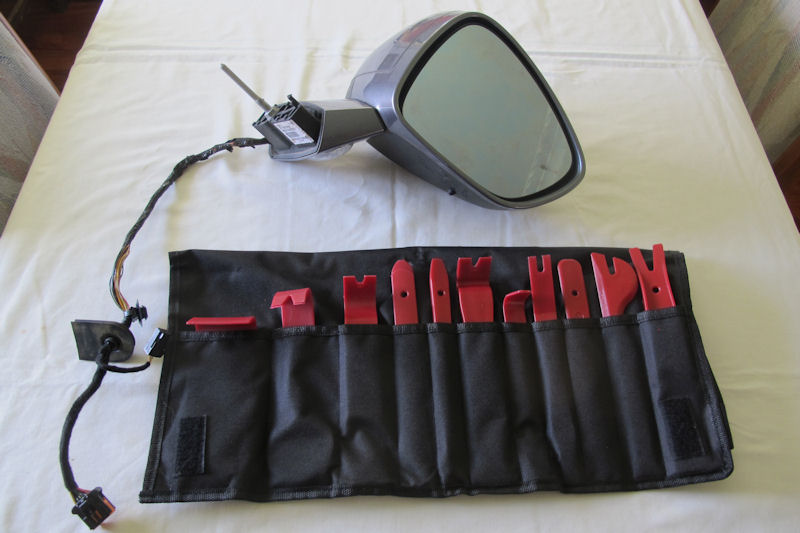
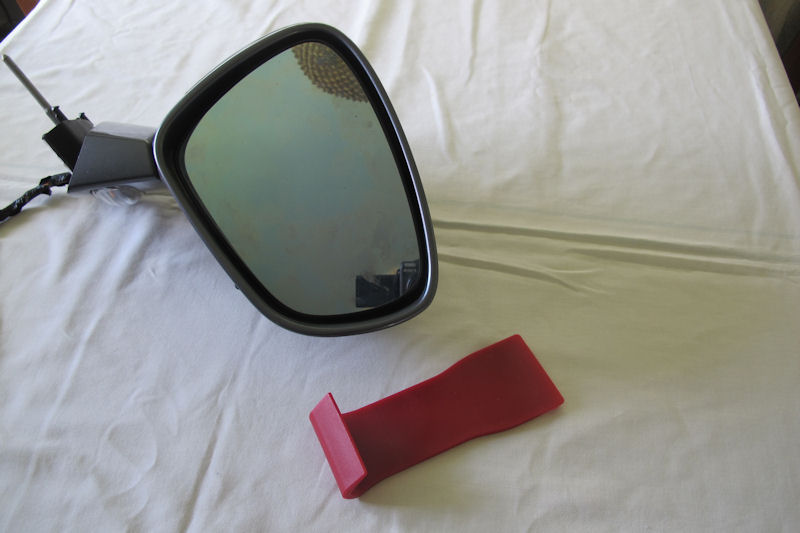
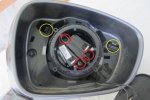
First step is to remove the mirror glass - using the broad plastic tool and levering from the top pops the glass off (so far no broken clips)

attachment.php


attachment.php


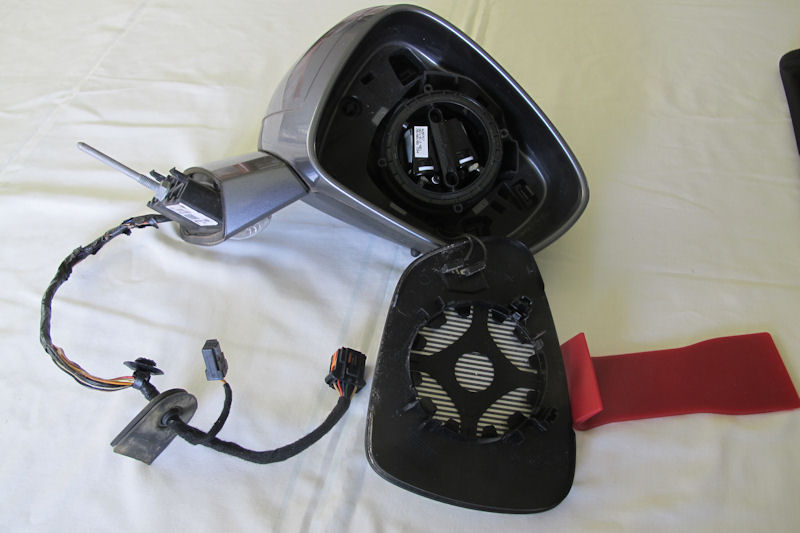
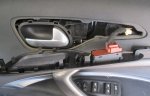
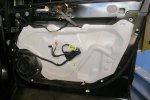
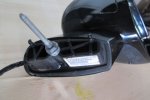
Release the wire connections from the mirror taking note of their positions - depending on the equipment on your car you may have more or less connections here, these look like they would be for the heated glass.

attachment.php


Next step is to remove the mirror orientation motor (up/down/left/right), three torx head screws (shown in red) releases it one multiplug and it's free.

attachment.php


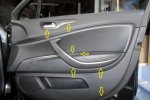
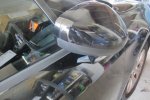
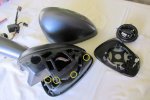
The two clips marked in yellow release the rear painted half shell, lots of patience required here, using the plastic tools to hold the clips open whilst pulling and prising the shell away, just when you are about to give up it releases.

attachment.php


Next release the lower shell, 4 clips shown in above image.

attachment.php


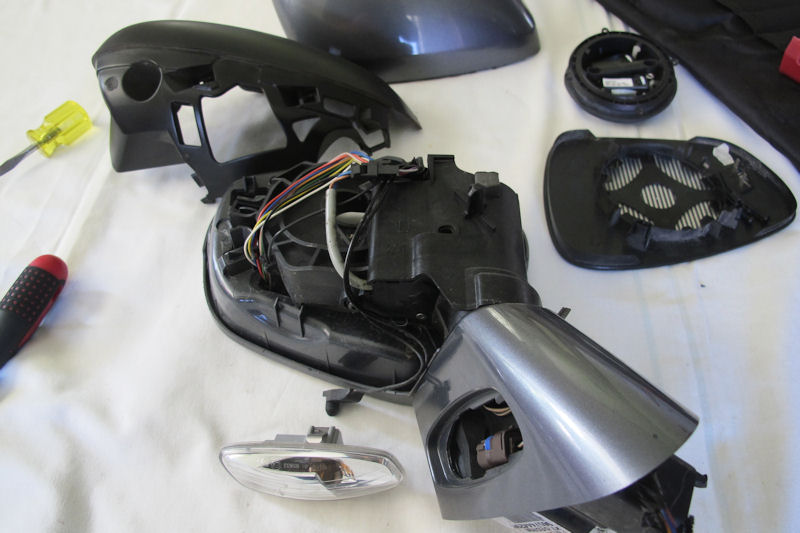
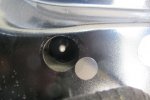
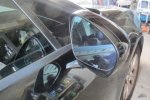
Now remove the painted front mirror frame, clips are released from the inside I don't have a good pic but they will now obvious.

attachment.php


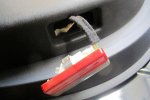
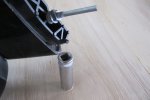
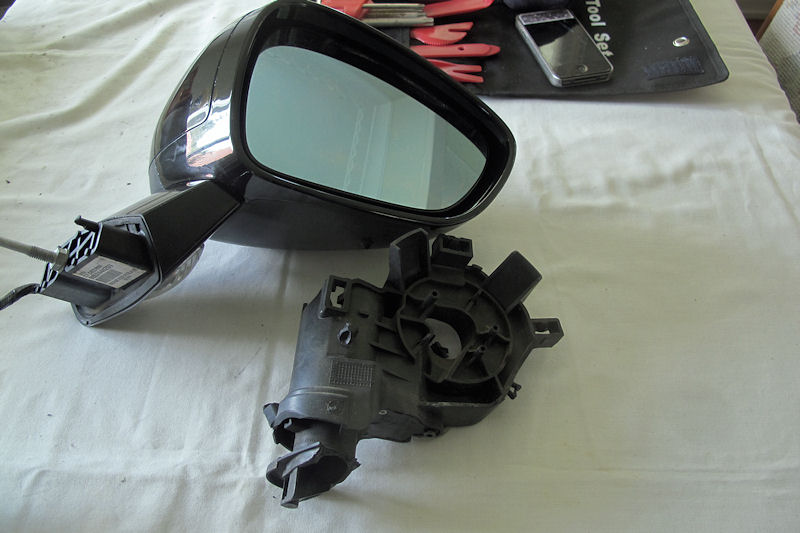
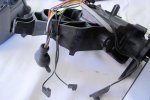
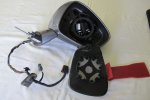
This is the part I need, it contains the motor for the folding function when locking the car. It is held to the lower stem by two torx screws (one hiding under a rubber protector. Pic shows the orientation of the harness - the wires feed down a central tube. You see the large multipug for the mirror motor, the two connections direct to mirror, and exterior temp sensor. That temp sensor requires the whole loom to be removed if it ever needs replacement, so the same process as above.

attachment.php


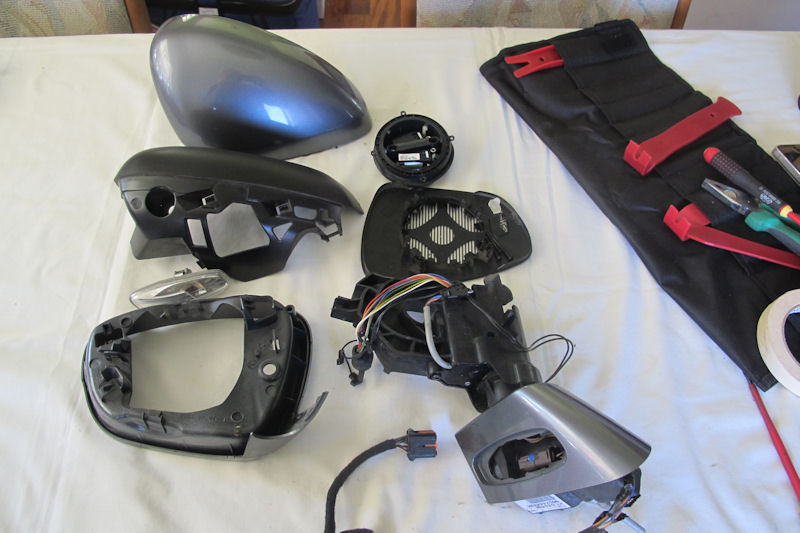
As they say assembly is the reverse. . .

attachment.php


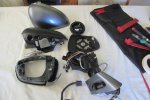
All came together nicely, around an hour to pull down the first mirror (with several frustration breaks, so more like 2 hours), maybe only 20 minutes or so to reassemble (the second mirror was much quicker to pull apart 40 minutes or so). I can report no broken clips or damage to paint.

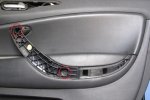
I'll take a break and show the removal and fitting of the mirror from the door. . .

Cheers
Chris
 

Attachments

  • Mirror4.jpg
    Mirror4.jpg
    70.6 KB · Views: 5,236
  • Mirror5.jpg
    Mirror5.jpg
    48.1 KB · Views: 5,331
  • Mirror7.jpg
    Mirror7.jpg
    48.5 KB · Views: 5,119
  • Mirror8.jpg
    Mirror8.jpg
    77.1 KB · Views: 5,210
  • Mirror10.jpg
    Mirror10.jpg
    86.5 KB · Views: 6,092
  • Mirror11.jpg
    Mirror11.jpg
    80.5 KB · Views: 5,234
  • Mirror25.jpg
    Mirror25.jpg
    75.4 KB · Views: 5,424
  • Mirror24.jpg
    Mirror24.jpg
    84.9 KB · Views: 7,146
  • Mirror1.jpg
    Mirror1.jpg
    74.8 KB · Views: 5,473
  • Mirror2.jpg
    Mirror2.jpg
    60.9 KB · Views: 5,358
  • Mirror3.jpg
    Mirror3.jpg
    69.4 KB · Views: 5,361
  • Like
Reactions: con
Removal refitting mirror/door trim

To remove the mirror you need to remove the internal door trim. . .

Disconnect Battery

attachment.php


Lever the parts shown by yellow arrows, don't forget the light under the door. Disconnect the multiplugs and set the parts aside.

attachment.php


attachment.php


attachment.php


The door handle hides two torx screws, remove these to release the door trim - pull out from the bottom and lift to remove.

attachment.php


attachment.php


Identify and release mirror multiplugs and harness, the top arrow shows a cover to the mirror stem - remove

attachment.php


attachment.php


Not a good pic but you can see the mirror shaft, the mirror is held by a 13mm nutat the end of the shaft - you will need a long shank socket. The socket I have was long enough to sit on the bolt but without the wrench, I had to use grips on the socket to release the nut.

My fix for refitting. . . cut 5mm from the shaft :eek:

attachment.php


attachment.php


I was then able to use my socket and wrench to secure the mirror - again refitting the trim is a reversal of removal.

Reconnect battery and test. . .

attachment.php


attachment.php


All working as it should, the BSI has remembered my mirror setting so selecting memory 1 or 2 changes mirror and seat positions as previous.

A bit of messing around but not worth making an insurance claim ($750.00 excess and no doubt the parts would be ex France and car off the road for a few days once parts were available).

Cheers
Chris
 

Attachments

  • Mirror15.jpg
    Mirror15.jpg
    55.8 KB · Views: 8,049
  • Mirror17.jpg
    Mirror17.jpg
    69.8 KB · Views: 4,674
  • Mirror16.jpg
    Mirror16.jpg
    79.8 KB · Views: 5,832
  • Mirror18.jpg
    Mirror18.jpg
    82.6 KB · Views: 4,712
  • Mirror20.jpg
    Mirror20.jpg
    85.5 KB · Views: 5,679
  • Mirror19.jpg
    Mirror19.jpg
    54.2 KB · Views: 6,241
  • Mirror23.jpg
    Mirror23.jpg
    74.8 KB · Views: 4,411
  • Mirror27.jpg
    Mirror27.jpg
    65 KB · Views: 4,349
  • Mirror26.jpg
    Mirror26.jpg
    63.4 KB · Views: 4,618
  • Mirror29.jpg
    Mirror29.jpg
    86.2 KB · Views: 4,344
  • Mirror28.jpg
    Mirror28.jpg
    88.6 KB · Views: 4,600
  • Mirror21.jpg
    Mirror21.jpg
    54.3 KB · Views: 4,683
Thank's for the care taken to present this problem. I am amazed at the complexity. I wonder if the "professional" repairers would have been so careful.
 
Thanks for the tutorial Chris, plus it'll remind me to be extra careful with my mirrors, now I'm aware of the complexity in removing and refitting.
It's always a close shave in the dimly lit underground shopping centres carparks.
 
Yep - agree that Lithuania is a surprisingly good source of parts - new as well. 'sm.autoparts' auto parts on Ebay have been good for me.

Nice documentation on the mirror renewal. I've always been shy about the first step - removing the mirror glass. Is it as simple as pushing a lever in from the top and levering out ?

Cheers

Justin

Hi Justin, I've just been advised that the first 4 pics didn't load - hopefully now remedied :wink2:

Yes, if you use a broad lever at the top the mirror just pops off without damage. Just as easy when refitting, a push fit. The frustration sets in when trying to unclip the various shells - with several clips for each a second pair of hands would be an asset. I found I could prise one of the plastic tools into one clip holding it open whilst working on another - invariably the first tool would fly across the room and I was back to square one. Perseverance!!!

Cheers
Chris
 
That's a pretty detailed and well thought out how-to demonstration there Mr Greenblood :worship:

It makes one wonder why the designers needed to make it so blinken complicated when most other car mirror changes can be done in a few minutes without even removing the door card( e.g. my Falcon) :confused: and $900 for a wing mirror pleez :rolleyes:.

Anyway carry on, how the decidedly special one coming along?
 
Wow, what a great example of a useful post! Great example of tackling a modern plastic fantastic too. I'm very impressed!

My thoughts are similar to 59 Floride's response. On my 1950 Renault 4CV the mirrors are held on by two exposed screws. If I want to see something else in the mirror I move my head...... :)

Cheers
 
Hi Justin, I've just been advised that the first 4 pics didn't load - hopefully now remedied :wink2:

Yes, if you use a broad lever at the top the mirror just pops off without damage. Just as easy when refitting, a push fit. The frustration sets in when trying to unclip the various shells - with several clips for each a second pair of hands would be an asset. I found I could prise one of the plastic tools into one clip holding it open whilst working on another - invariably the first tool would fly across the room and I was back to square one. Perseverance!!!

Cheers
Chris

All visible now - thanks.

It should be pointed out that most of the work here was due to the need to colour match the painted shell of the mirror. I'm stating the obvious, but if you'd been lucky enough to source an identically coloured mirror then most of the work here wouldn't have been required. We can't always be so lucky with used parts though of course.

Cheers

Justin

True indeed, for an investment of just a tad over $100.00 and my time I'm happy with the outcome - Knowing me a black mirror will be on offer as we speak. Good learning curve though and should be useful info for anyone needing to get behind the door card, window motor anyone? Postage from Lithuania was less than sending a parcel across town here and it was sent Priority.

Cheers
Chris
 
Not all mirrors have the two connectors. Those that do will have the chromatic glass and memory adjustment, which require additional control lines. The simpler versions may have only the one connector. So, if you are using one of those as a donor, you have to dismantle it to swap the harness over, even if it was the correct colour. Remember, the donor also came from a LHD market, where it was the passenger mirror. Specs vary between markets and where the mirror is fitted. There is also a Saudi version that has different glass and specific markings for that market. Mirrors aint mirrors!
 
Does the Saudi version make females disappear? Does it matter which glass is pre-fitted?
 
Does the Saudi version make females disappear? Does it matter which glass is pre-fitted?

No, women can (legally) drive there now. And even go to the sport.
It has an artificial dune horizon and a note saying camels travel faster than you think!

Actually, I think they are convex glass with specific markings, making them slightly different to what other markets received. I'm sure it would fit, but changing the type of mirror can catch some people out.
 
Last edited:
Driving the Nullarbor one doesn't see the usual warnings of beware of kangaroos,koalas etc but there are warning signs beware of camels;couldn't help wondering if i'd gone too far.
 
Driving the Nullarbor one doesn't see the usual warnings of beware of kangaroos,koalas etc but there are warning signs beware of camels;couldn't help wondering if i'd gone too far.

Near Kambalda, they warn of road trains too. But you surely see THEM coming....
 

Attachments

  • Sign for unfenced road.jpg
    Sign for unfenced road.jpg
    98.2 KB · Views: 388
  • Sign for road trains.jpg
    Sign for road trains.jpg
    96.4 KB · Views: 374
  • Wide load on Eyre Highway.jpg
    Wide load on Eyre Highway.jpg
    89.9 KB · Views: 388
Not all mirrors have the two connectors. Those that do will have the chromatic glass and memory adjustment, which require additional control lines. The simpler versions may have only the one connector. So, if you are using one of those as a donor, you have to dismantle it to swap the harness over, even if it was the correct colour. Remember, the donor also came from a LHD market, where it was the passenger mirror. Specs vary between markets and where the mirror is fitted. There is also a Saudi version that has different glass and specific markings for that market. Mirrors aint mirrors!

Here's another version, I suspect the additional connector on the left would be for chromatic glass, mine didn't have this. Definitely need to get the correct part number if replacing the mirror

attachment.php


A good write up here, showing replacement of temp sensor, rather than removing the mirror and loom a cut and shut job. . . you may need to translate :clown:
https://www.drive2.com/l/482146570091889165/

Cheers
Chris
 

Attachments

  • C5 X7 Photochromatic mirror.jpg
    C5 X7 Photochromatic mirror.jpg
    90.9 KB · Views: 4,685
I great post Chris but as a "dumb" Peugeot owner I'm confused.............. Wouldn't it have been easier to paint the new Lithuanian mirror to match your car and just attach that? :pugplak:
 
I great post Chris but as a "dumb" Peugeot owner I'm confused.............. Wouldn't it have been easier to paint the new Lithuanian mirror to match your car and just attach that? :pugplak:

Oooha!, a post on topic :clown:

I did think of that, but to do it properly you need to pull the mirror apart anyway (There are three separate pieces that require painting). Another thought was to vinyl wrap. Both would have added time and cost so I persisted :wink2:

Cheers
Chris
 
Hi, on the subject of this mirror, is it easy to pry of the indicator light to replace the bulb ?
How easy would it be to access the wiring of that indicator? (without removal of the mirror) tx
 
Top