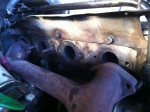
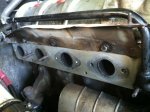
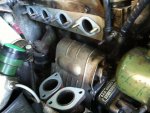
This weekend I'm going to remove my DS23 (DX engine) exhaust manifolds to replace a couple of studs. I have neither hoist nor pit so could do with some advice as to how best to tackle, from above, the nuts at the base of the manifolds at the down pipe flange. Would I need a crows foot spanner, or does anybody have any other tricks?
Cheers,
Dave R
Cheers,
Dave R

")